• my photo

    Click photo for About Me

  • Enter your email address to subscribe to this blog and receive notifications of new posts by email.

    Join 1,190 other subscribers
  • Pinterest

    Follow Me on Pinterest
  • Amazing Deals

    Click image for Amazing Deals!

  • Share this blog

    Bookmark and Share
  • Archives

  • Categories

  • Recent Posts

  • Blog Stats

    • 466,781 hits
  • Meta

  • Disclaimer

    All content found at Stampin' by Genny is the sole responsibility of Genevieve Valdes, a Stampin’ Up! Independent Demonstrator. Stampin’ Up! does not endorse, edit, or otherwise contribute to this website.

A Vintage Rose for my Friends

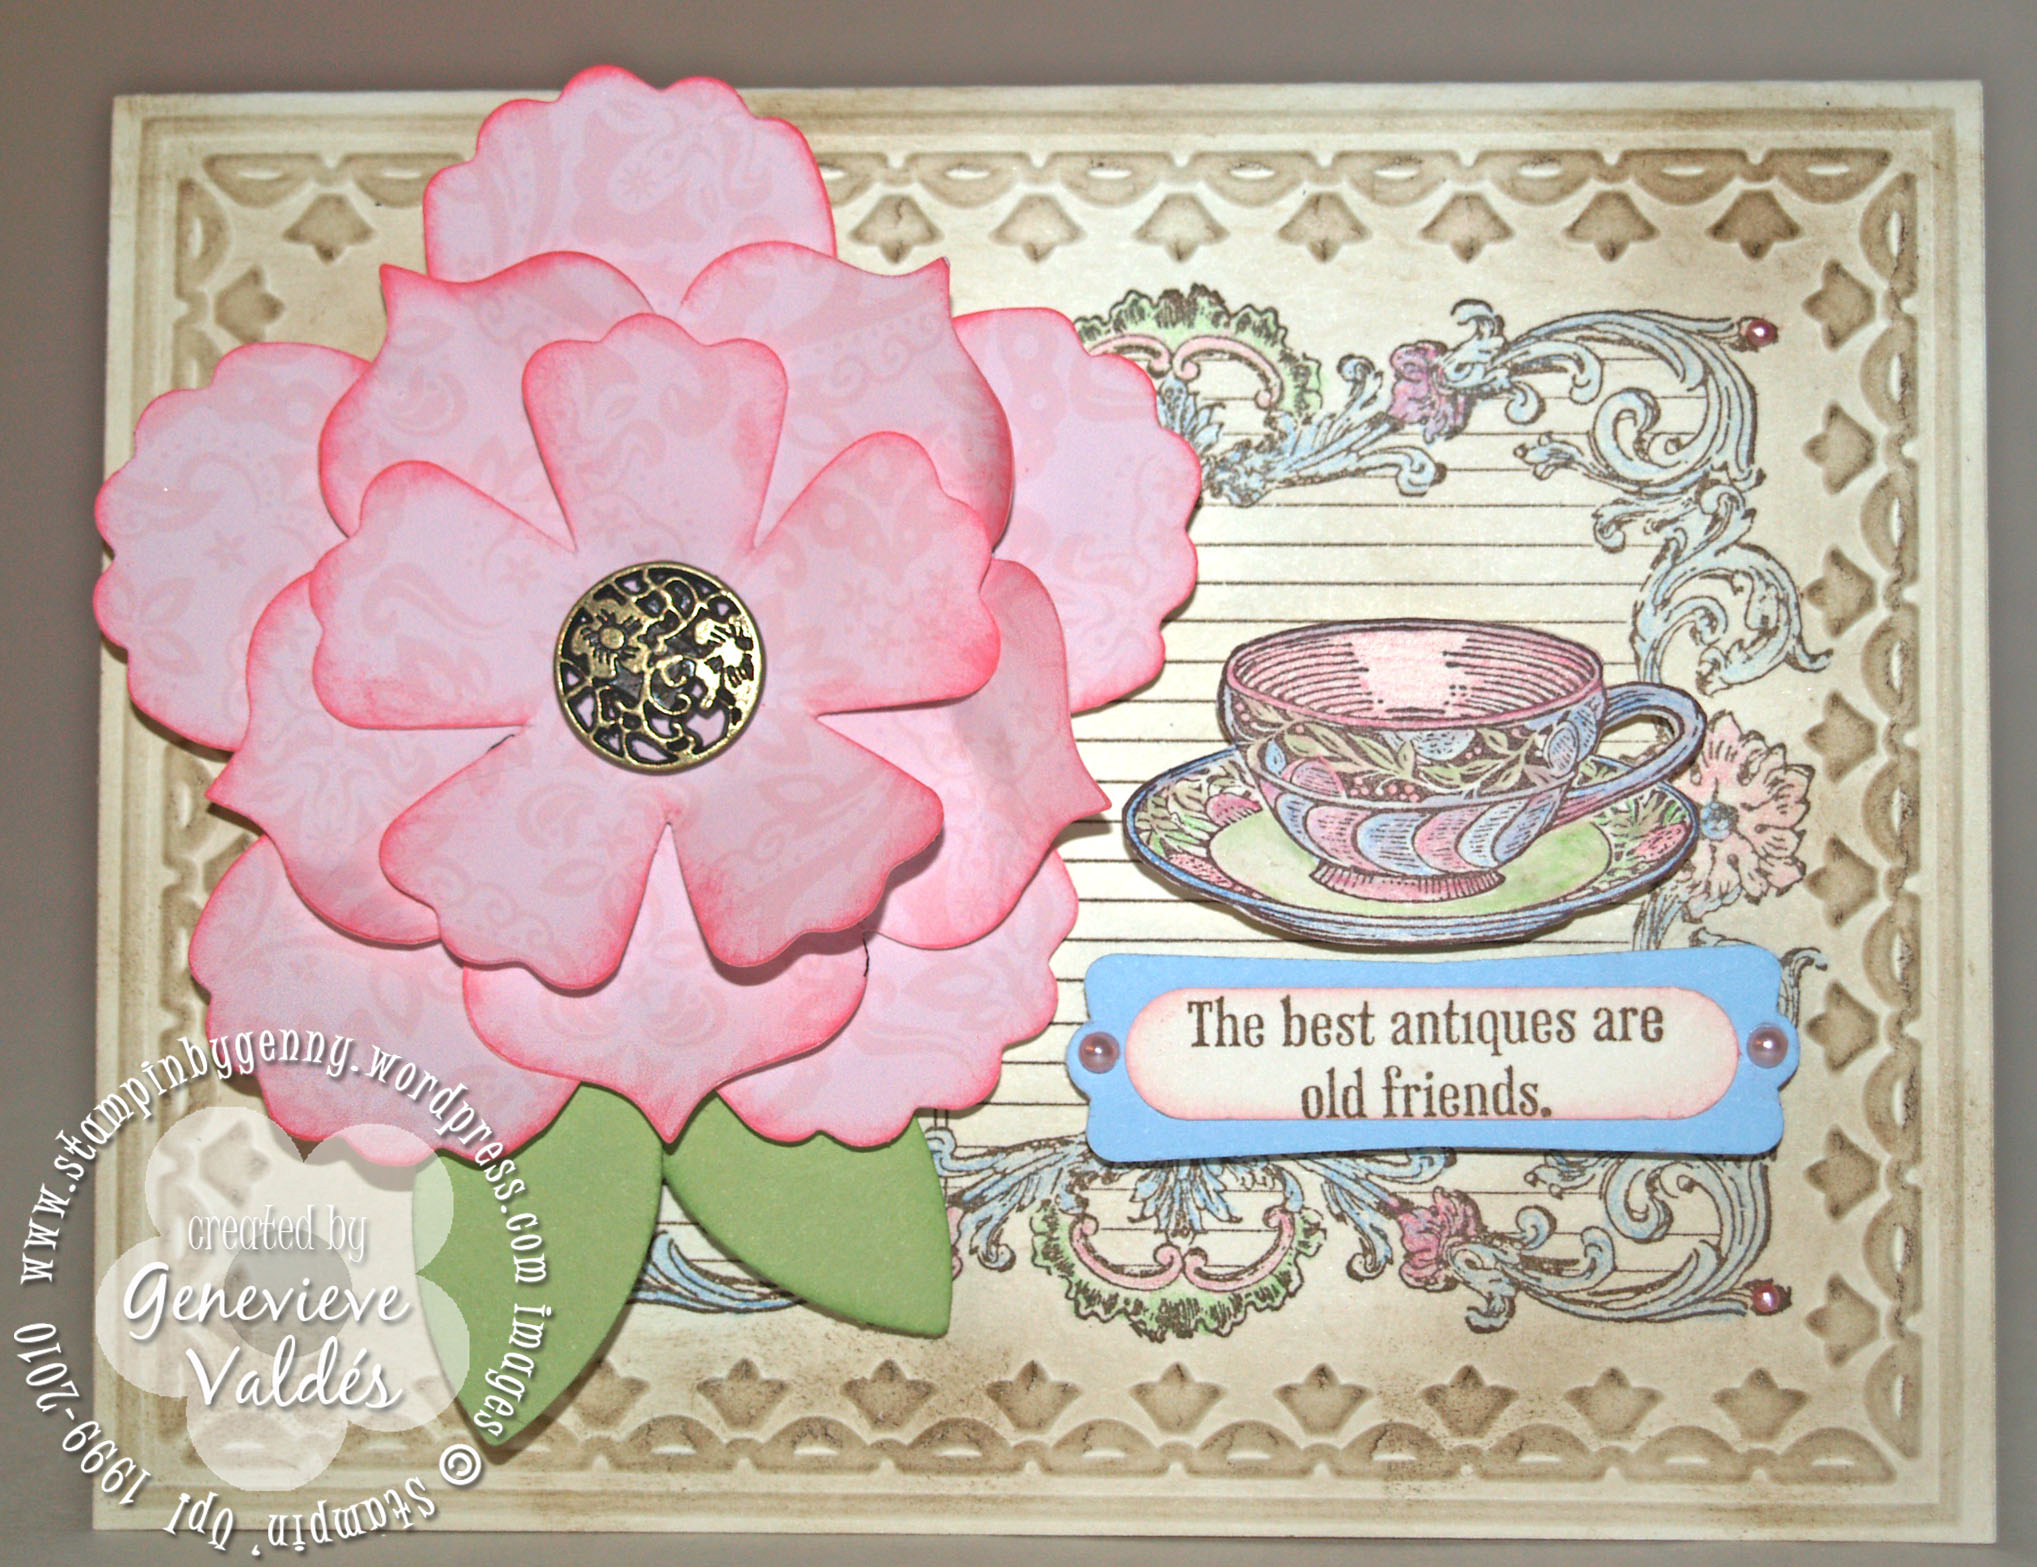
This week at Hand Stamped Sentiments we have a Color Splash Challenge.  Use the colors of Pretty in Pink, Certainly Celery and Bashful Blue to create a card or paper project.  A few weeks ago I received the stamp set Timeless Treasures from my dear friend Amy.  I’d been dying to use it so I created this card.  Although we met about two years ago through Stampin’ Up! I feel we’ve been friends for a long time.  The same goes for my other stamping friends.  I’ve made such wonderful friendships through Stampin’ Up!  So this card is dedicated to all of my stamping friends.  I am so fortunate to have them in my life.

Vintage rose and teacup card

click image to enlarge

All Stampin’ Up! supplies below may be ordered from my website or email me to place your order.

All products are Stampin’ Up! unless noted.

Vintage rose for my friends card

Size:  5.0″ w x 4.25″ h

Stamps: Timeless Treasures, Notably Ornate

Paper: Card stock:  Very Vanilla, Bashful Blue; DSP:  Digital Pretty in Pink Brocade

Ink:  Soft Suede, Pretty in Pink; Watercolor pencils:  Pink, Green, Blue

Accessories: Big Shot, Framed Tulips Embossing Folder, Fun Flowers die, Word Punch, Modern Label Punch, Antique brad, Basic Pearls (colored with Stampin’ Up! markers)

Technique: Stamping, die cutting

Strength & Hope Butterfly Card – Let’s Fight Breast Cancer!

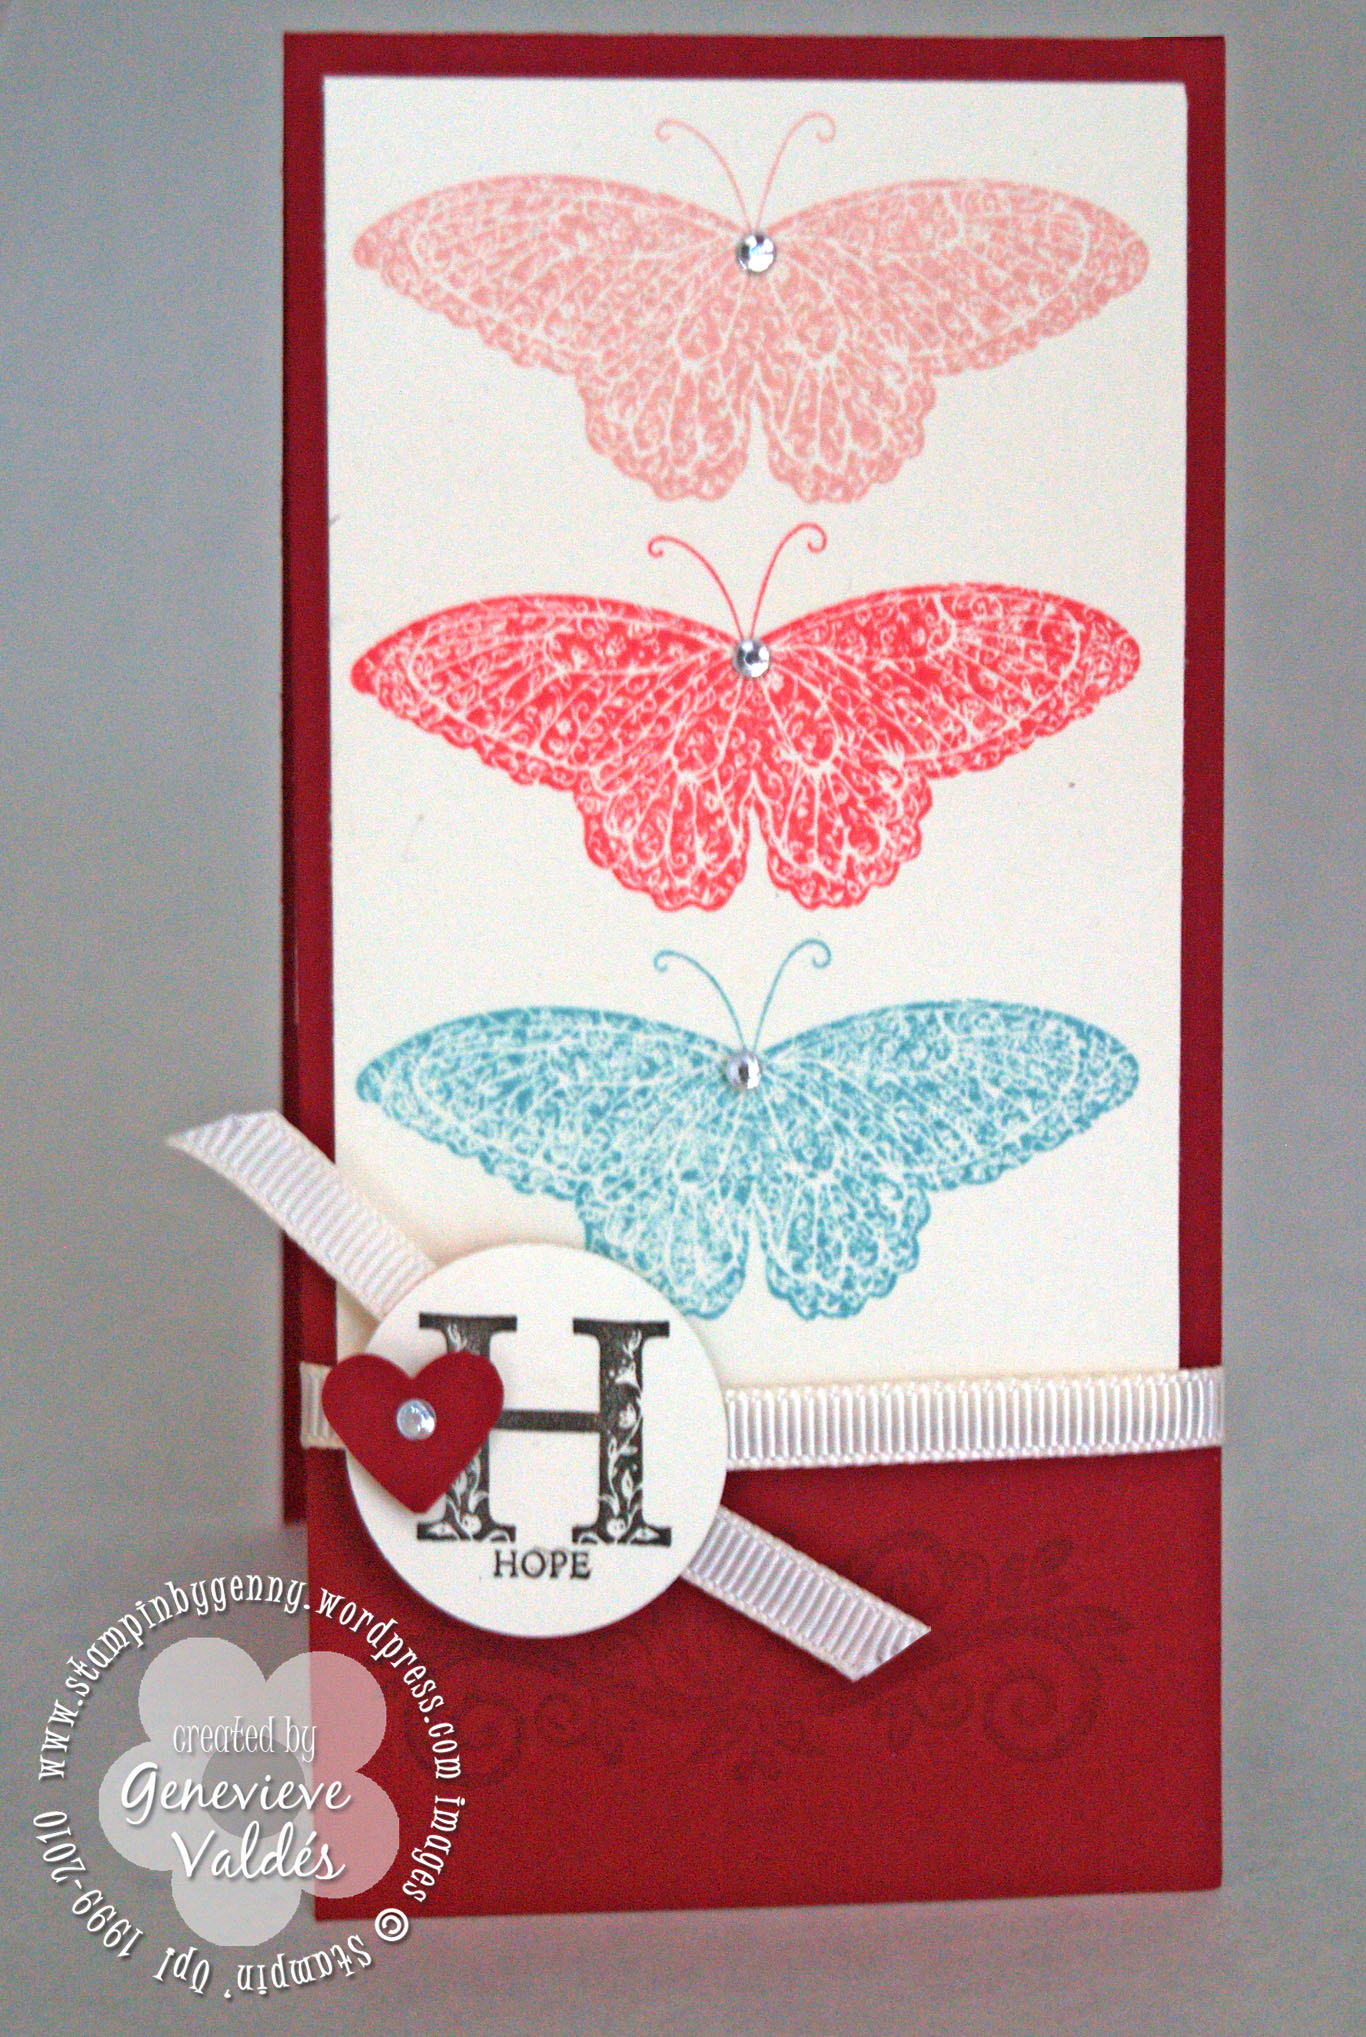
This past weekend I held a workshop and my make-and-take was a card I saw in the May issue of SUCCESS.  SUCCESS is a magazine for Stampin’ Up! demonstrators and is a valuable tool to helping us with our business.   I used the colors and punches I own to create the card.  My customers loved making it.  Plus it showcased the stamp set so well.  With each purchase of this stamp set Stampin’ Up! will donate $2 to The Breast Cancer Research Foundation.  BCRF is dedicated to preventing breast cancer and finding a cure in our lifetime by funding clinical and translational research worldwide.

click image to enlarge

All Stampin’ Up! supplies below may be ordered from my website or email me to place your order.

All products are Stampin’ Up! unless noted.

Strength & Hope Butterfly Card

Size:  3″ w x 6″ h (card fits into SU’s Small Open End Envelops item#107286)

Stamps: Strength & Hope

Paper: Card stock:  textured Cherry Cobbler, Very Vanilla,

Ink:  Versamark, Blushing Bride, Regal Rose, Baja Breeze, Early Espresso

Accessories: Small Heart punch, 1-1/4 circle punch, 1/4″ Very Vanilla ribbon, Basic Clear Rhinestones

Technique: Stamping, die cutting

A Framed Rose for Mom

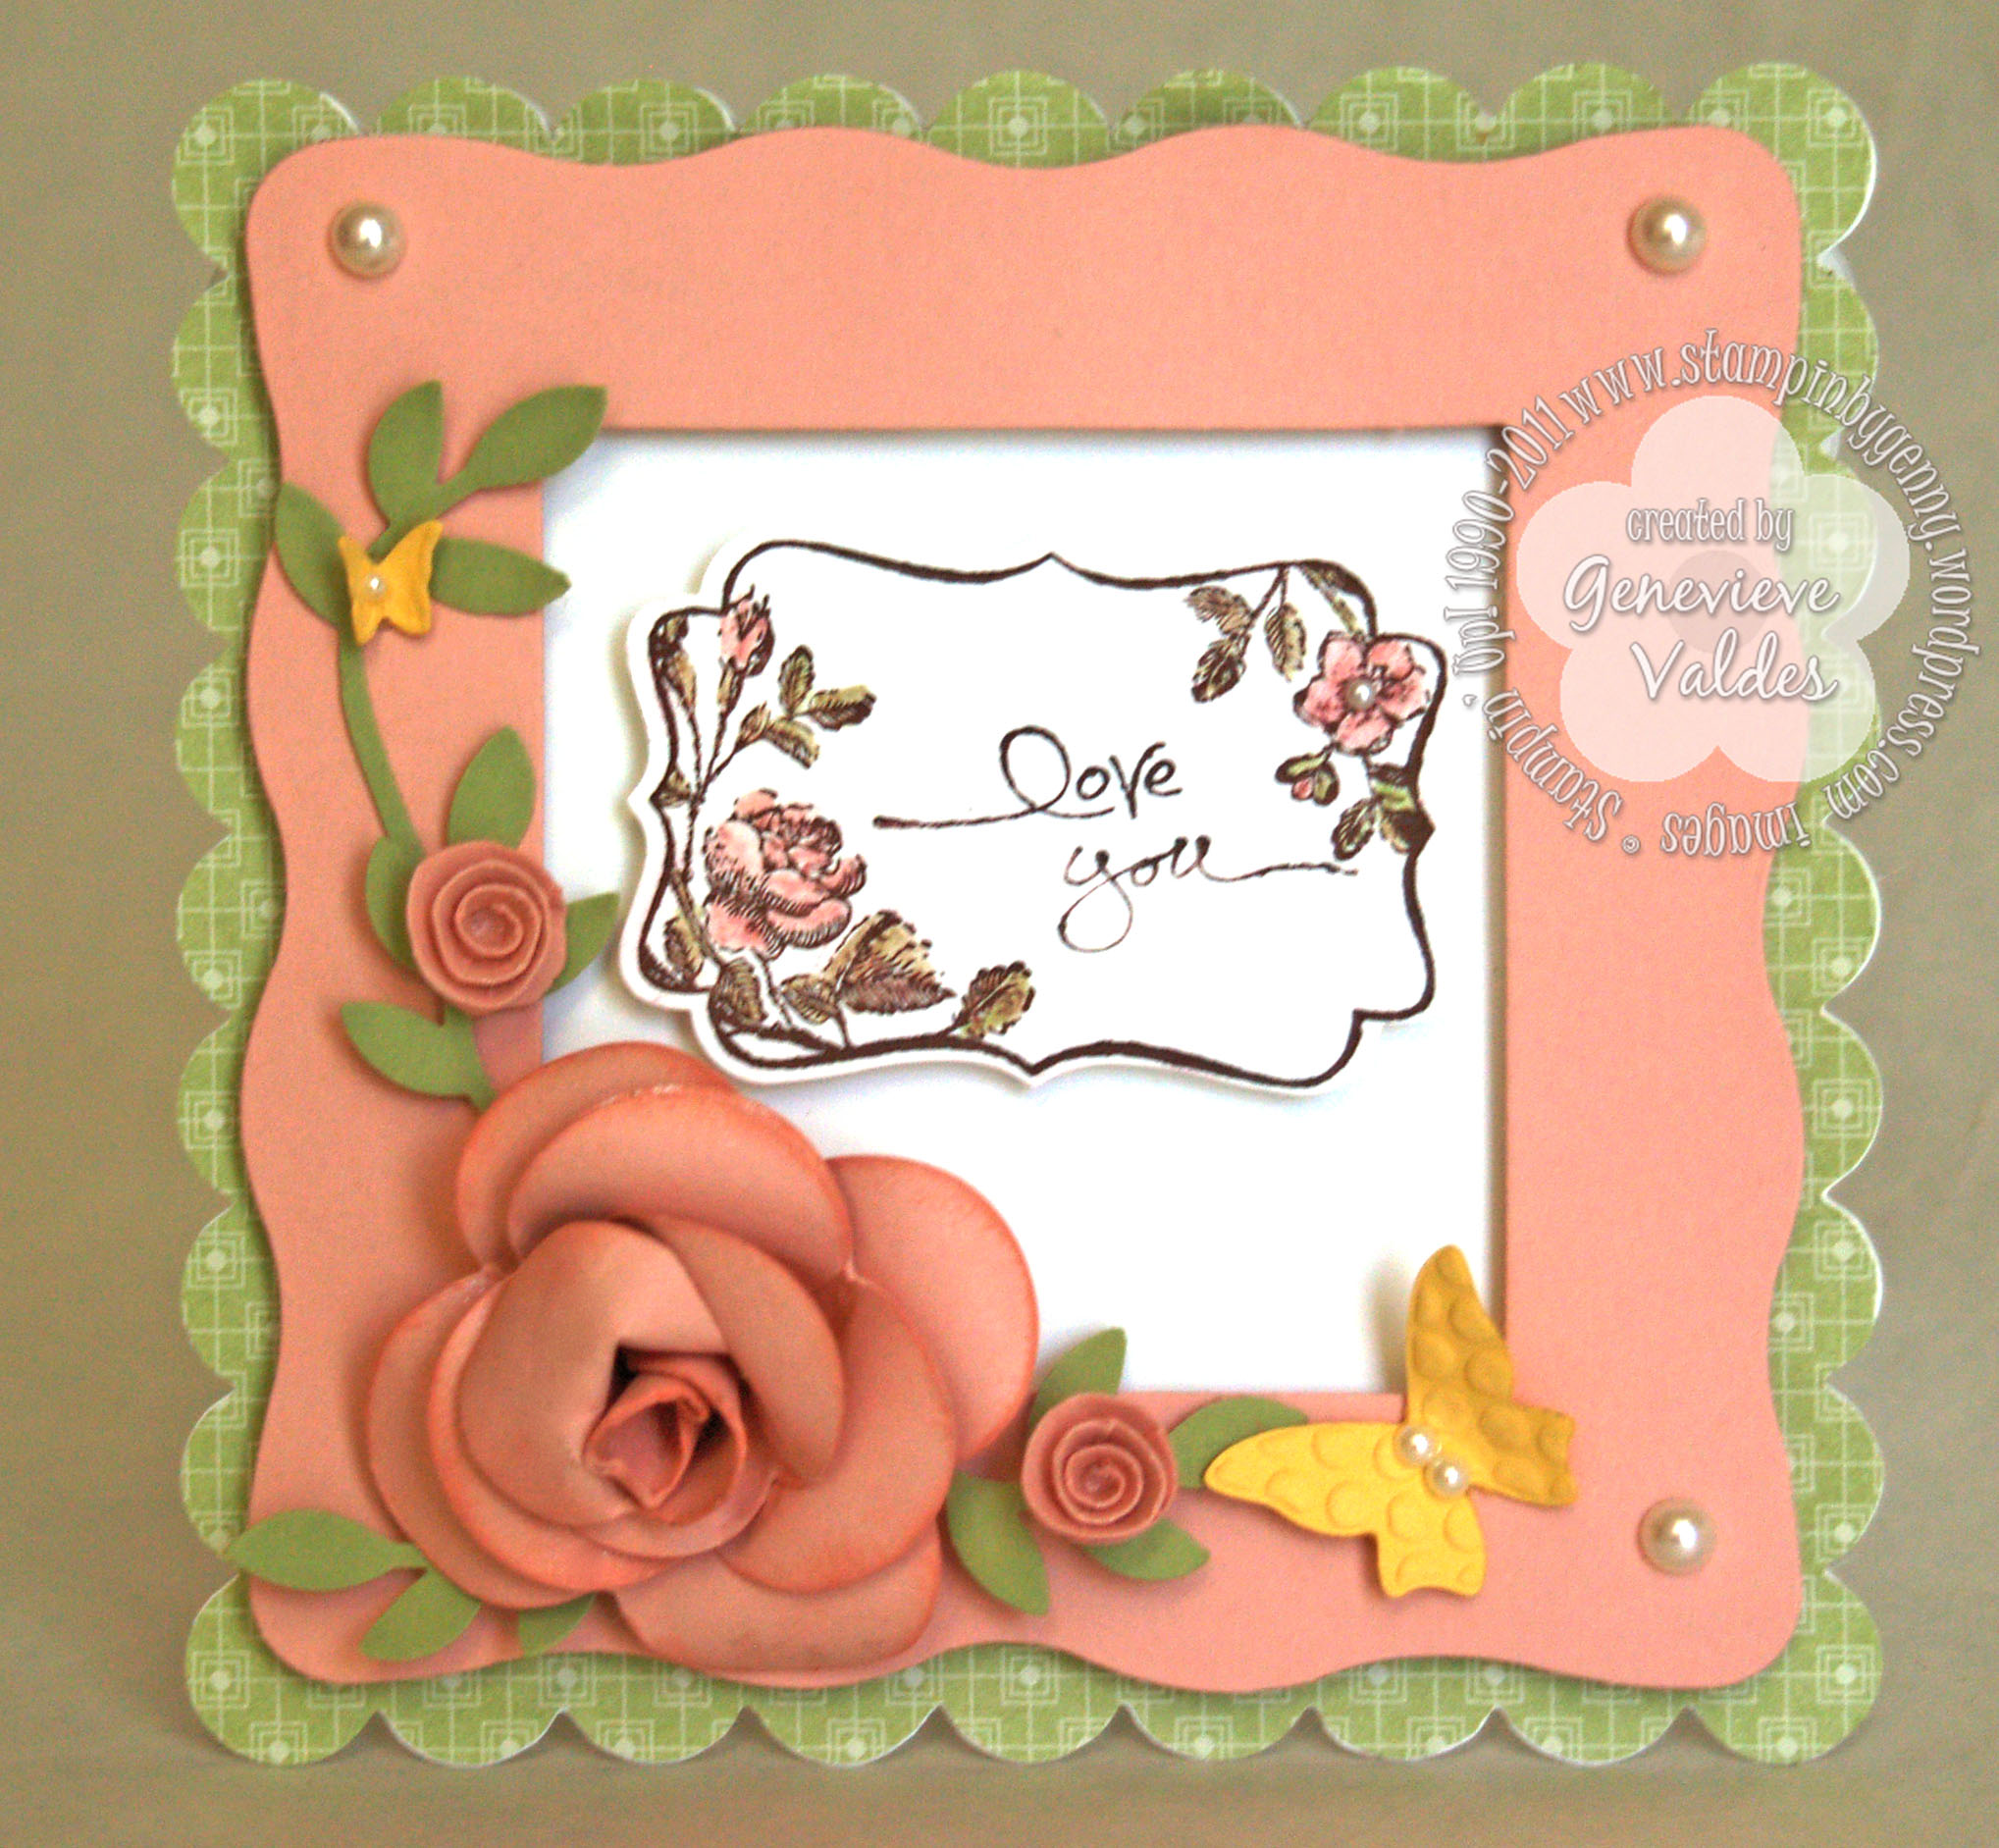
I love making paper roses from the Fancy Flower punch.  I also had a Sizzix frame die I had not used and decided to make a card for Mother’s Day.  I also used the Sizzix Square Scallop Frame die to create the card base and I layered a Pear Pizzazz DSP background to the front, added the Blushing Bride frame then embellished with small quilled roses and a large rose.  The Beautiful Wings butterflies also were added with pearls.  The sentiment is stamped with the Four Frames rose frame.  I used a blender pen and my Blushing Bride and Pear Pizzazz stamp pads to color the roses on the sentiment frame.   This set is available until the end of the month.  It’s a sneak peek from the new Stampin’ Up! Idea Book & Catalog for 2011-2012.  After April 30th you’ll have to wait until July to purchase.  Click here for more info.

click image to enlarge

This is one of the samples I’ll be showing at my workshop on Saturday.  If you live in San Antonio and would like to attend please email me.  I’ll be demonstrating how to make the large rose and quilled roses.  Another reminder, the Occasions mini catalog expires at the end of the month and we’ll have a new summer mini.  Visit me tomorrow for a sneak peak from the Summer mini catalog.

All Stampin’ Up! supplies below may be ordered from my website or email me to place your order.

All products are Stampin’ Up! unless noted.

Mother’s Day Rose Frame Card

Rose Tutorial:  Click here for Fancy Flower rose tutorial.  Click here for quilled rose tutorial.

Stamps: Four Frames, Short & Sweet

Paper: Card stock:  Whisper White, Blushing Bride, Pear Pizzazz; DSP – Pear Pizzazz from the hostess level 1 paper pack

Ink: Blushing Bride, Early Espresso, Pear Pizzazz

Accessories: Big Shot, Beautiful Wings Embosslits, Clear Large Square Scallop Bigz Die, Fancy Flower Punch, Two-Step Bird Punch, Decorative Label Punch, 3/4″ circle punch,  Basic Pearls, Blender Pen

Technique: Stamping, Die cutting

For the Graduate

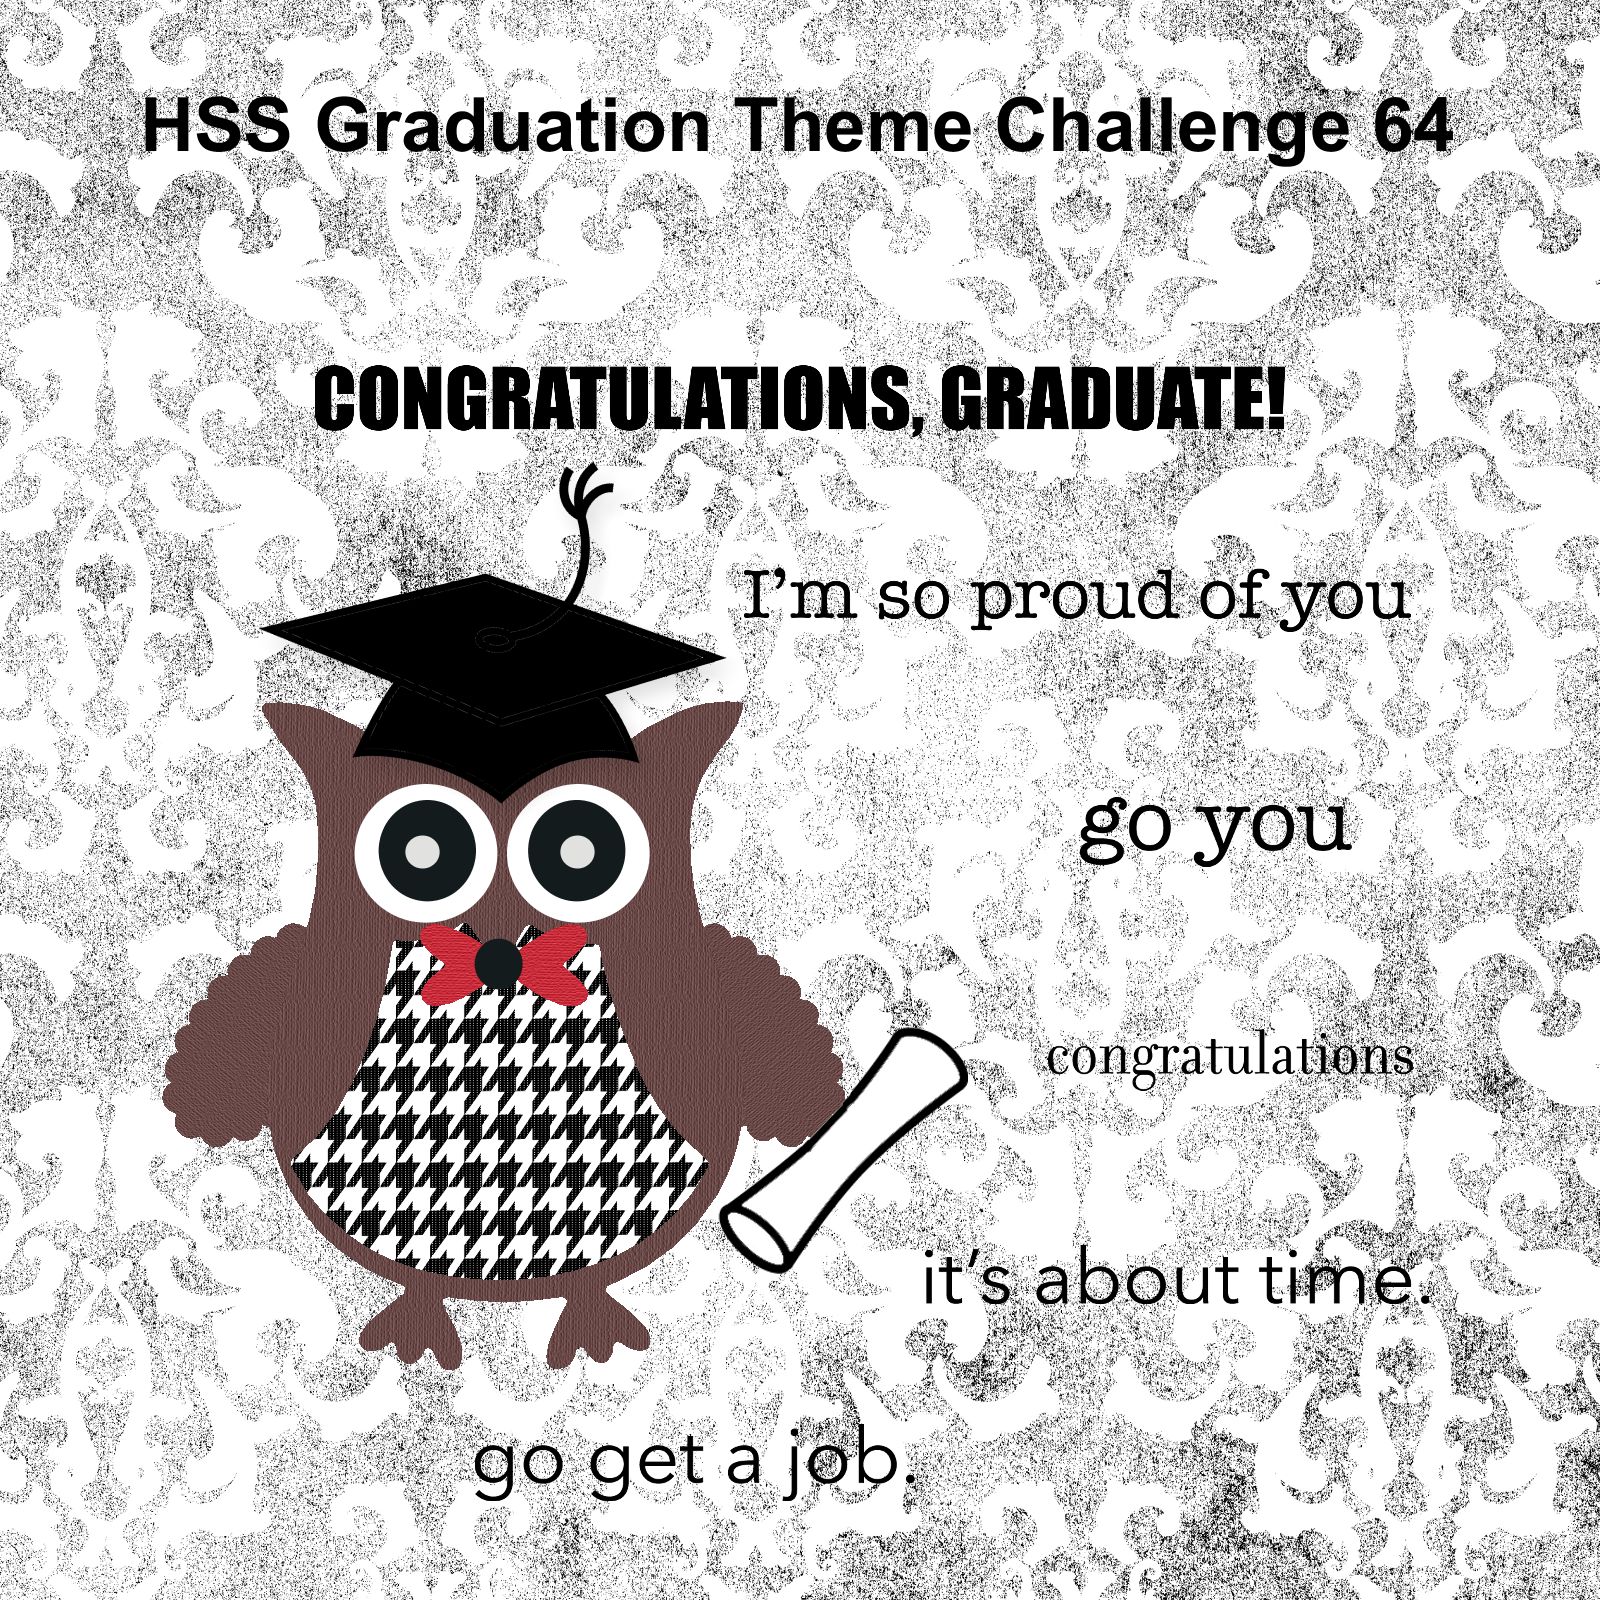
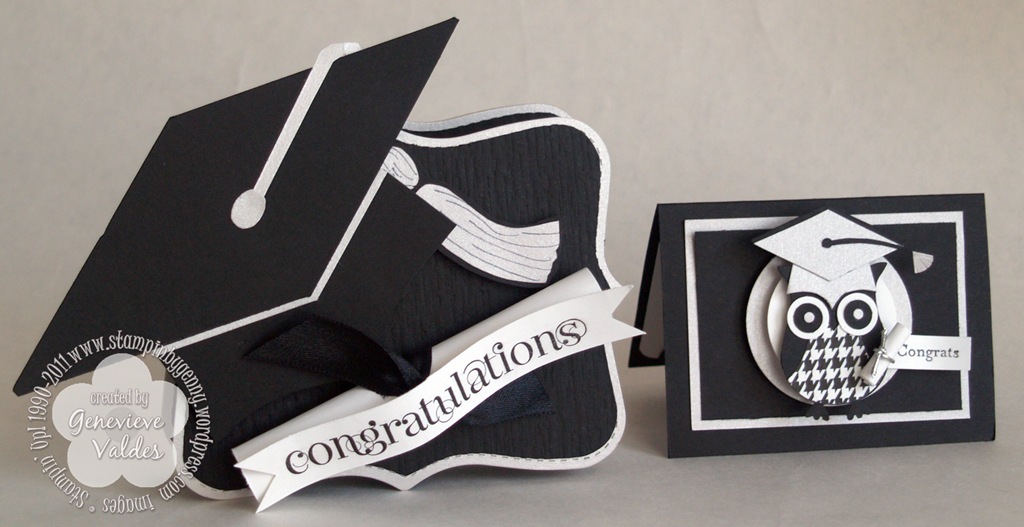
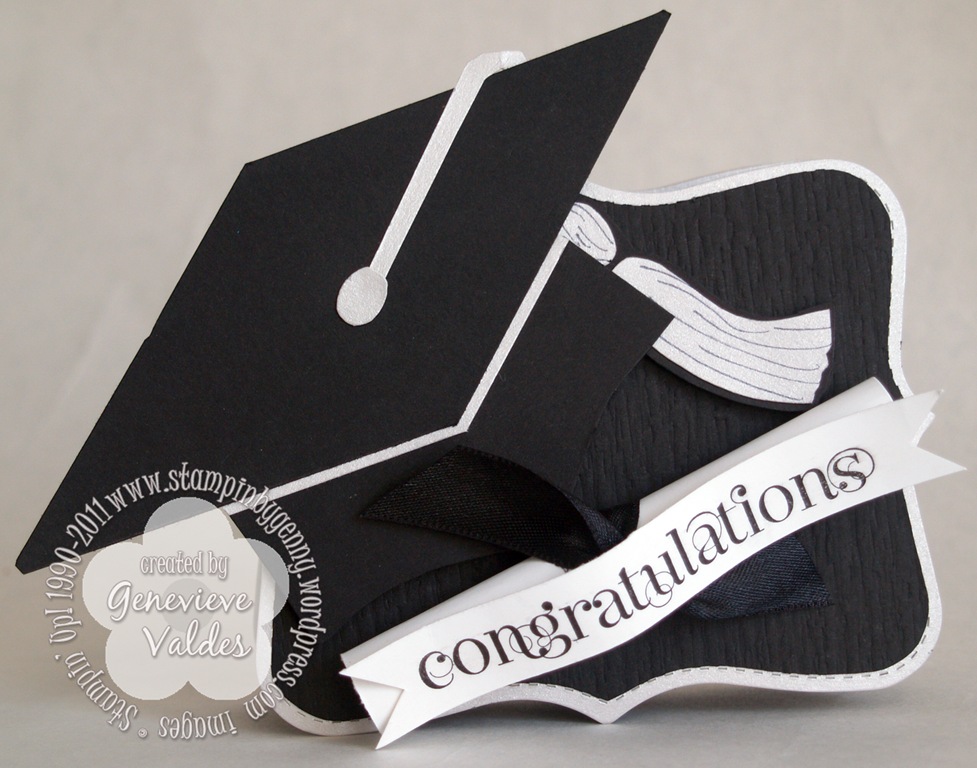
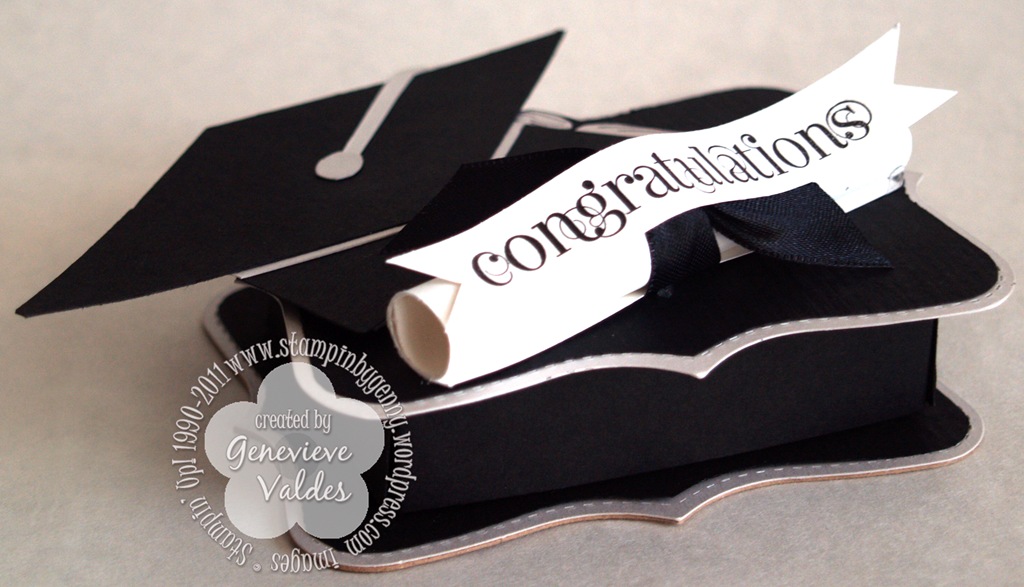
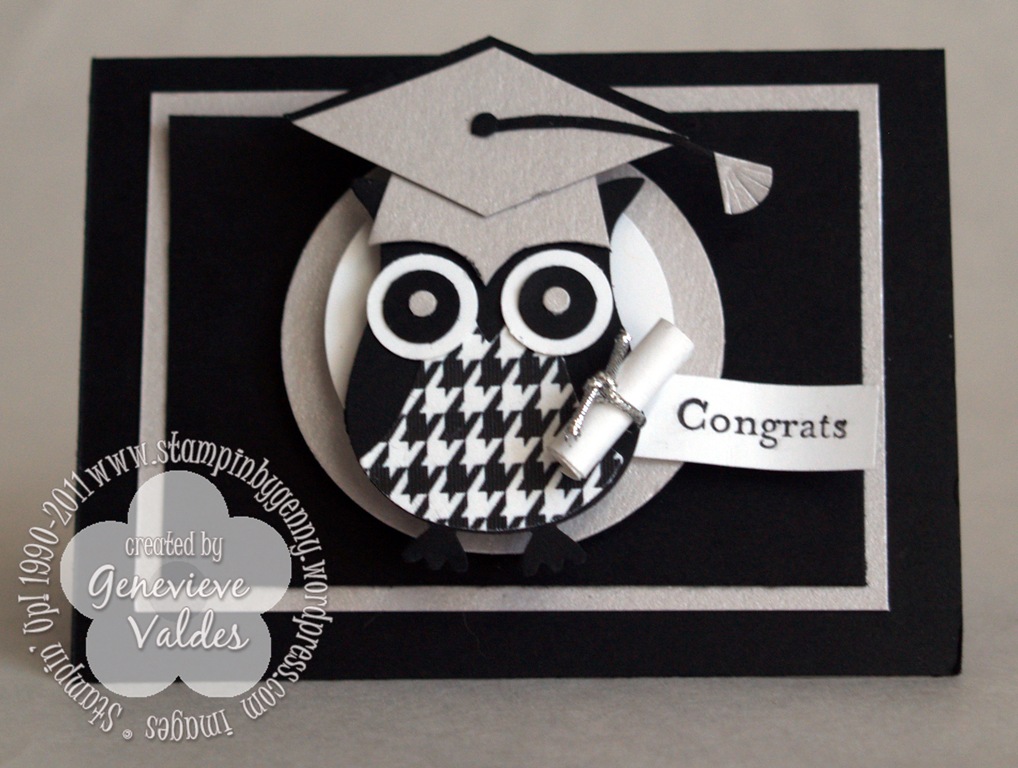
This week at Hand Stamped Sentiments we’re celebrating graduates.  Create any project – card, gift set, card holder, money holder, scrapbook page, or any 3D item with a graduation theme.  For my project I wanted to make a gift set using my Top Not die.  I used Basic Black, Silver and Whisper White card stock.  After die cutting the Basic Black Top Notes I textured them with the Texture Plates Kit #4 Distressed plate.  I die cut two more Top Notes in Silver to outline the black ones.  Cut along he perforated line on the Basic Black Top Note then adhere the silver Top Note behind the Basic Black one. The graduation cap silhouette is one I created.  See below for template.  I rolled some Whisper White paper for the diploma and tied with Basic Black Satin ribbon.  I then stamped the sentiment (Curly Cute) and created the banner.

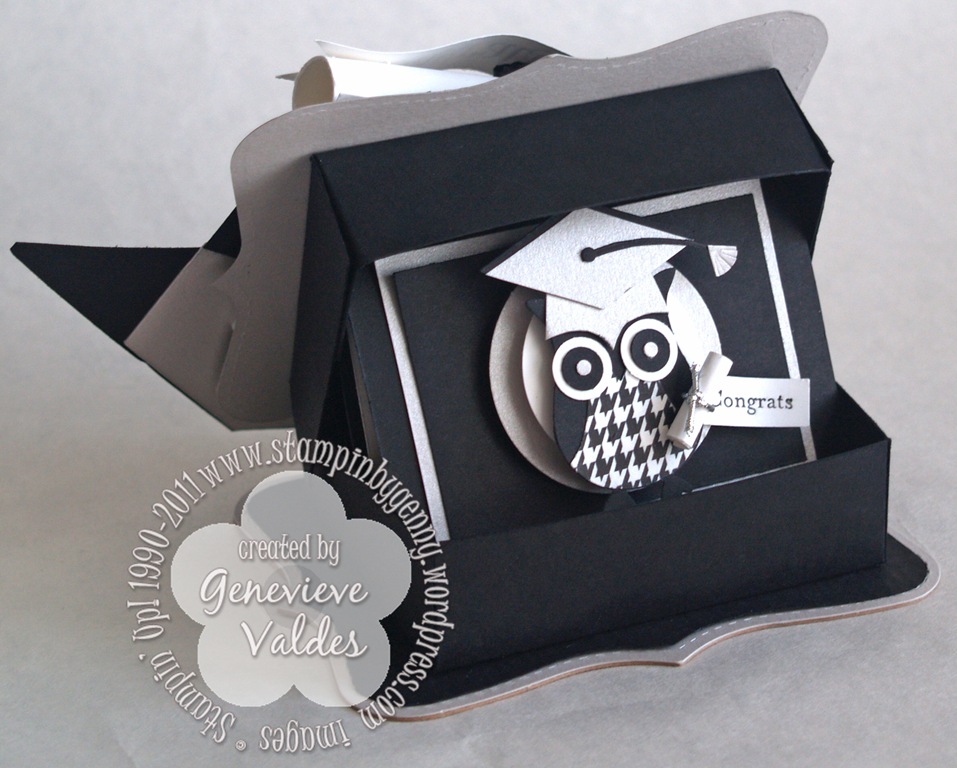
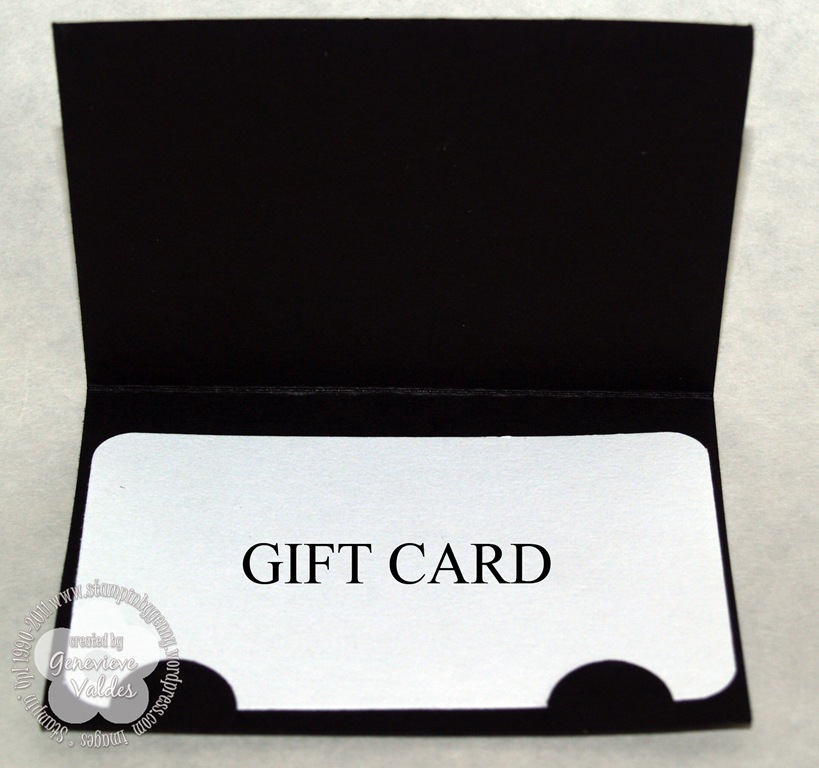
I created the card to hold a gift card.  I used the Two-step owl punch and created the cap from silver card stock.  The diploma is a strip of Whisper White then wrapped with retired silver cording.  I then adhered the owl to circle layers with dimensionals.

I hope you’re inspired to make your own graduation gift sets.  Hop over to Hand Stamped Sentiments, be inspired, create and upload your project.

Here’s my project.  Click the images to enlarge.

OLYMPUS DIGITAL CAMERA         OLYMPUS DIGITAL CAMERA
Top Note box and gift card holder Top Note box
OLYMPUS DIGITAL CAMERA         OLYMPUS DIGITAL CAMERA
Top Note box side view Gift card holder inside Top Note box
OLYMPUS DIGITAL CAMERA         OLYMPUS DIGITAL CAMERA
Outside of gift card holder Gift card holder inside

All Stampin’ Up! supplies below may be ordered from my website or email me to place your order.

All products are Stampin’ Up! unless noted.

Top Note Box

Templates: click here for box template; click here for grad cap template

Size: 3-1/2” L x 2-1/2″ W x 1” D

Stamps: Curly Cute

Paper: Basic Black , Silver, Whisper White

Ink: Basic Black

Accessories: Very Black Satin Ribbon, Big Shot, Texture Plates Kit #4 Distressed plate

Technique: Stamping, Die Cutting, Embossing

Congrats Gift Card holder

Size: 3-1/2” W x 2-5/8”H

Stamps: Silhouette Sentiments

Paper: Basic Black , Silver, Whisper White, Digital DSP Night and Day houndstooth pattern

Ink: Basic Black

Accessories: 1-3/4” circle punch, 1-3/8” circle punch, Two-Step Owl punch, retired Slit punch, Very Black Satin Ribbon, retired silver cording, dimensionals, MIni-glue dots

Technique: Stamping, Die Cutting, Embossing

Nature Walk Gift Set

I recently discovered that I had purchased the Botanical Gazette DSP and had not used it so I created this box and cards gift set based on Nancy Gabbert’s project featured in the January Success magazine.  Since the DSP and stamp set will retire at the end of the month I created this project to feature at my next workshop this month as a final push for my customers to buy this beautiful paper and stamp set.  If you’re a SU demonstrator making the box at your next workshop would be a great demo along with showing the completed cards.  I have created the template, instructions for making the box, card photos and recipes with dimensions and instructions for making the cards.  This is not a step-by-step tutorial.  You can purchase these instructions for $2.99.  I hope this inspires you to have ONE more workshop this month for a final push on the occasions mini products and to give a sneak peek of the summer or if you’re a hobby stamper I hope this set inspires you to purchase the paper and stamp set.  The stamp set is one I’ll never part with.  It’s a keeper.

Nature Walk Box and Cards Instructions - $2.99

Lucky Four Leaf Clover

This week I’m going for the green!  Hand Stamped Sentiments has a fun challenge this week to create any project inspired by St. Patrick’s Day.

Hand Stamped Sentiments

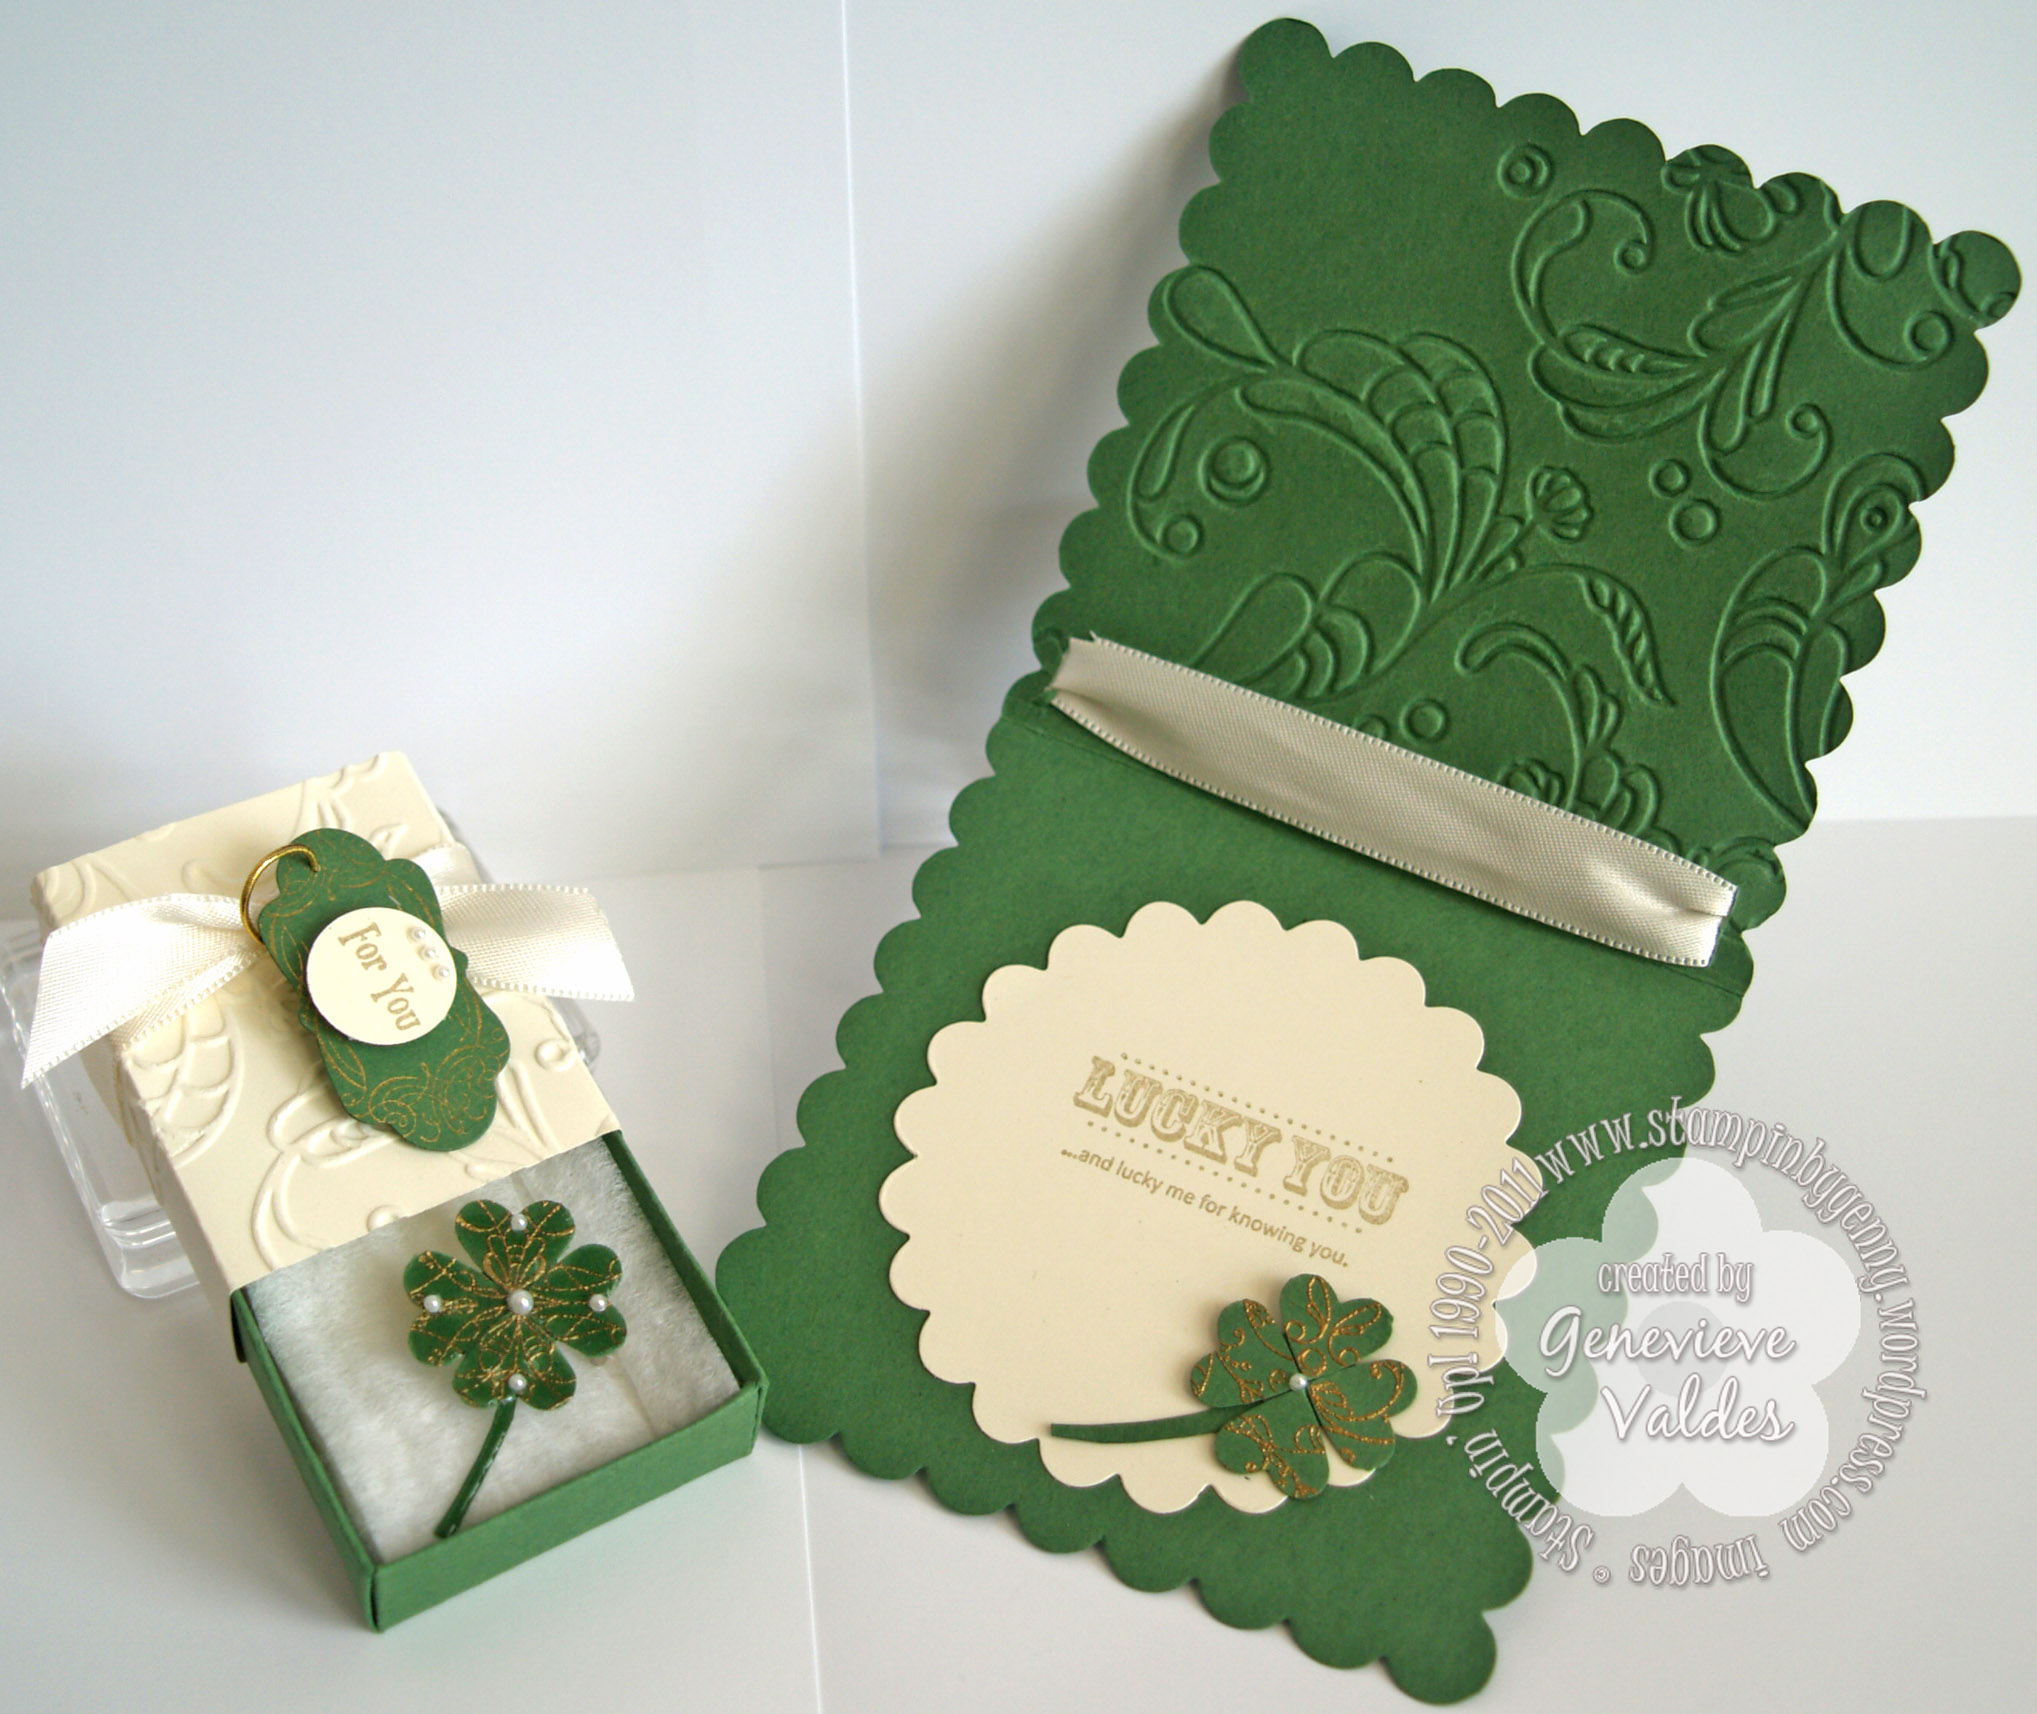
My idea for this challenge was inspired by the flourish in the Always Elegant stamp set by Stampin’ Up!  I knew instantly I wanted to create a lucky four leaf clover jewelry pin gift set that featured this beautiful flourish.   Since I had not played with my Crystal Effects this was perfect for the pin I had in my mind.  I first stamped the flourish from the Always Elegant stamp set and heat embossed it with gold then punch four hearts with the small heart punch.  I punched a 1/2″ circle and adhered the hearts to the circle with a mini glue dot then adhered the stem to the back.  I covered the front of the clover pin with Crystal Effects then let dry overnight.   I embellished with pearls and adhered a 3/4 inch silver safety catch pin back with hot glue gun.

The box and tag for the pin were created with the Sizzix Matchbox Bigz XL die.  I first ran the CS through with this die then embossed the top of the box with the Elegant Lines embossing folder before putting it together.  I wrapped the box with Very Vanilla satin ribbon.  The green tag is stamped with gold ink with the oval from the Vintage labels then stamped the ‘FOR YOU’ also from this set and punched it out with the 3/4″ circle.  I adhered the circle to the tag with dimensionals then tied it to the ribbon with gold cording.

The card base was cut with the Sizzix Bigz Large Scallop Square die and then embossed with the Elegant Lines embossing folder.  I used the Scallop Circles #2 die for the second layer. I stamped it with the flourish from the Always Elegant stamp and heat embossed it with gold then used Champagne Glass Glitter on the edges of the scalloped circle.  I made another four leaf clover and adhered it to the flourish with a dimensional.  The sentiment is from the Hostess Level 1 Aftherthoughts stamp set punched out with the large oval punch then outlined with Champagne Glass Glitter. I then layered on a scallop oval and adhered with dimensionals.
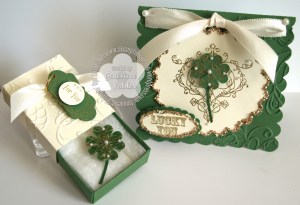
Lucky Four Leaf clover pin gift set

click image to enlarge

click image to enlarge

I hope you’re inspired to create some St. Patrick’s day projects.  Hop on over to Hand Stamped Sentiments and see more inspiration from our talented design team.

All Stampin’ Up! supplies below may be ordered from my website or email me to place your order.

All products are Stampin’ Up! unless noted.

Lucky Four Leaf Clover pin

Approx. Size: 1.75″ H x 1″ W

Stamps: Always Elegant

Paper: CS: Garden Green

Ink: Versamark

Accessories: Small Heart Punch, Gold embossing powder, Heat Tool, Basic Pearls, Crystal Effects, non-SU safety clasp pin back, mini glue dots

Technique: Stamping, Heat embossing

Lucky Four Leaf Clover pin gift box

Approx. Size: 2″ x 2-1/2″

Stamps: Always Elegant, retired Vintage Labels

Paper: CS: Garden Green, Very Vanilla

Ink: Encore Gold ink pad

Accessories: Sizzix Matchbox Bigz XL die, Big Shot, Elegant Lines embossing folder, Basic Pearls, Very Vanilla Satin Ribbon, gold cording

Technique: Stamping, Dry embossing

Lucky Four Leaf Clover card

Size: 4″ x 4″

Stamps: Always Elegant, Afterthoughts

Paper: CS: Garden Green, Very Vanilla

Ink: Encore Gold ink pad, Versamark

Card Accessories: Small Heart Punch, Gold embossing powder, Heat Tool, Basic Pearls, Very Vanilla Satin ribbon, Crystal Effects, Champagne Glass Glitter non-SU safety clasp pin back, mini glue dots

Technique: Stamping, Heat embossing, Die cutting

Paris in the Spring

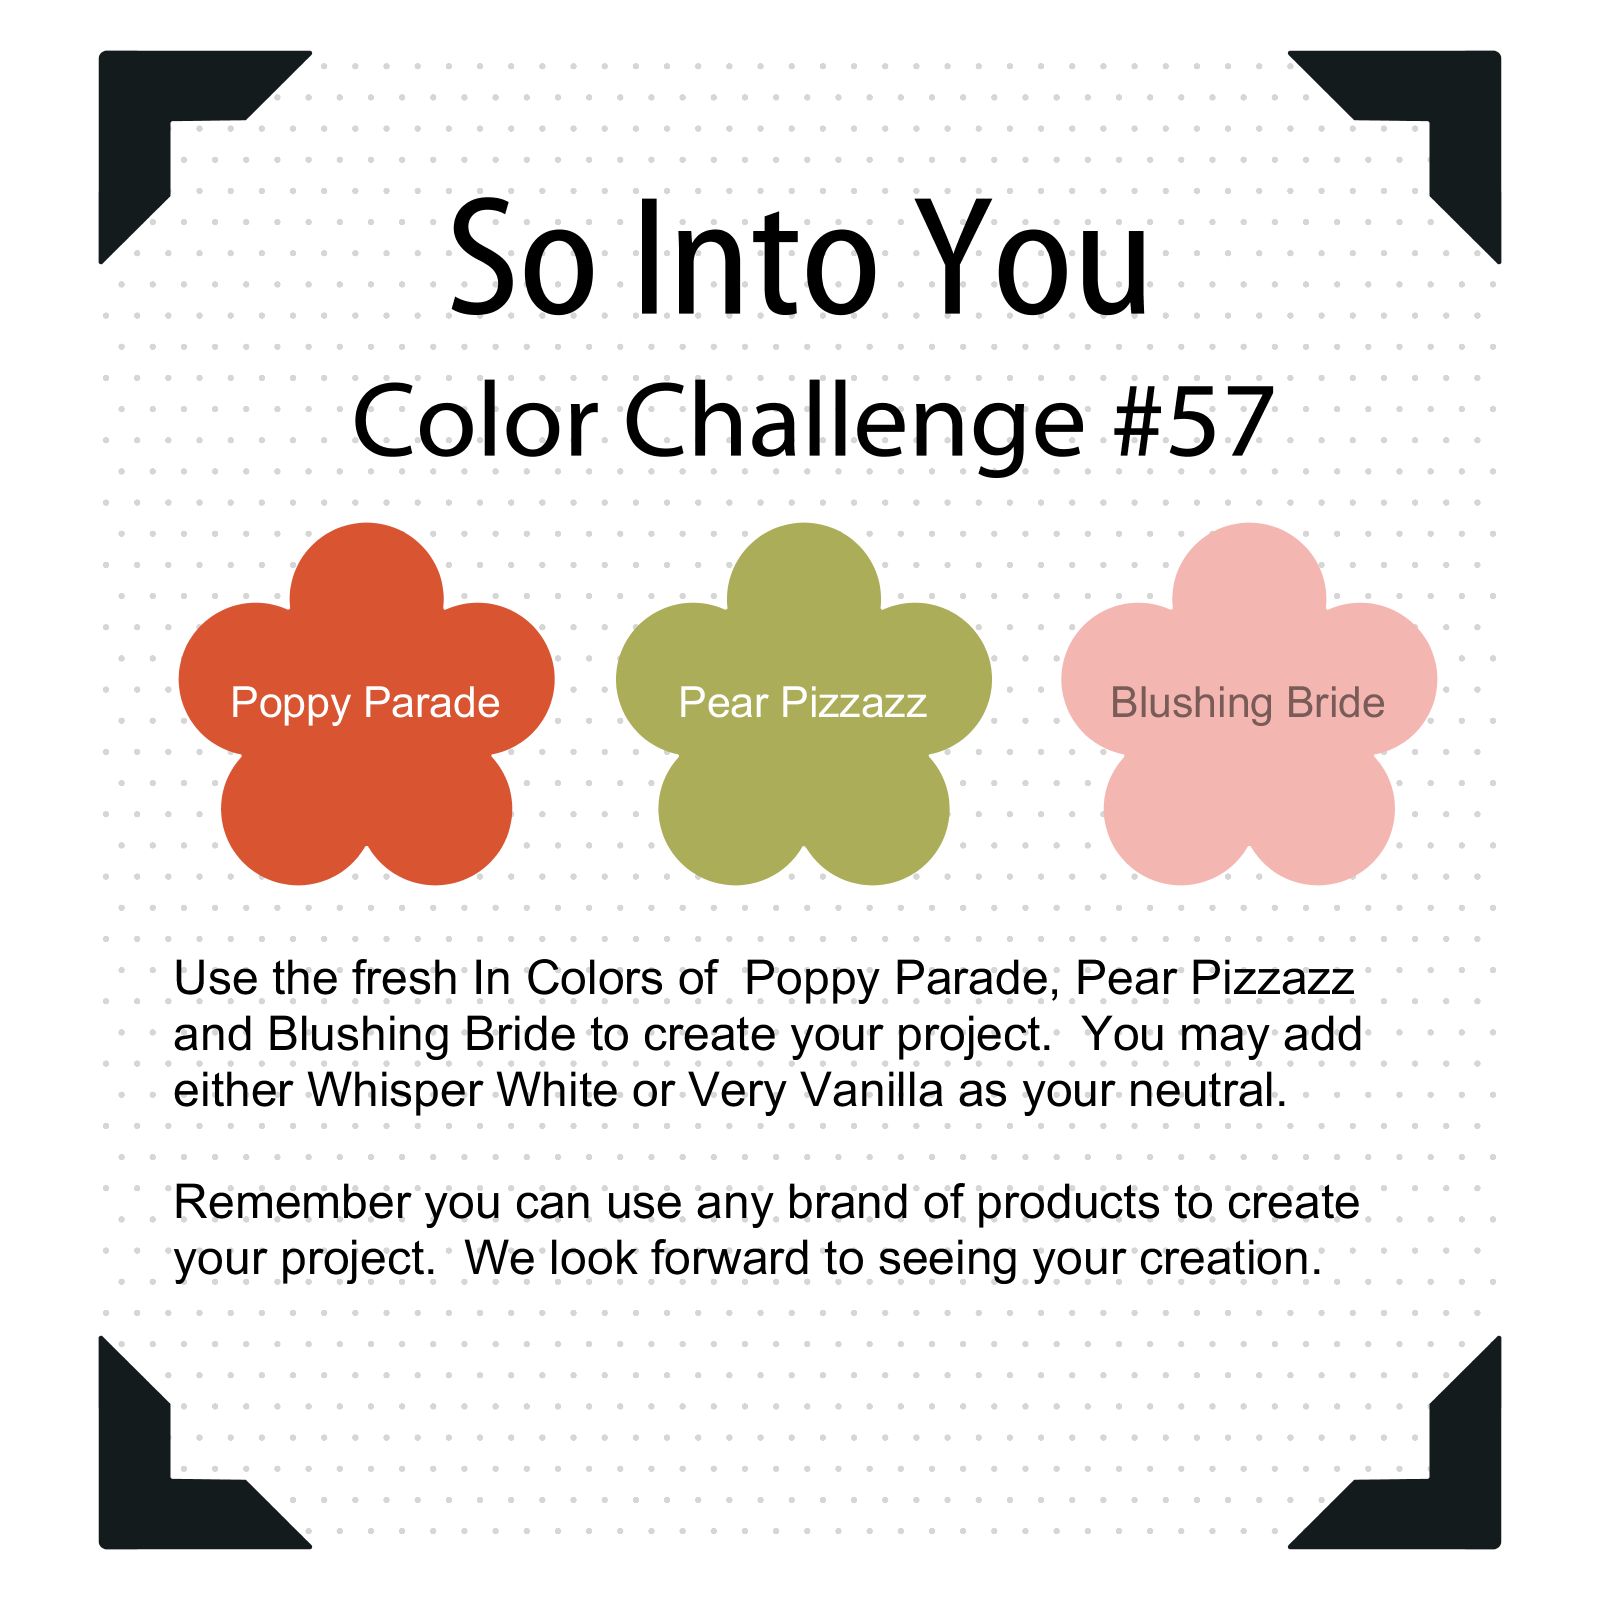
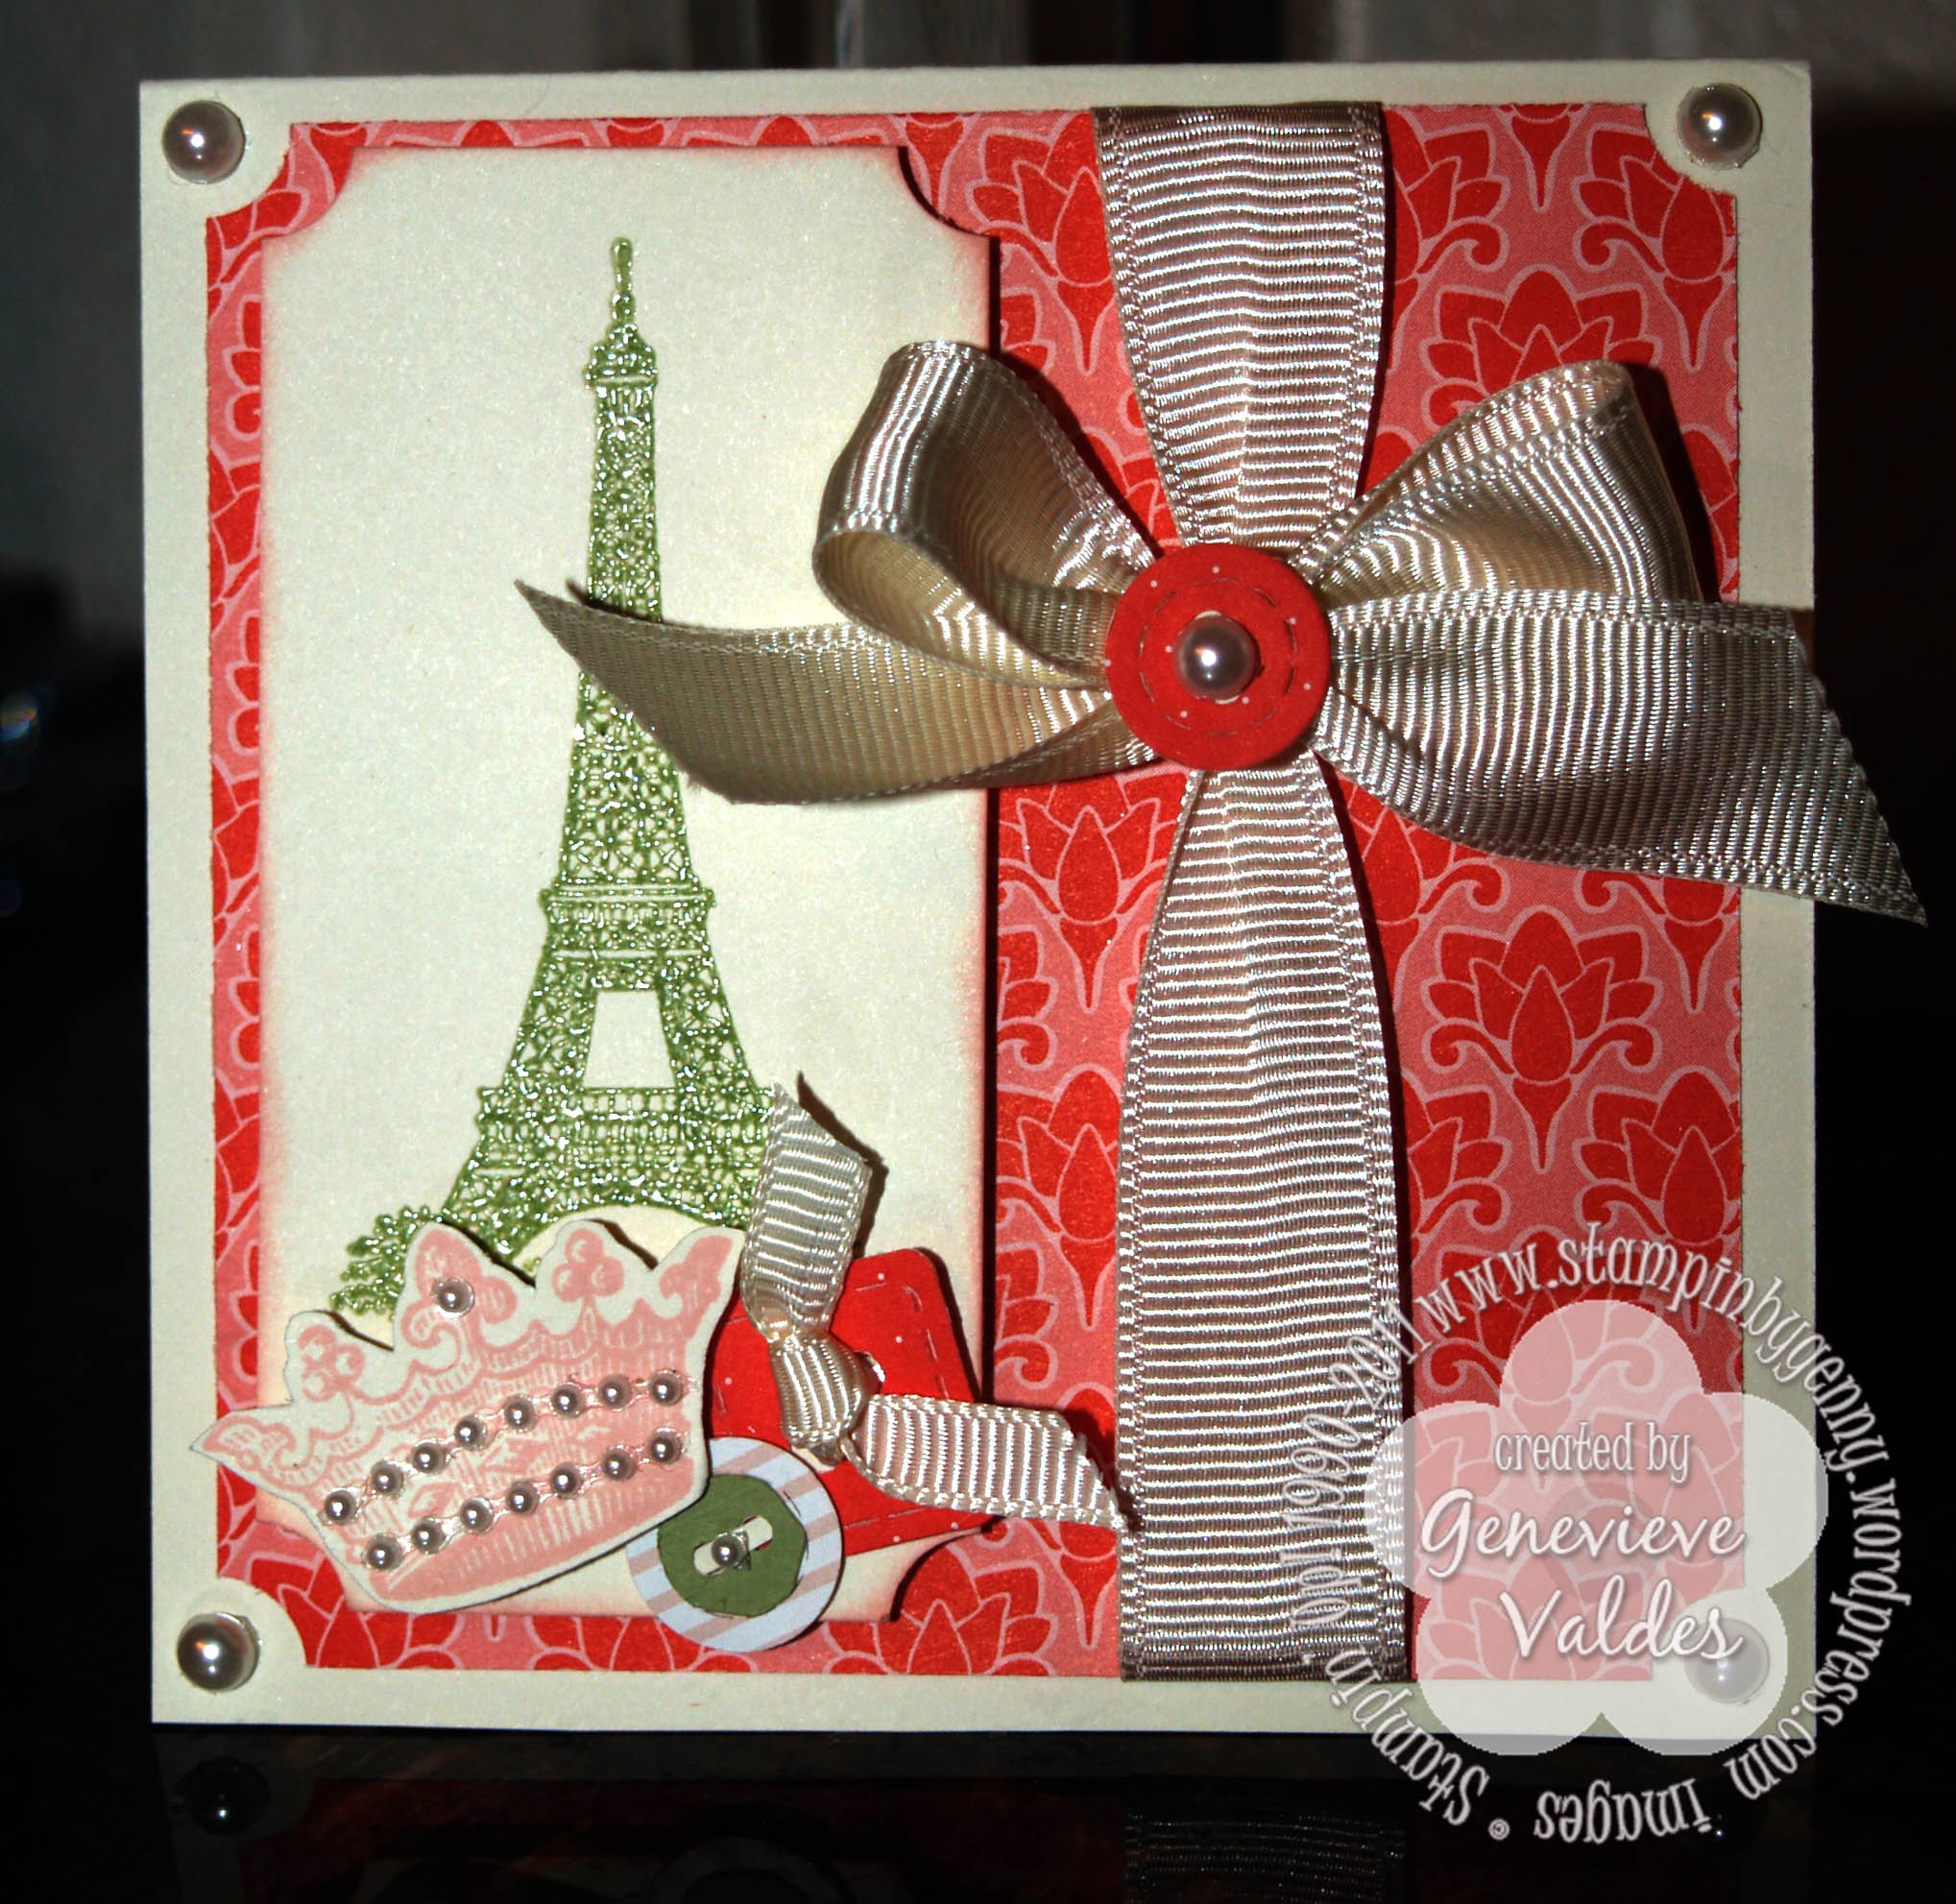
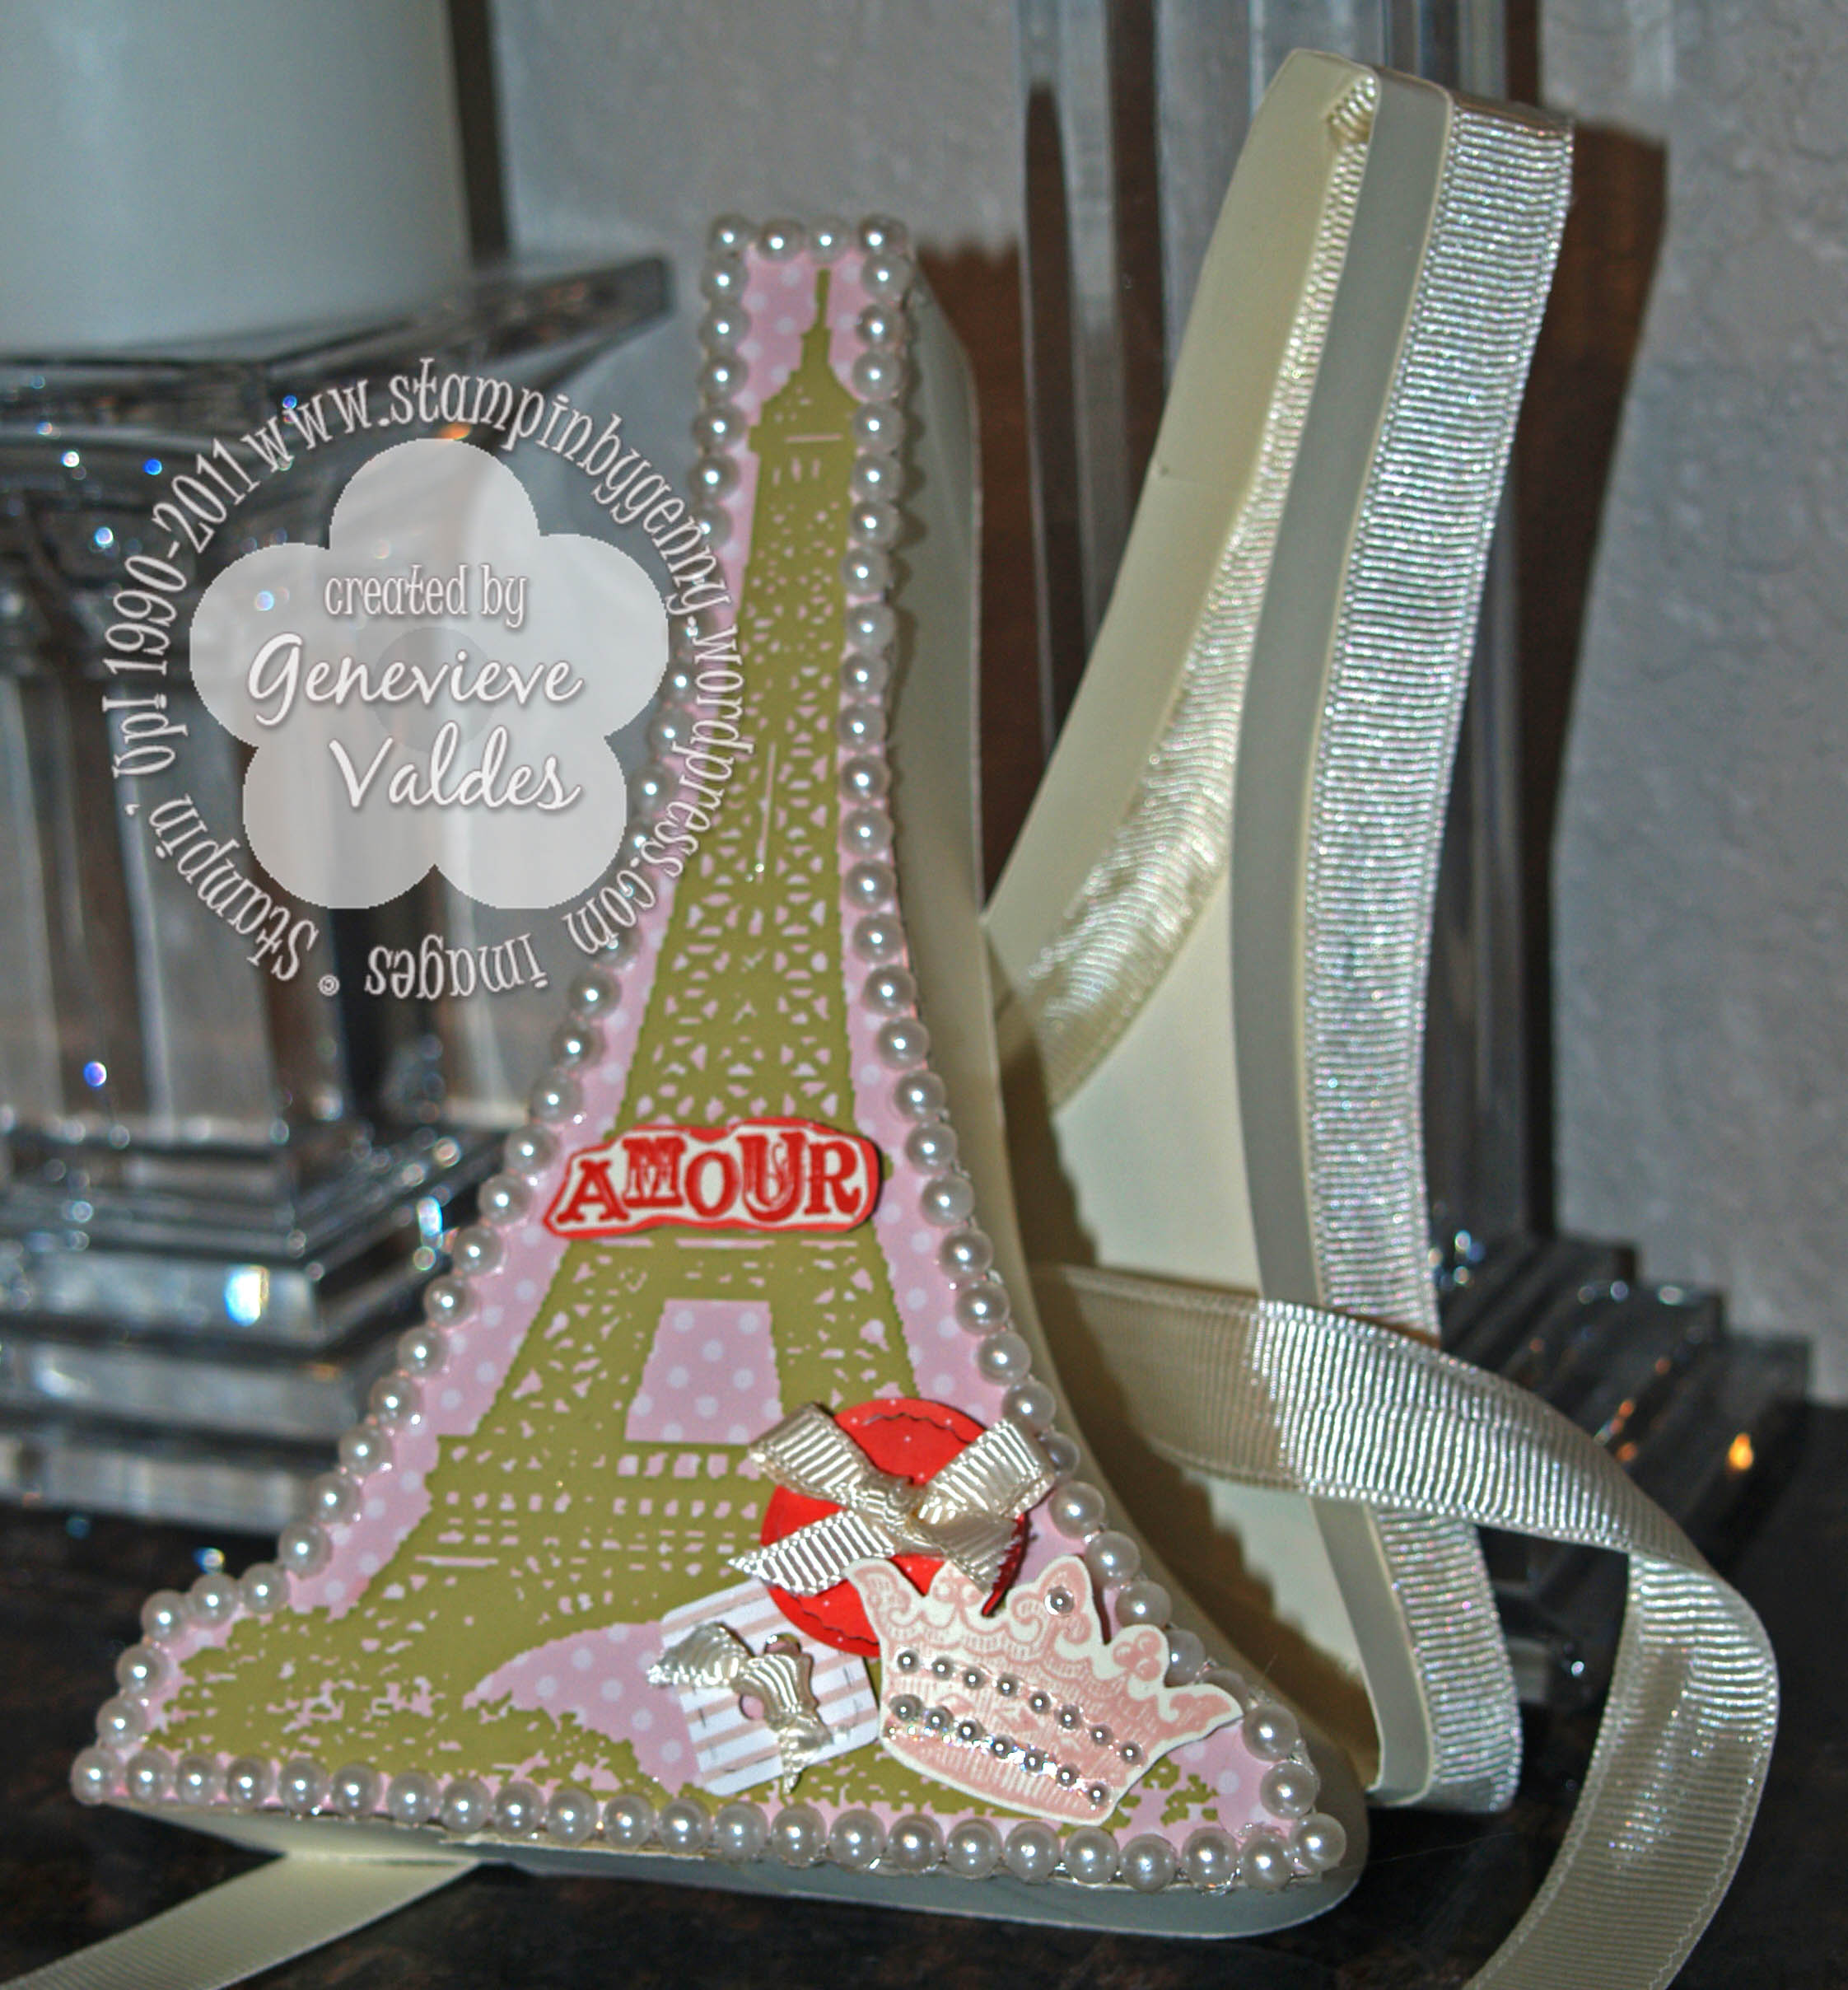
Do you ever get an idea for a project you can’t get out of your head and you have to create it?  Well this happened with an idea to make an Eiffel Tower shaped box using the image from the Artistic Etchings digital stamp set because then I can make it whatever size I like.  I finally decided to create the box for this week’s challenge at Hand Stamped Sentiments Color Splash Challenge.  The colors are Poppy Parade, Blushing Bride and Pear Pizzazz.  These colors together remind me of spring.

I created the front of the box on My Digital Studio.  I used the Blushing Bride polka dot background and enlarged the Eiffel Tower and colored it Pear Pizzaz.  I then created an outline template of the tower and cut it out.  I made the front and bottom of the box from chip board then adhered the Eiffel Tower image/DSP on the front and trimmed any uneven edges.  The bottom of the box is slightly smaller so the top can fit over the sides from the bottom.  The sides of the box are made from Very Vanilla CS.  I also finished the inside with Very Vanilla CS and grosgrain ribbon.  I plan on creating a tutorial for this box.  As soon as complete it I’ll post it.

For the card I stamped the tower in Versamark and Pear Pizzazz ink then heat embossed with clear embossing powder.  The card also features Poppy Parade DSP from the In Color  Hostess Level One paper pack.  I embellished the box and the card with buttons created with the Sizzlit Buttons #5 die.  I also embellished with loads of pearls.  I hope these colors inspire you to create a project for spring.

HSS Color challenge 57


Eiffel tower box and card

click image to enlarge

4x4 Eiffel Tower card

click image to enlarge

Eiffel Tower box

click image to enlarge

All Stampin’ Up! supplies below may be ordered from my website or email me to place your order.

All products are Stampin’ Up! unless noted.

Eiffel Tower Card

Card Size: 4″ x 4″

Stamps: Artistic Etchings

Paper: CS: Very Vanilla, Pear Pizzazz; DSP:  Poppy Parade DSP from hostess level 1 paper pack

Ink: Blushing Bride (sponged edges of tower layer), Pear Pizzazz, Versamark

Card Accessories: Big Shot, Sizzlit Buttons #5 die, 5/8″ and 1/4″ Very Vanilla grosgrain ribbon, Basic Pearls, Ticket corner punch, sponge dauber

Technique: Stamping, Die Cutting, Digital crafting

Eiffel Tower Box

Box Size: 6″ H x 4.5″ W (widest part)

Stamps: Digital and Rubber set Artistic Etchings

Paper: CS: Very Vanilla, Pear Pizzazz; DSP:  Poppy Parade and Blushing Bride DSP from hostess level 1 paper pack

Digital DSP: Blushing Bride Polka Dot

Ink: Classic Ink: Blushing Bride, Poppy Parade

Digital Eiffel Tower color: Pear Pizzazz

Card Accessories: Big Shot, Sizzlit Buttons #5 die, 5/8″ and 1/4″ Very Vanilla grosgrain ribbon, Basic Pearls,

Technique: Die Cutting, Stamping, Digital crafting

Fall is in the air…

Well it looks like fall is definitely here!  Today when I went out this morning to walk my dog there was a slight chill and it felt so nice because the sun was just beginning to peek out.  All this inspired me to create this week’s Hand Stamped Sentiment’s Baby Wipe Technique Challenge card with the Autumn Splendor and Day of Gratitude stamp sets.  This technique is perfect for capturing the different leaf colors.  I used Pumpkin Pie, Chocolate Chip and Old Olive re-inkers on my baby wipe.  I then used the baby wipe ink pad to stamp the Autumn Splendor leaf images and Punch Potpourri bird image on Very Vanilla card stock.

I used the Scallop Trim corner and border punches on the Very Vanilla layers.  I ran the smaller Very Vanilla layer through my Big Shot with the Square Lattice embossing folder.   Both Very Vanilla layers were sponged with Pumpkin Pie.

The Chocolate Chip layer is distressed with scissors.

I implemented the tone on tone technique and stamped the medallion image from the Day of Gratitude stamp set with Old Olive ink on the Old Olive layer.  I stamped the sentiment with Versamark and Chocolate Chip ink then heat embossed with clear embossing powder.  As a final touch I added a half pearl for the eye of the bird and to the corner of the Old Olive layer.

I enjoyed this technique and encourage you to try it.  It’s very easy and results are beautiful.  You can go here to SCS to see a written and video tutorial for this technique.  Once you’ve created your baby wipe technique project please post it to the Hand Stamped Sentiments site.

Baby Wipe Technique Leaf card

click image to enlarge

All Stampin’ Up! supplies below may be ordered from my website or email me to place your order.
All products are Stampin’ Up! unless noted.

Baby wipe Leaf technique card


Finished size: 5.50″ H x 5.50″ W

Stamp Sets: Day of Gratitude, Autumn Splendor

Paper: Card stock:  Old Olive card base (5.50″ x 5.50″), Very Vanilla (started with following sizes then punched 5.25″ x 5.25″, 4.25″ x 4.25″),  Chocolate Chip (4.50″ x 4.50″), Old Olive (3.25″ x 3.25″)


Ink: Chocolate Chip, Pumpkin, Pie, Old Olive, Versamark

Accessories: Big Shot, Square Lattice embossing folder, half pearls, Two-step bird punch, Scallop Trim corner and border punches, Clear embossing powder, Heat tool

Techniques: Stamping, Embossing

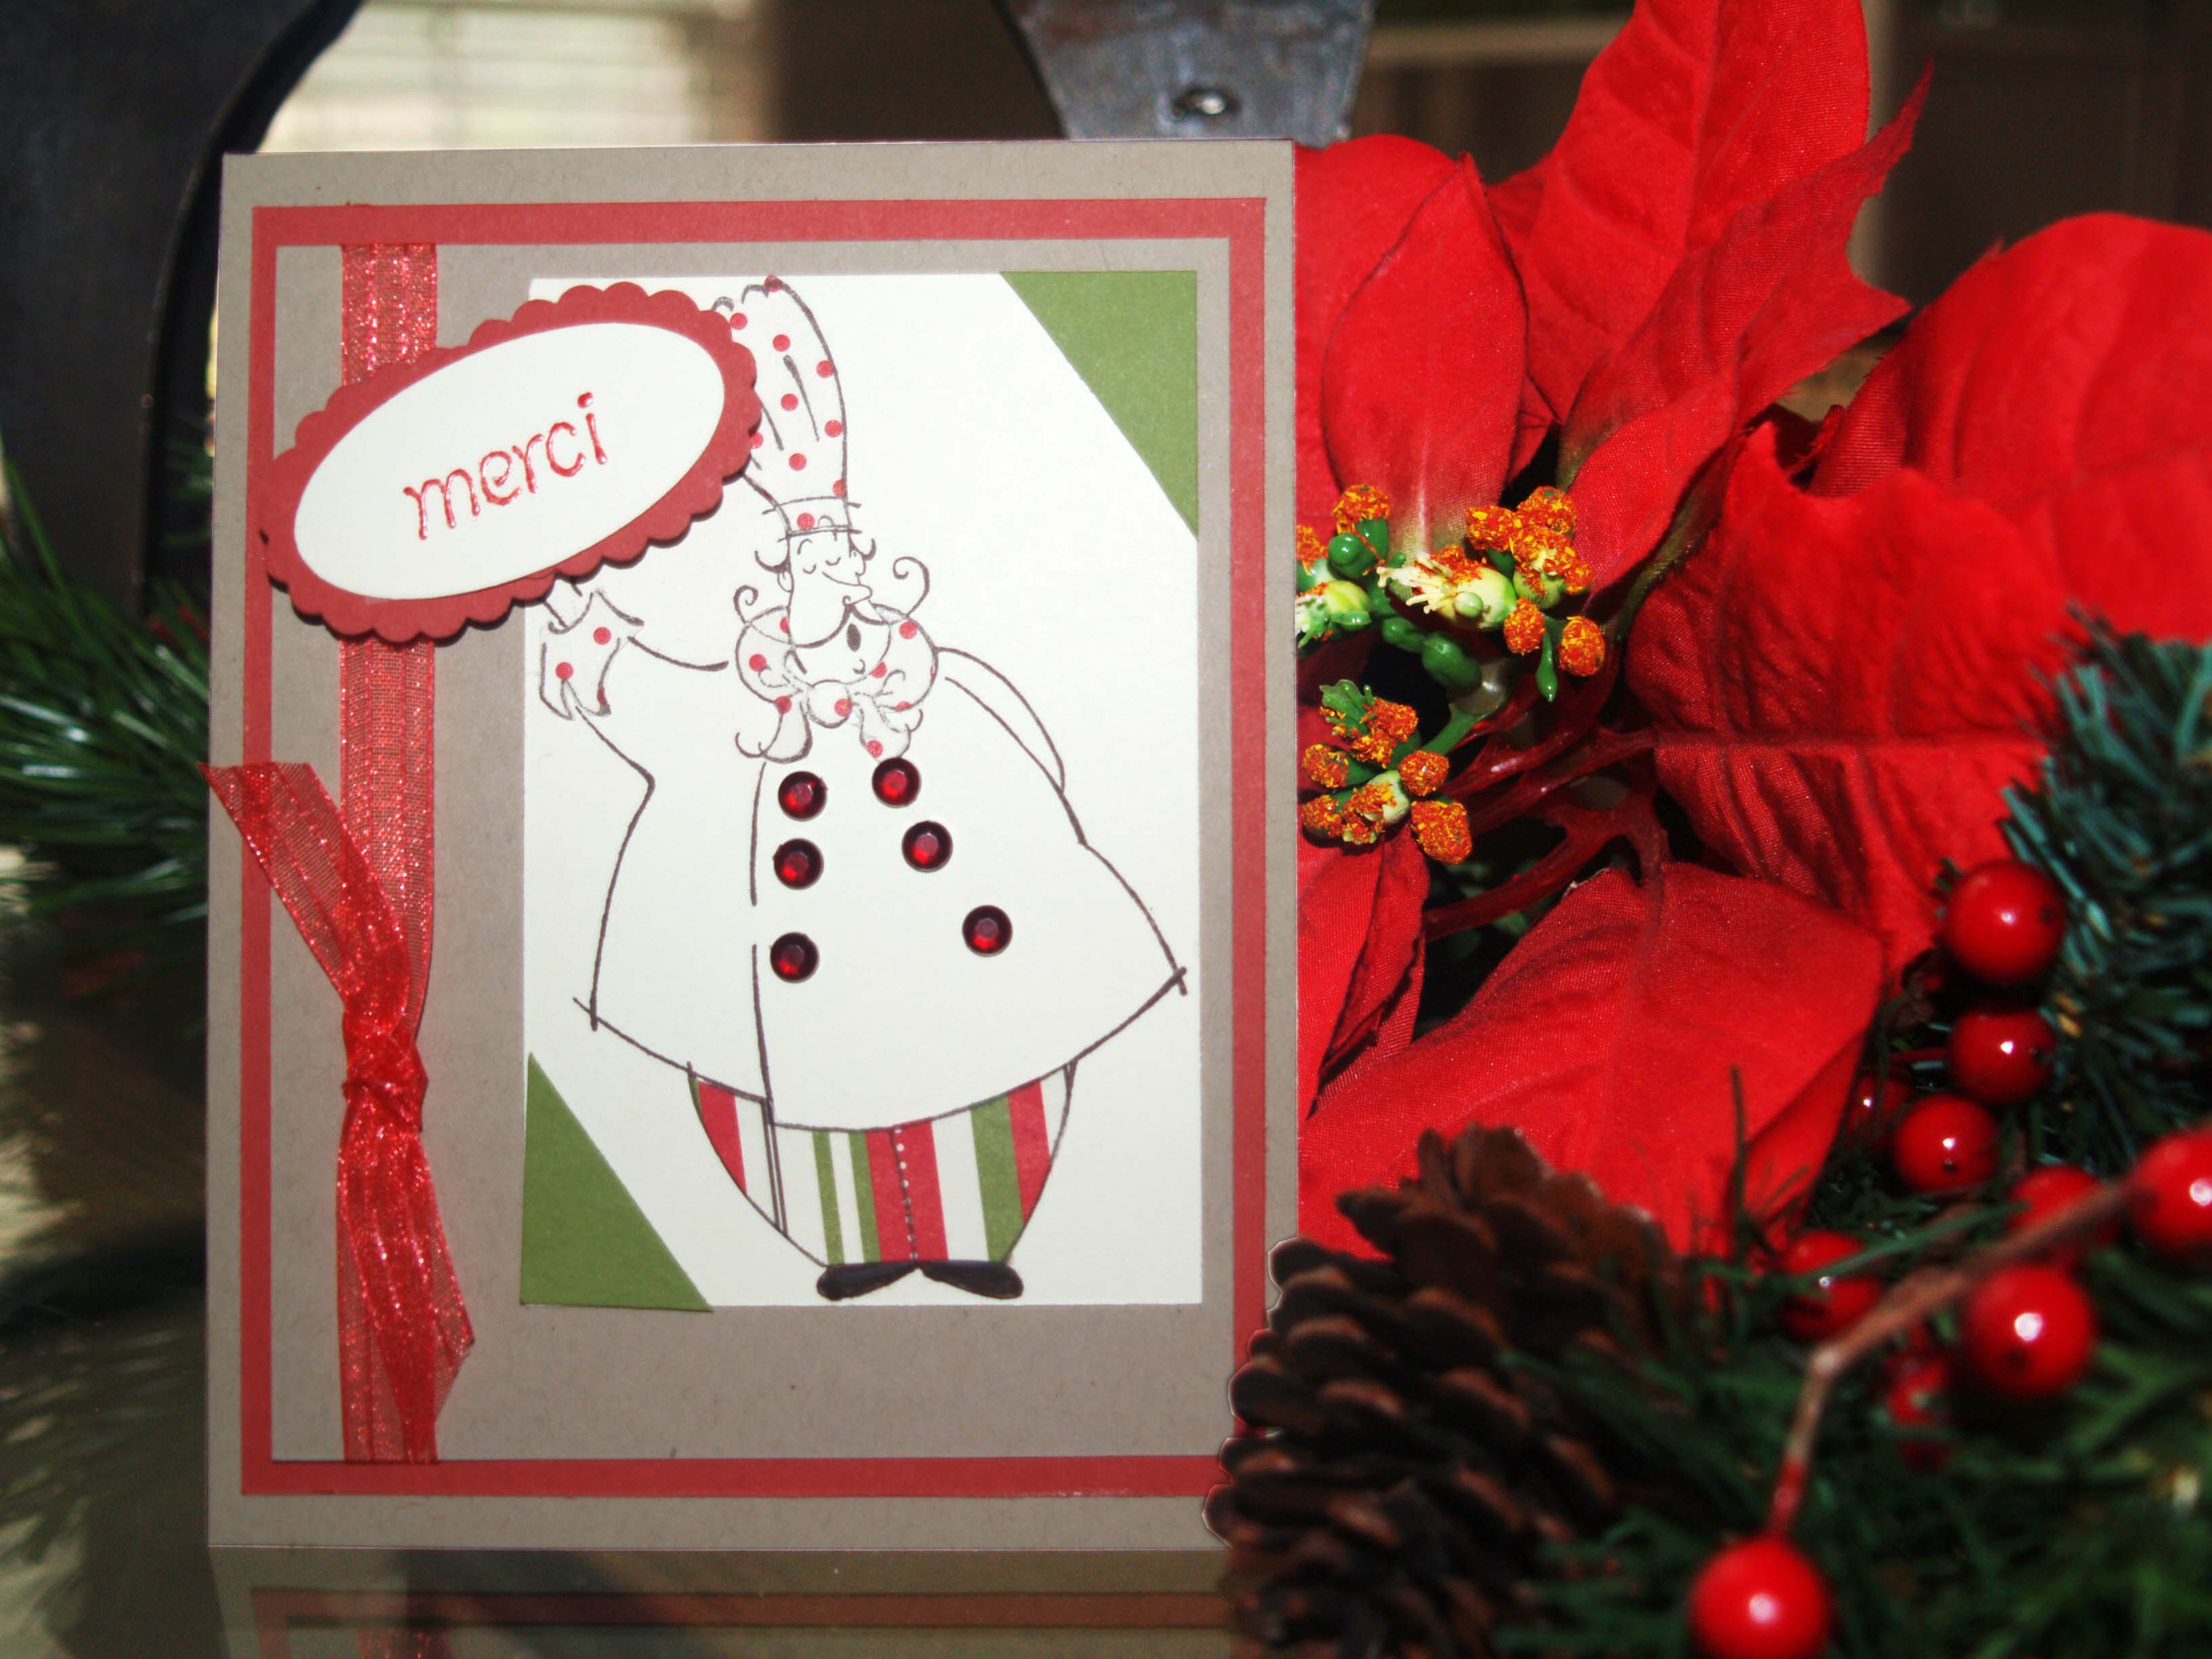
Voilà, Merci! It’s all gone to the French

Here’s another card I made using the little chef from the Voila! stamp set with a Christmas twist.  This card was made to thank a dear friend for a wonderful holiday dinner.  She also shares my addiction for stamping and loves all things French.  To thank her I made this card using the paper piecing technique with scraps from the Christmas Jingle Scrappin’ kit.

Voilà merci

Voilà merci thank you card - click for larger image

Stamp Sets:  Voilà, sentiment from retired Merci ( good substitute is  merci stamp from Chic Boutique)

Paper: SU cardstock Kraft Brown, Ruby Red, Old Olive and pattern paper from Christmas Jingle Simply Scrappin’ kit

Ink:  ink pads Real Red, Chocolate Chip, Versa Mark and Chocolate Chip marker

Accessories: SU large oval punch, SU dimensionals, non SU oval scallop punch, red self-adhesive gems,  non SU ribbon

Techniques: stamping, paper piecing, heat embossing

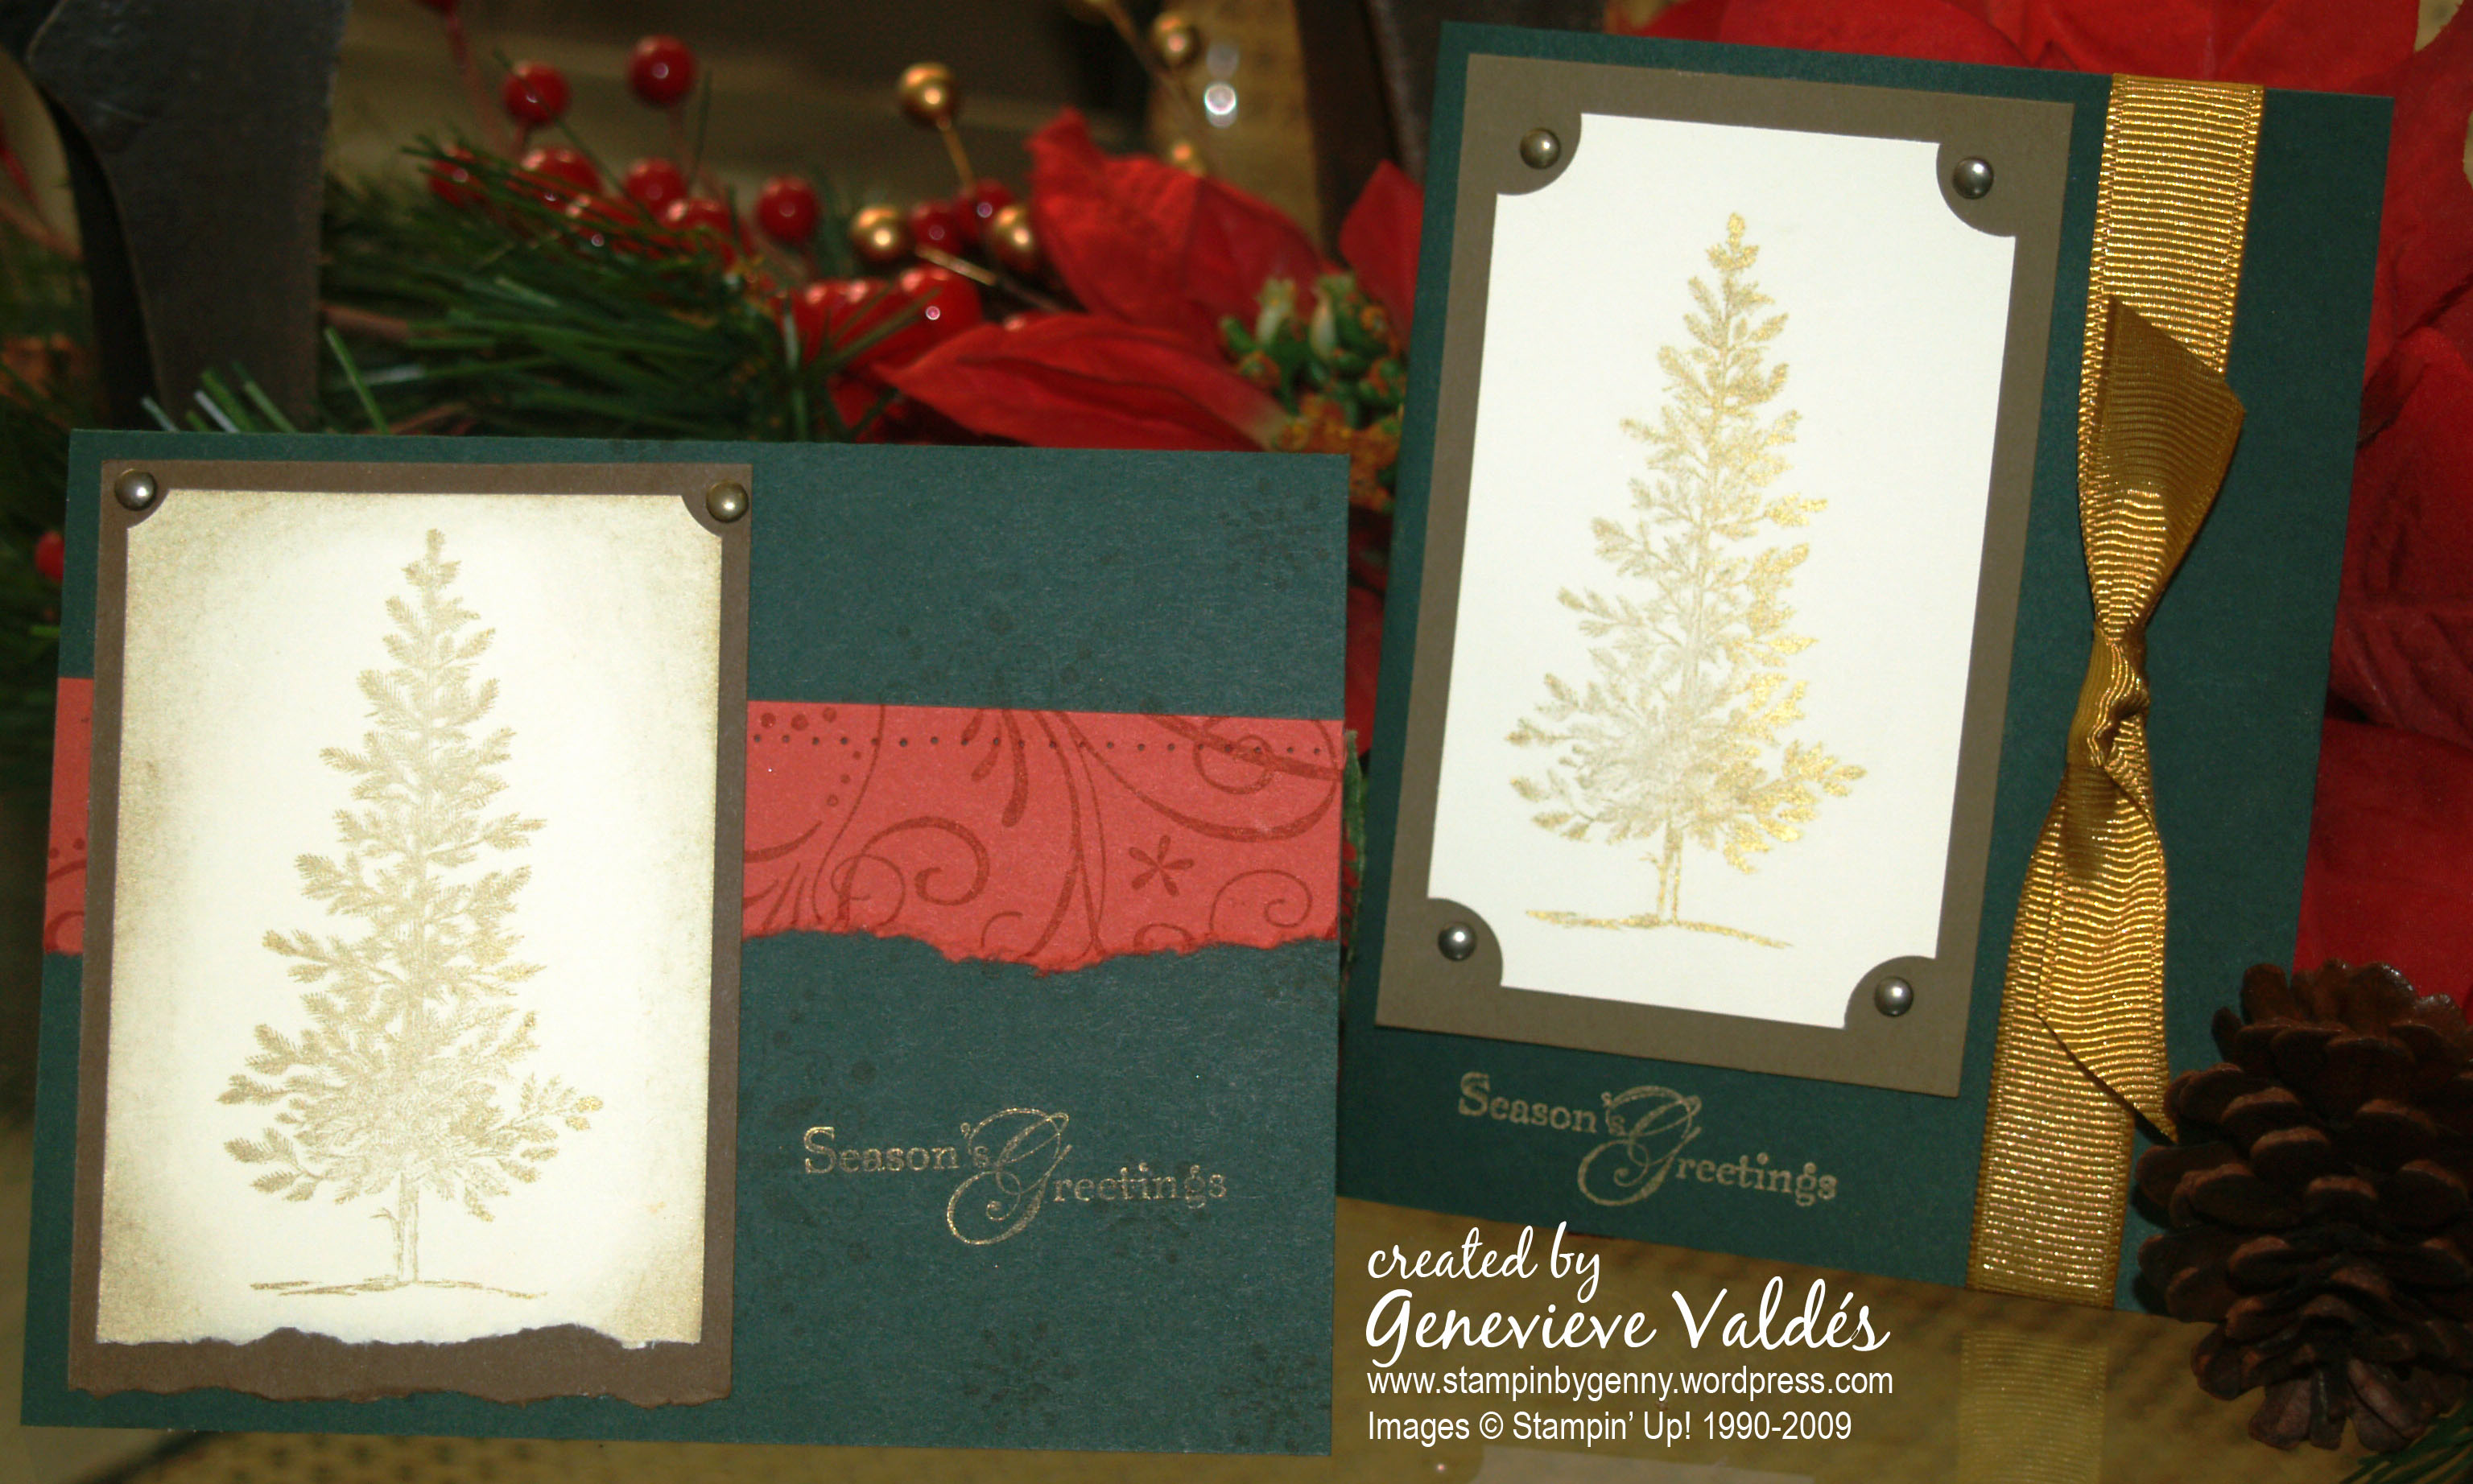
Lovely as a Tree for Christmas

I love this stamp set.  So versatile!  I decided to make some quick Christmas cards and here’s what I whipped up.  Very easy.  If you are going to buy one stamp set for Christmas, this is it.  You can use it for so many occasions.

Lovely as a Tree Christmas cards

Click for larger view

Stamp Sets: SU  Lovely as a Tree, SU Snow Swirled (sentiment), retired SU So Swirly jumbo Wheel

Paper: SU Handsome Hunter, SU Ruby Red, SU Soft Suede, SU Very Vanilla

Ink: SU Encore! Gold pad, SU Real Red classic ink

Accessories: SU vintage brads, SU slit punch to create tag edges, SU sponge, SU paper piercer, SU mat pack, non-SU ribbon

Techniques: stamping, ink distressing, edge distressing