• my photo

    Click photo for About Me

  • Enter your email address to subscribe to this blog and receive notifications of new posts by email.

    Join 1,253 other subscribers
  • Pinterest

    Follow Me on Pinterest
  • Amazing Deals

    Click image for Amazing Deals!

  • Share this blog

    Bookmark and Share
  • Archives

  • Categories

  • Recent Posts

  • Blog Stats

    • 406,809 hits
  • Meta

  • Disclaimer

    All content found at Stampin' by Genny is the sole responsibility of Genevieve Valdes, a Stampin’ Up! Independent Demonstrator. Stampin’ Up! does not endorse, edit, or otherwise contribute to this website.

BOO to you and a Howl-o-ween Treat

I received my pre-order stash from Stampin’ Up! and part of my order included the Howl-o-ween Treat Stamp Set + Boo to You Framelits Dies bundle.  Super cute images and the framelits makes it easy to die-cut them.  These cute images inspired me to make a side drawer card.  This type of card  CASE’d from Jackie Topa.  For instructions and a video click here.  I have previously made a couple of Halloween cards of this type and can be found here and here.

My side step drawer card features a skeleton and spider coming out of spooky drawers and an owl with a witch’s hat saying BOO!  I also used for embellishment the Spider Web Doilies.  I love them.  One side is black and the other is white.  I used the white side so it would contrast against the black.  I stamped the owl with silver ink.  I cut the drawers and the panel behind the owl from the new Black Glimmer paper.  I also used the Decorative Label punch on the to create the legs of the dresser.  I had so much fun creating this card!

All these products may be found in the new 2015 Holiday Catalog.

Stampin Up Halloween Howl-o-ween Treat Boo to You Framelits dies side step drawer cardAll Stampin’ Up! supplies below may be ordered from my website or email me to place your order.

All products are Stampin’ Up! unless noted.

BOO to you and a Howl-o-ween Treat card

Size:  4.25″ h x  5.00″ w

Stamp Sets:  Howl-o-ween Treat

Paper:  Cardstock:  Basic Black, Whisper White, Tangelo Twist, Black Glimmer paper

Ink:  Encore Silver ink, Momento Black

Accessories:  1/8″ silver brads, basic rhinestones, Spider Web Doilies, Boo to You Framelits dies, Decorative Label punch, Fine Tip Glue pen, dimensionals


Owl Love You Valentine’s Day Card

For this next Hand Stamped Sentiments challenge we have an inspiration challenge.  See the bird photo below and see what your inspired to create.  I created a Valentine’s day card with the Owl builder punch.

stampin up owl valentine's day cardThe punch was an easy way to create the owls on this card.  Don’t these owls look in love?  For texture I also used the Wood Grain embossing folder for the background.  Join us at Hand Stamped Sentiments for more inspiration from our talented designers.

Hand Stamped Sentiments Challenge blog

All Stampin’ Up! supplies below may be ordered from my website or email me to place your order.

All products are Stampin’ Up! unless noted.

Owl Love You Valentine’s Day Card

Size:  4.25″h x 5.50″ w

Stamp Sets:  Itty Bitty Banners

Paper:  Cardstock:  Soft Suede, Early Espresso, Whisper White, DSP; Polka Dot Parade, Red Glimmer paper

Ink:  Real Red

Accessories:  Owl builder punch, Wood Grain embossing folder, Bitty Banners Framelits

Fashionable In-color owls

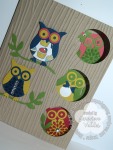
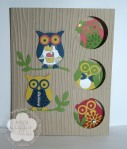
This week at Hand Stamped Sentiments we have a color challenge.  Create any project with the new Stampin’ Up! colors of Gumball Green, Midnight Muse, Summer Starfruit, Primrose Petals, Raspberry Ripple.  These colors are so cheerful together so what better way to show off these colors than on very smartly dressed owls!  I used all the colors to dress up my owls and completed the look with some bling.

This slideshow requires JavaScript.

Go to Hand Stamped Sentiments and see all the wonderful projects from our talented design team.  Get inspired and join us!

All Stampin’ Up! supplies below may be ordered from my website or email me to place your order.

All products are Stampin’ Up! unless noted.

Fashionable In-Color Owls

Approx. Size:  4.25″ W x 5.50″ H

Stamp sets:  Mixed Bunch

Paper: Card Stock:    Gumball Green, Midnight Muse, Summer Starfruit, Primrose Petals, Raspberry Ripple; DSP:  Patio Party

Ink:   Midnight Muse, Raspberry Ripple, Gumball Green

Accessories:  Big Shot, Woodgrain Textured Impressions Embossing folder, Owl Builder punch, Bird Builder punch, 1-3/8″ circle punch, Basic Rhinestones

Graduation Owl Card

It’s that time of year and I’ve been inspired to create graduation projects.  I used the Perfect Pennants die to create the focal point of my card.  I have tons of silver card stock from an invitation project.  I used it as my card base and die cut a pennant from Basic Black cardstock.  I embossed the pennant with the Stripes embossing folder and added a silver glitter top.  I cut both medallions from the Perfect Pennants die and used my Owl builder punch for my graduation owl.  Doesn’t he look smart?  He’s such a cutie too!

I printed the black and white Houndstooth check from the digital Night and Day Designer Series Papers for his little vest.  You get ten beautiful black and white background papers for $4.95.   I love creating hybrid projects with My Digital Studio.

I used the graduation cap from the digital stamp set Go Graduate Plus stamp brush set.  I printed it out and used it as a template.  The wings are 1/4 of the 1-3/4 Scallop Circle.

This card can be given to any graduate and they would love it.  Especially if there’s a gift card or check inside.  This card can be created with any high school colors.  I think I’ll send this card to my nephew.  His school colors are cardinal, black and white.

Stampin' Up! Graduation Owl card

click image to enlarge

All Stampin’ Up! supplies below may be ordered from my website or email me to place your order.

All products are Stampin’ Up! unless noted.

Graduation Owl Card

Size:  4.25″ W x 5.50″ H

Stamp sets:  Delightful Dozen, Go Graduate Plus stamp brush set

Paper: Basic Black, Whisper White, Silver glitter paper, non Stampin’ Up! silver card stock, digitally printed First Edition and Night & Day DSP

Ink:  Cherry Cobbler

Accessories:  Antique brad, Perfect Pennants die, Big Shot, Owl builder punch, Modern Label punch, Scallop Trim Border punch, Embossing Folders; Stripes and Houndstooth, retired Basic Black satin ribbon, basic rhinestones

For the Graduate

This week at Hand Stamped Sentiments we’re celebrating graduates.  Create any project – card, gift set, card holder, money holder, scrapbook page, or any 3D item with a graduation theme.  For my project I wanted to make a gift set using my Top Not die.  I used Basic Black, Silver and Whisper White card stock.  After die cutting the Basic Black Top Notes I textured them with the Texture Plates Kit #4 Distressed plate.  I die cut two more Top Notes in Silver to outline the black ones.  Cut along he perforated line on the Basic Black Top Note then adhere the silver Top Note behind the Basic Black one. The graduation cap silhouette is one I created.  See below for template.  I rolled some Whisper White paper for the diploma and tied with Basic Black Satin ribbon.  I then stamped the sentiment (Curly Cute) and created the banner.

I created the card to hold a gift card.  I used the Two-step owl punch and created the cap from silver card stock.  The diploma is a strip of Whisper White then wrapped with retired silver cording.  I then adhered the owl to circle layers with dimensionals.

I hope you’re inspired to make your own graduation gift sets.  Hop over to Hand Stamped Sentiments, be inspired, create and upload your project.

Here’s my project.  Click the images to enlarge.

OLYMPUS DIGITAL CAMERA         OLYMPUS DIGITAL CAMERA
Top Note box and gift card holder Top Note box
OLYMPUS DIGITAL CAMERA         OLYMPUS DIGITAL CAMERA
Top Note box side view Gift card holder inside Top Note box
OLYMPUS DIGITAL CAMERA         OLYMPUS DIGITAL CAMERA
Outside of gift card holder Gift card holder inside

All Stampin’ Up! supplies below may be ordered from my website or email me to place your order.

All products are Stampin’ Up! unless noted.

Top Note Box

Templates: click here for box template; click here for grad cap template

Size: 3-1/2” L x 2-1/2″ W x 1” D

Stamps: Curly Cute

Paper: Basic Black , Silver, Whisper White

Ink: Basic Black

Accessories: Very Black Satin Ribbon, Big Shot, Texture Plates Kit #4 Distressed plate

Technique: Stamping, Die Cutting, Embossing

Congrats Gift Card holder

Size: 3-1/2” W x 2-5/8”H

Stamps: Silhouette Sentiments

Paper: Basic Black , Silver, Whisper White, Digital DSP Night and Day houndstooth pattern

Ink: Basic Black

Accessories: 1-3/4” circle punch, 1-3/8” circle punch, Two-Step Owl punch, retired Slit punch, Very Black Satin Ribbon, retired silver cording, dimensionals, MIni-glue dots

Technique: Stamping, Die Cutting, Embossing

A Haunted Spooky Dresser

I’ve become addicted to creating spooky dressers.  In my previous post I created a witch in the dresser.  Today I created a haunted dresser.  I love the Wicked Cool stamp set and Two-step Owl punch.  The punch is so versatile.  You can create penguins, witch owls, tulips bats and ghosts.  For this card I created the bat and ghosts from the owl punch.  The bat tutorial comes from Bonnie Mountford’s blog. I got the idea for the ghosts from Diane Carr.     See my previous post to link to Jackie Topa’s dresser tutorial and for Patti Lee’s blog link.

I have also submitted my card for the PPA60 Halloween Inspiration challenge.  Stop by and take a look at all the fabulous Halloween cards.

Haunted dresses card

click image to enlarge

All Stampin’ Up! supplies below may be ordered from my website or email me to place your order.
All products are Stampin’ Up! unless noted.

Project info:

Haunted Dresser Card


Finished size: 4.25″ H x 5.50″ W

Stamp Sets: Wicked Cool

Paper: Cardstock:  Basic Black, Whisper White, Pumpkin Pie, Cherry Cobbler


Ink: Whisper White Craft ink, Versamark

Accessories: Curly Label Punch, Two-Step Owl Punch, Scallop Trim edge Punch, 1″ circle Punch, 1-3/8″ circle punch for bat wings, Regular hole punch for scalloping the bottom of bat wings, Clear embossing powder for spider webs, Silver embossing powder for sentiment, Silver Glimmer brads, dimensionals, Sponge daubers, Heat tool

Techniques: Paper crafting, Punch crafting

I’ve become addicted to creating spooky dressers.  In my previous post I created a witch in the dresser.  Today I created a haunted dresser.  I love the Wicked Cool stamp set and Two-step Owl punch.  The punch is so versatile.  You can create penguins, witch owls, tulips bats and ghosts.  For this card I created the bat and ghosts from the owl punch.  The bat tutorial comes from Bonnie Mountford’s blog. I got the idea for the ghosts from Diane Carr.     See my previous post a link to Jackie Topa’s dresser tutorial and for Patti Lee’s blog link.

Owls together

This week on Hand Stamped Sentiments we have a color challenge so I decided to use my new Two-Step Owl punch.  I love this punch.  It’s so much fun to use.  I created a boy and girl owl using the heart punch to make a bow tie and hair bow to differentiate between the two.  I wanted to have my two owls on a tree branch so I cut free hand a trunk with branch in Early Espresso and ran it through my Big Shot using my distressed texture plate.  I punched the vests and ran the Old Olive and embossed it with the Lattice embossing folder and embossed the yellow dress with the Perfect Polka Dots embossing folder then used the Owl punch to punch polka dots in Tangerine Tango then glued them on using Tombow Glue.  I punched the bottom of the owl again in Daffodil Yellow and Old Olive to give color to the feet.

Hand Stamped Sentiments Color Challenge #32

Two Owls card

click to enlarge


All Stampin’ Up! supplies below may be ordered from my website or email me to place your order.
All products are Stampin’ Up! unless noted.

Project info:

Owls Together card

Finished size: 4.25″ H x 5.50″ W

Stamp Sets: In a Word

Paper: Cardstock:  Crumb Cake, Early Espresso, Daffodil Delight, Old Olive, Tangerine Tango

Ink: Early Espresso

Accessories: Two Step Bird punch, Two Step Owl Punch, Large Oval punch, Big Shot, Distressed Texture plate, Lattice embossing folder, Perfect Polka Dots embossing folder

Techniques: Paper crafting

Owl be your friend

This week at Hand Stamped Sentiments we have another sketch challenge from  Stampin’ Up!’s SUCCESS magazine.  We’d love to see your interpretation of the sketch so hop on over to HSS and show us your creation.

For this project I decided to do a digital card using My Digital Studio.  I have just purchased the Two Step Owl Punch – Digital Download, Price: $0.95 and I wanted to use it for this card.  I love this punch and so fun to use.

Since this is a girl owl I decided to use the Cherry Cobbler Wallpaper DSP on the vest and Very Vanilla button latte.  So cute!  If you own MDS don’t forget to update your software with the new colors.  Click here to update your software.

The background is Textured Baja Breeze.  Love the Textured papers!  The Soft Suede distressed background, included with the purchase of MDS, is from the Distressed DSP and the frame is from the Sweet Pea DSP collection.  The Textured and Sweet Pea DSP collections are available as add-ons.  If you don’t have these consider purchasing them.  The price is right and they’ll never retire.  How cool is that!  You can purchase any of the digital downloads even if you do not own My Digital Studio software.  You can use the images with any graphics program that allows you to import images into your document.  The other great thing about purchasing digital downloads is they are available to use instantly as soon as you pay.  I love that…instant gratification.

Digital Owl card

click image to enlarge

Digital Owl Punch

Two Step Owl Punch - Digital Download - #122153 - Price: $0.95

All Stampin’ Up! supplies below may be ordered from my website or email me to place your order.
All products are Stampin’ Up! unless noted.

Project info:

You’ve got a friend in me Owl digital card

Finished card size: 5.25″ w x 4.25″ h

Digital Stamp Sets: Holiday Blitz (apple), Cheep Talk (branch and sentiment)

Digital Paper: Textured Baja Breeze,  My Sweet Pea pattern 47, Distressed Soft Suede, Cherry Cobbler Wallpaper

Ink: HP 6400 inkjet printer

Digital Accessories: Two-Step Owl punch download, Very Vanilla button Latte,

Techniques: Digital Crafting

So much for the cool weather

No cool weather anymore.  It’s back to being summer.  I was hoping it would last so it could offer inspiration for my fall crafts.  As I was trying to think fall in 90 degree weather I decided to do an owl theme card.  I love owls.  I whipped up this card yesterday, 5-1/2″ x 4-1/4″, for my friend who needs to take it easy.  My hubby and I were invited to her house for dinner and I wanted to give her this card and remind her to relax.  She made a fabulous dinner.

Please email me if you ever have any questions about any of the projects featured on my blog.

Stamp Sets:  sentiment ‘find joy in the little things’ from retired Polka Dots & Paisley SU stamp set, Non SU owl stamp

Paper:  In Colors –  Soft Suede, regular card stock Vanilla, Non SU paper for background

Ink:  Classic Inks Soft Suede, Rich Razzleberry, Crushed Curry, Melon Mambo

Accessories:  Oval punch, vintage brads, Big Shot and Top Note Bigz Die, craft scissors, non-SU small adhesive jewels

Techniques:  stamping, die cutting

P9275318