

• my photo

    Click photo for About Me

  • Enter your email address to subscribe to this blog and receive notifications of new posts by email.

    Join 1,190 other subscribers
  • Pinterest

    Follow Me on Pinterest
  • Amazing Deals

    Click image for Amazing Deals!

  • Share this blog

    Bookmark and Share
  • Archives

  • Categories

  • Recent Posts

  • Blog Stats

    • 466,974 hits
  • Meta

  • Disclaimer

    All content found at Stampin' by Genny is the sole responsibility of Genevieve Valdes, a Stampin’ Up! Independent Demonstrator. Stampin’ Up! does not endorse, edit, or otherwise contribute to this website.

Over the Top Pewter Gilded Frame Christmas Card

This week’s challenge at Hand Stamped Sentiments is to create an over the top Christmas card.  Inspired by a project I saw in the November Stampin’ SUCCESS magazine I created this over the top pewter gilded frame Christmas Card.
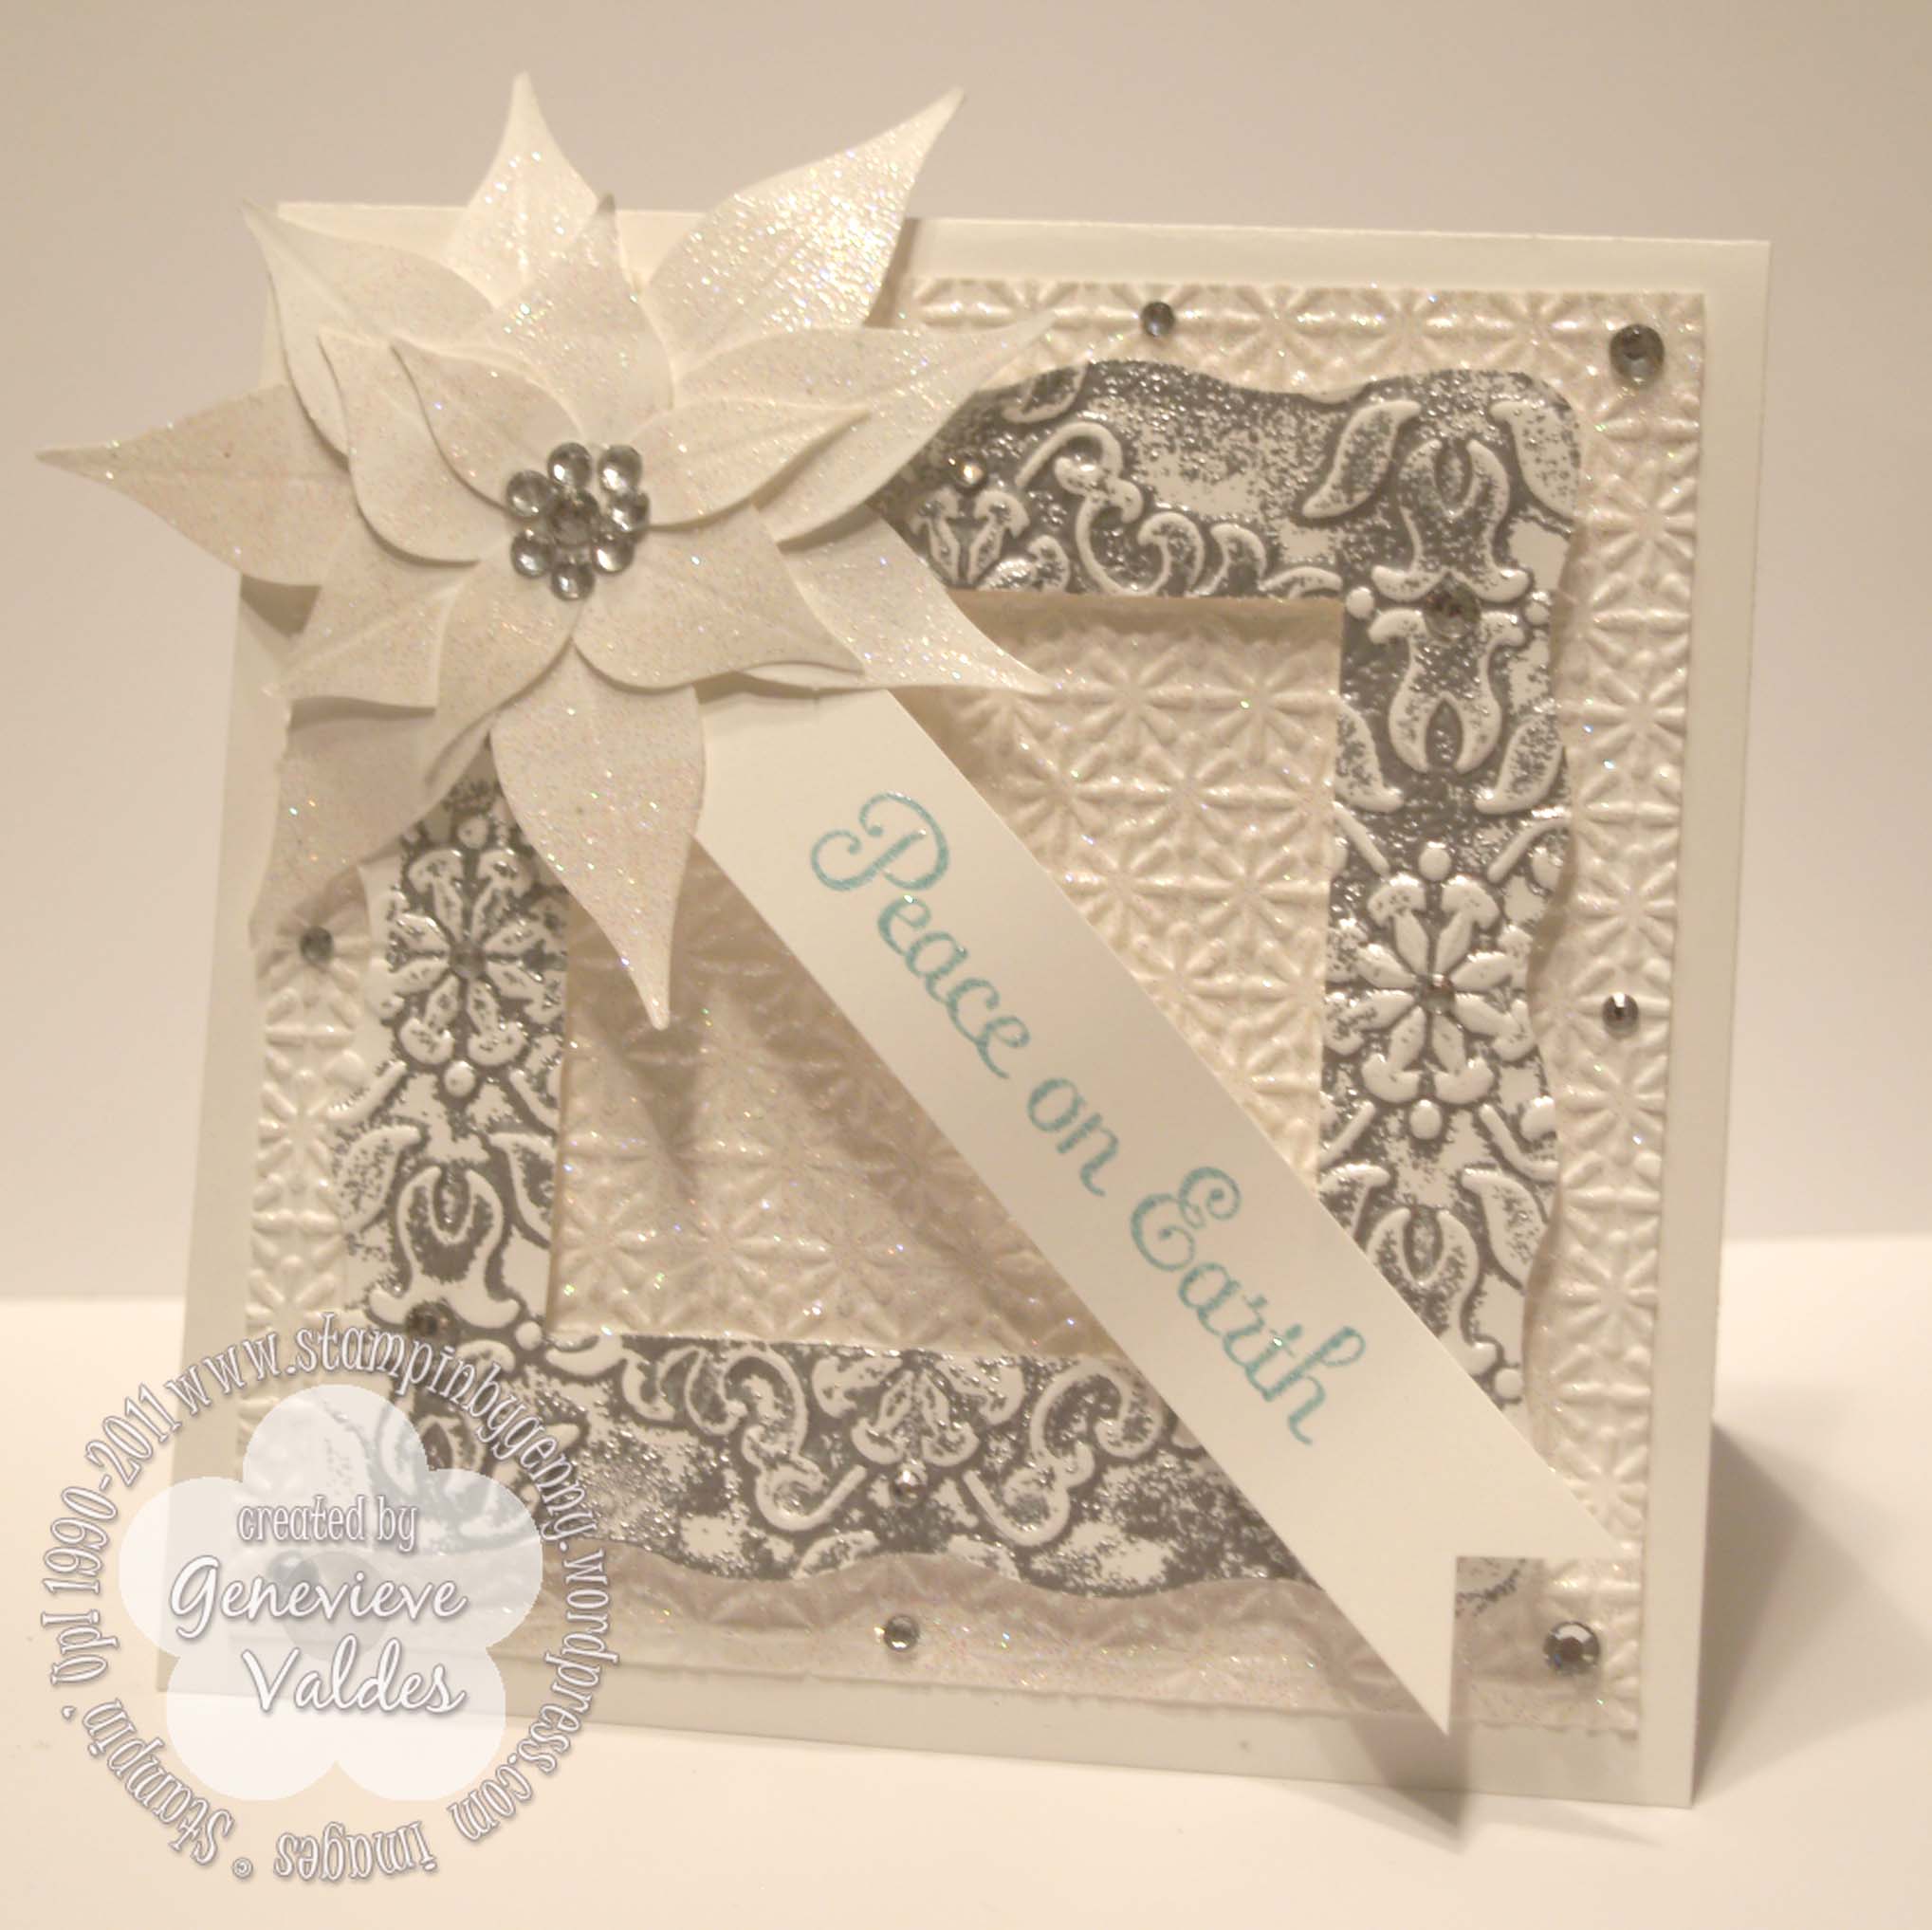
Gilded Frame Over the Top Christmas Card

Click image to enlarge

The embossed snowflake background is heat embossed with Iridescent Embossing Powder.

The frame is die cut using Sizzix Frame die.  I used the Vintage Wallpaper embossing folder and inked up the inside of the embossing folder with Versamark then ran it through the Big Shot.  I then heat embossed it with Pewter Stampin’ Emboss Powder.  I love how the frame looks antiqued!

I used the Blossom Petals Builder punch to make the white poinsettia.  I used the three narrow petals to create the layers then used the Simply Scored to score the petals then adhered them to a 1″ circle with glue dots.  For some extra sparkle I applied Versamark and heat embossed with Iridescent Embossing Powder. For more shine I used  basic rhinestones for the center of the poinsettia.  The Blossom Petals Builder punch made it so easy!  The sentiment is stamped and heat embossed with Iridescent Embossing Powder on a 3/4″ strip of Whisper White card stock.

More basic rhinestones were added to the frame and background to send this card over the top with sparkle.

HSS Over the Top Christmas Card Challenge

I hope you’re inspired to join us this week.  For more over the top inspiration go to Hand Stamped Sentiments and see what our design team has created for this week.

All Stampin’ Up! supplies below may be ordered from my website or email me to place your order.

All products are Stampin’ Up! unless noted.

Over the Top Pewter Gilded Frame Christmas Card

Size:  5.00”  H x 5.00” W

Stamp sets: Four the Holidays

Paper: Card Stock:  Whisper White

Ink: Baja Breeze

Accessories: Big Shot, Vintage Wallpaper Textured Embossing Folder, Snow Burst Textured Embossing Folder, Frame Sizzix Die, Blossom Petals Builder Punch, 1-1/4″ square punch, Basic Rhinestones, Versamrk, Pewter Stampin’ Embossing Powder

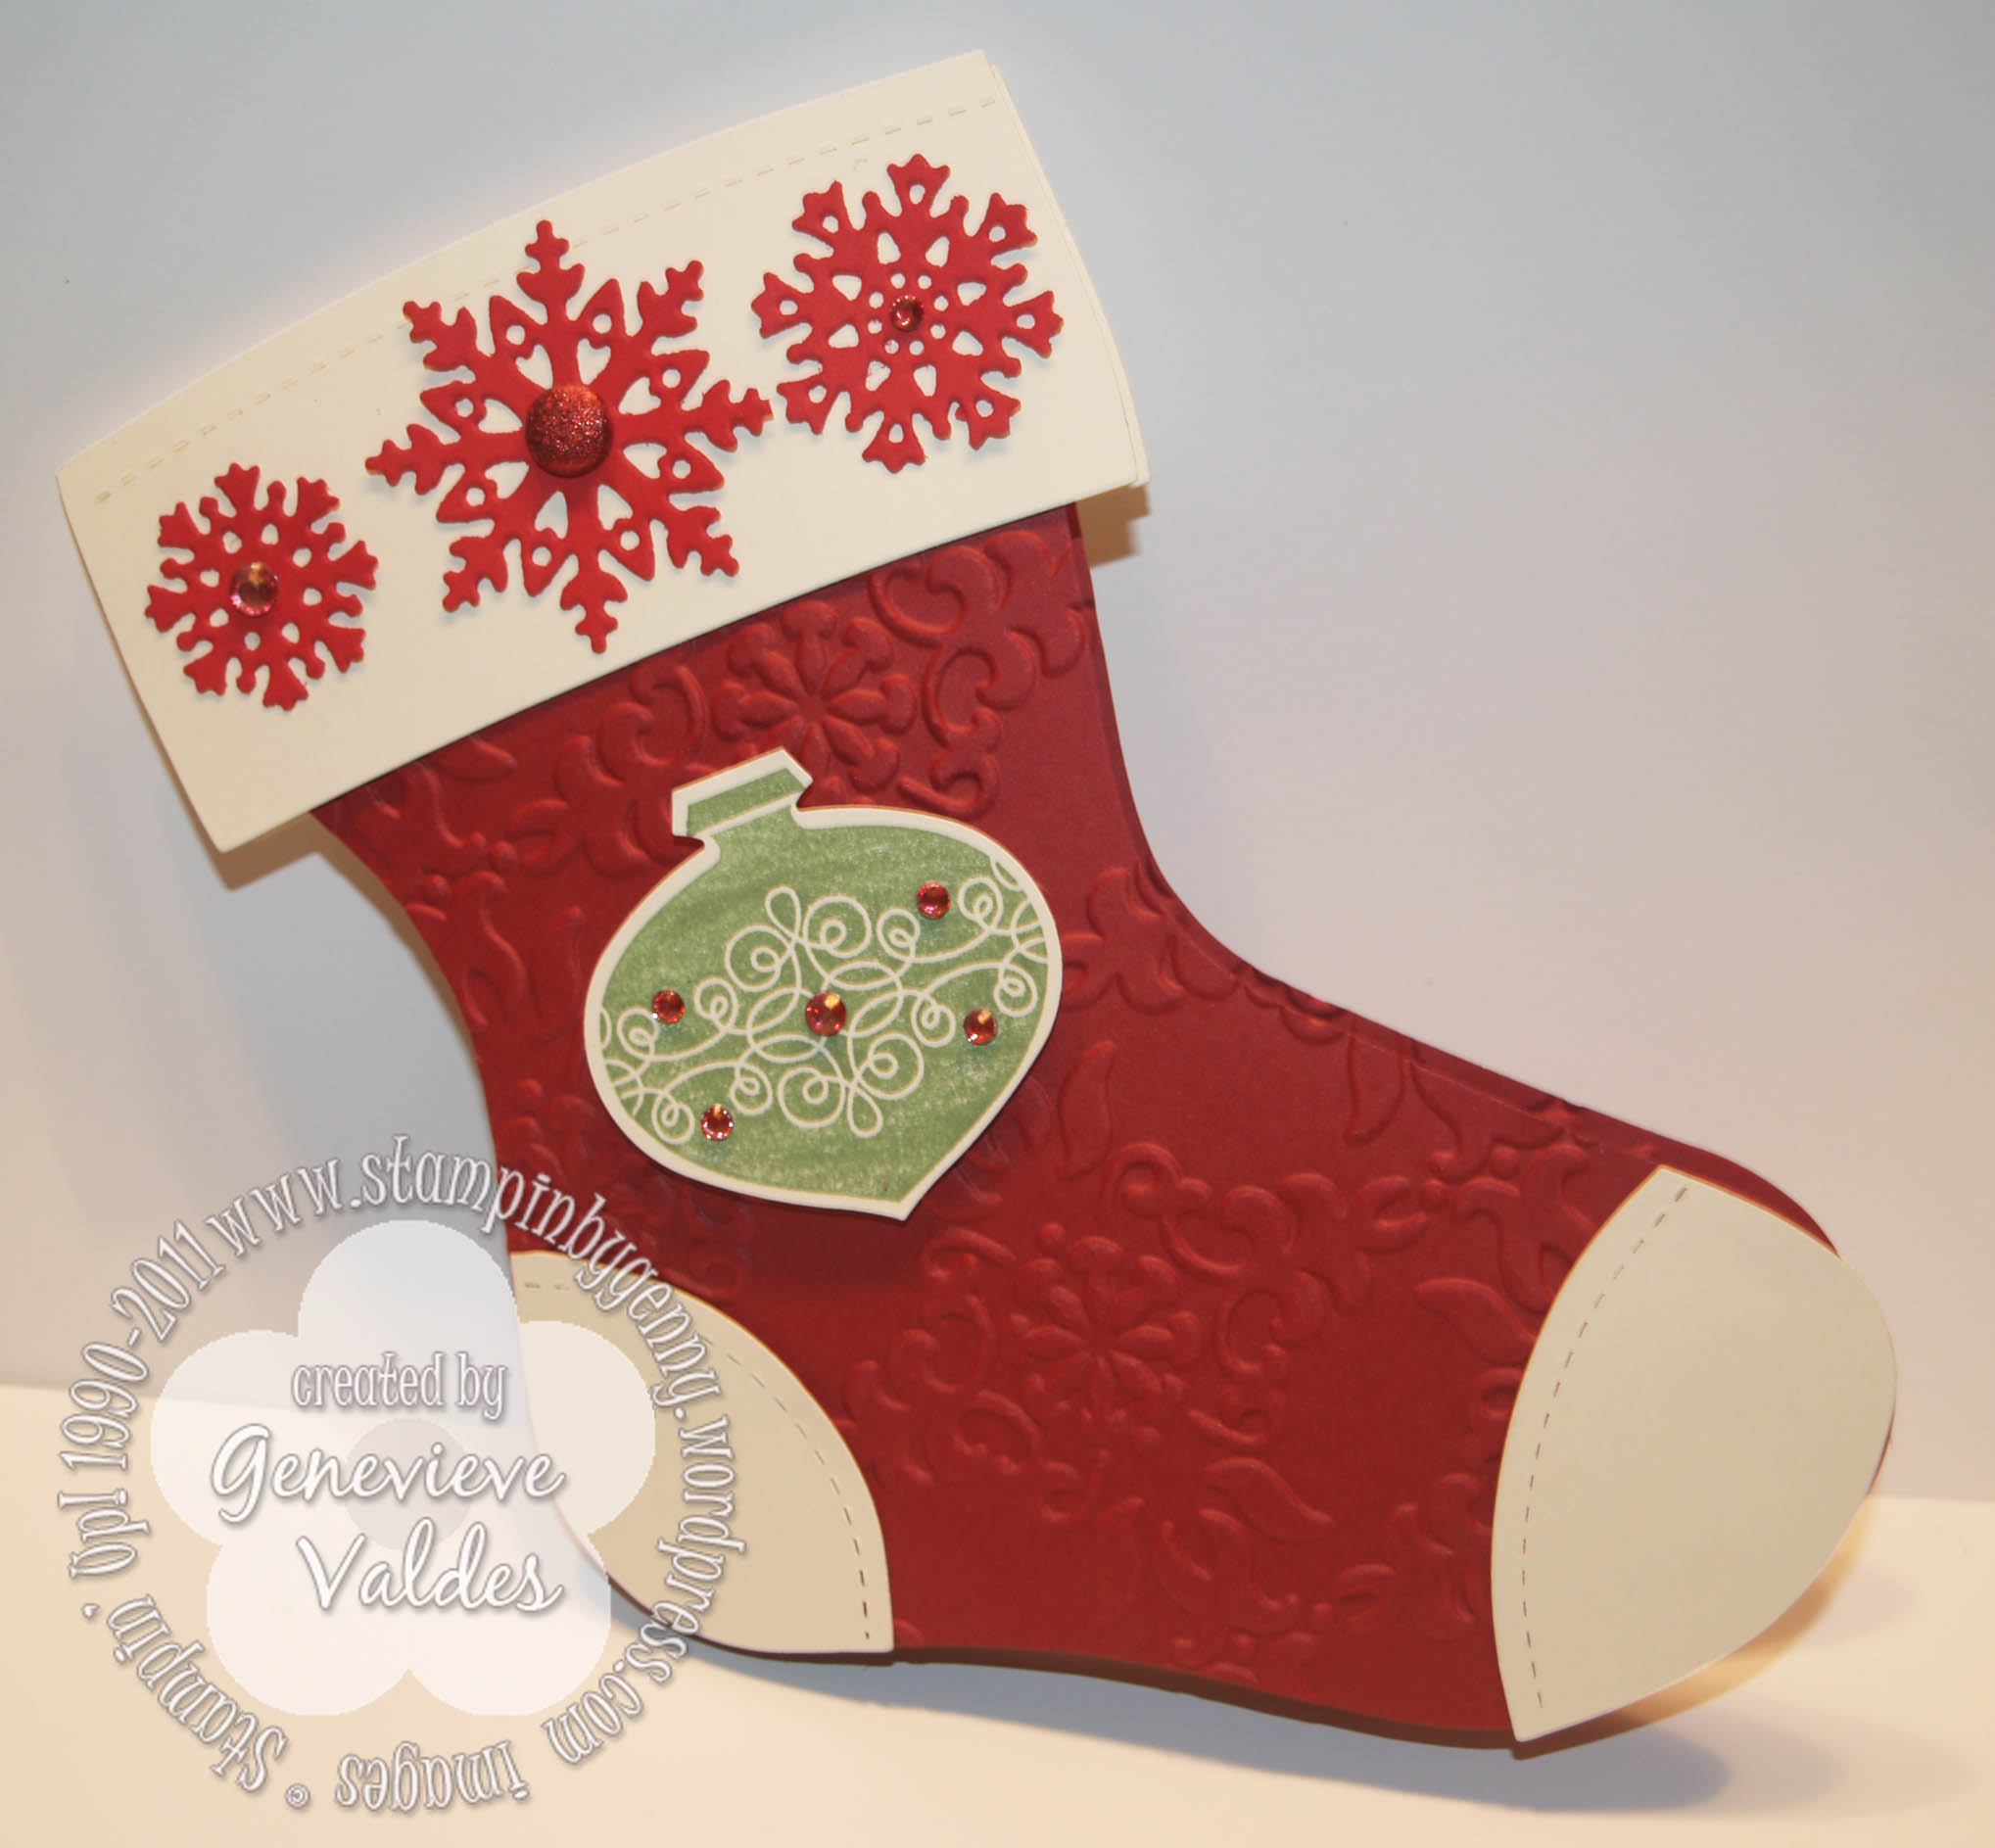
Christmas Stocking Greeting

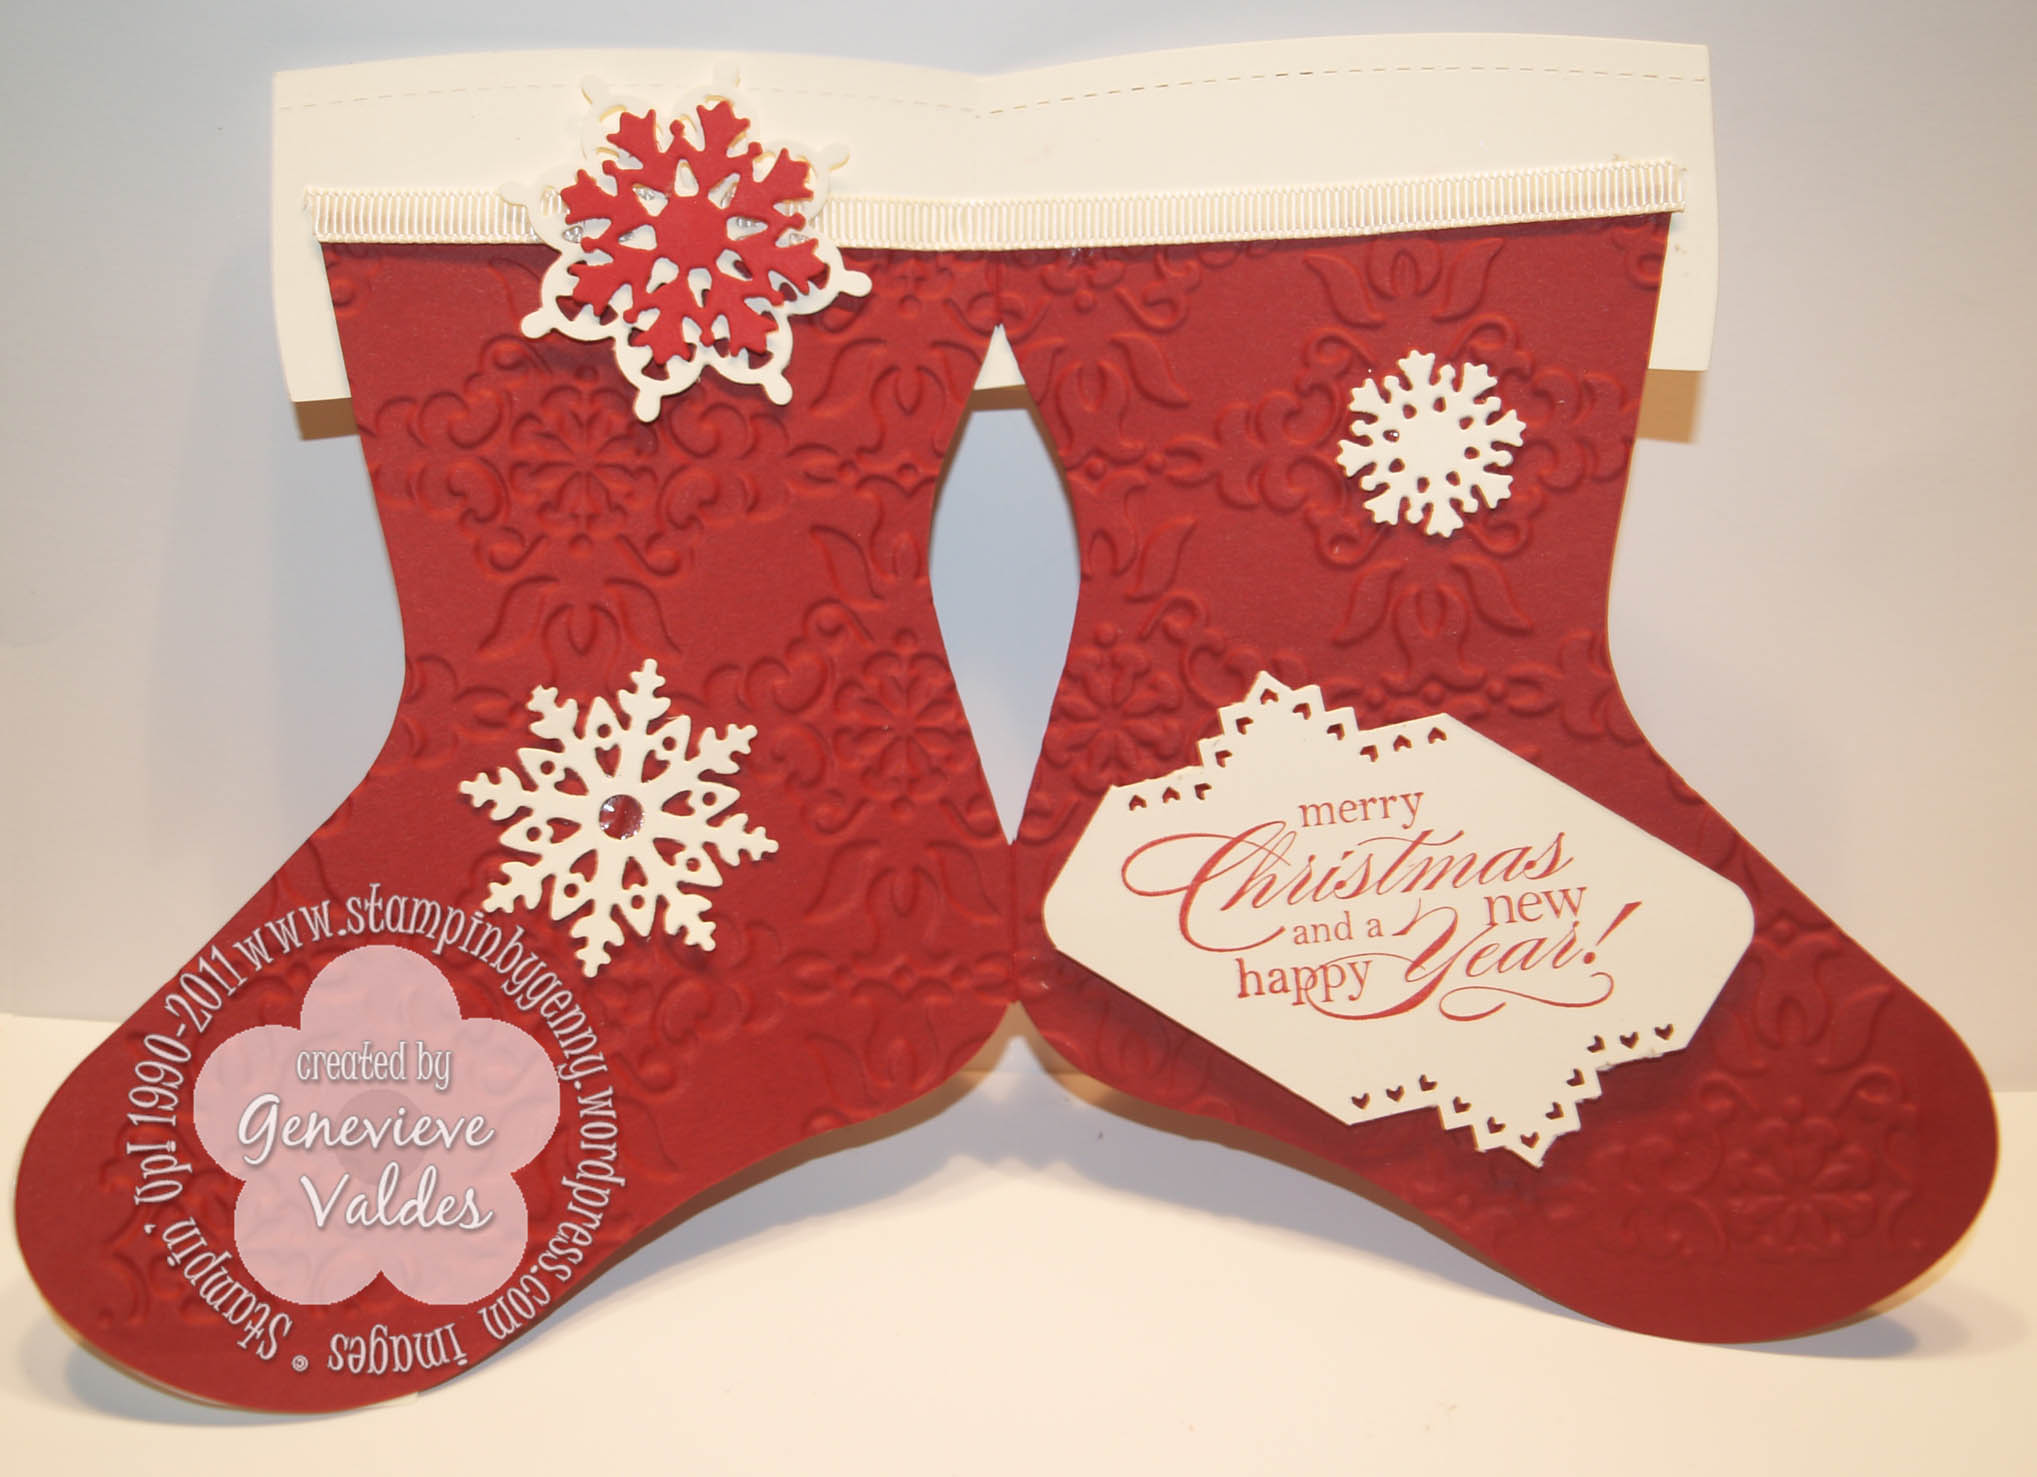
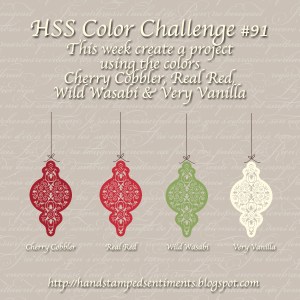
This week at Hand Stamped Sentiments we have a color challenge – Cherry Cobbler, Real Red, Wasabi Green and Very Vanilla.  I immediately thought Christmas and I can use my new Stocking die!  I was so excited because I knew a stocking shaped card would be so cute.  The stocking is Cherry Cobbler and the snowflakes are Real Red.  I wasn’t sure how these two colors would look like together but I after I assembled my card the different reds look fabulous!  I textured the stocking with the Vintage Wallpaper folder.  Using the stocking die made this card fast and easy!

Click image to enlarge

I used more Real Red and Very Vanilla snowflakes on the inside and the sentiment is from Delightful Dozen.  I used the Pinking Hearts Corner punch on the corners of the sentiment layer.

Click image to enlarge

I hope your inspired to join us at HSS.  We’d love to see your projects.

All Stampin’ Up! supplies below may be ordered from my website or email me to place your order.

All products are Stampin’ Up! unless noted.

Stocking Shape Christmas Card

Size:  6.25”  H x 5.00” W

Stamp sets: Delightful Dozen, Tags til Christmas

Paper: Card Stock:  Cherry Cobbler, Real Red, Very Vanilla

Ink: Wild Wasabi, Real Red

Accessories: Big Shot, Vintage Wallpaper Embossing Folder, Holiday Stocking Bigz L Die, Ornament Punch, Northern Frost Sizzlits Strip, Basic Rhinestones (colored with red Sharpie), Real Red Glitter Brad, Pinking Hearts Corner Punch

Gratitude Paper Pumpkin

This week at Hand Stamped Sentiments we have an inspiration challenge.  I’ve been wanting to make these 3D paper strip pumpkins and today I did!  It was so easy!  These would make beautiful decorations for your Thanksgiving table.  Another option would be instead of the stamped sentiment you could do place cards.

I cut 14 strips  1 inch by 6 inch, of DSP then sponged the edges with Soft Suede.  I used my Crop-a-dile to make 1/8″ holes on each end of the strips.  If you use the Crop-a-dile you can make a hole all at one time.  What a time saver!  I then used two brads to make the pumpkin.  I die cut the leaves using the Leaves #2 die then I embossed them with the Vintage Wallpaper embossing folder.  I also used Gold Lame Smooch Pearlized Accent ink on the leaves and on the tendrils.  To add more dimension to the leaves I also sponged them with with Soft Suede.  The sentiment is from Day of Gratitude and I used the Decorative Label punch to die cut and frame it.

click image to enlarge

I hope you’re inspired!  We’d love to see your project.

All Stampin’ Up! supplies below may be ordered from my website or email me to place your order.

All products are Stampin’ Up! unless noted.

3D Pumpkin

Size:  3.00”  H x 5.00” W

Stamp sets: Day of Gratitude

Paper: Card Stock:  Early Espresso, DSP:  Paisley Petals

Ink: Soft Suede, Early Espress, Gold Lame Smooch Pearlized Accent ink

Accessories: Big Shot, Vintage Wallpaper Embossing Folder, Leaves #2 die, Decorative Label Punch, Old Olive Brights Designer Buttons, Hemp Twine

It’s not too early for Christmas

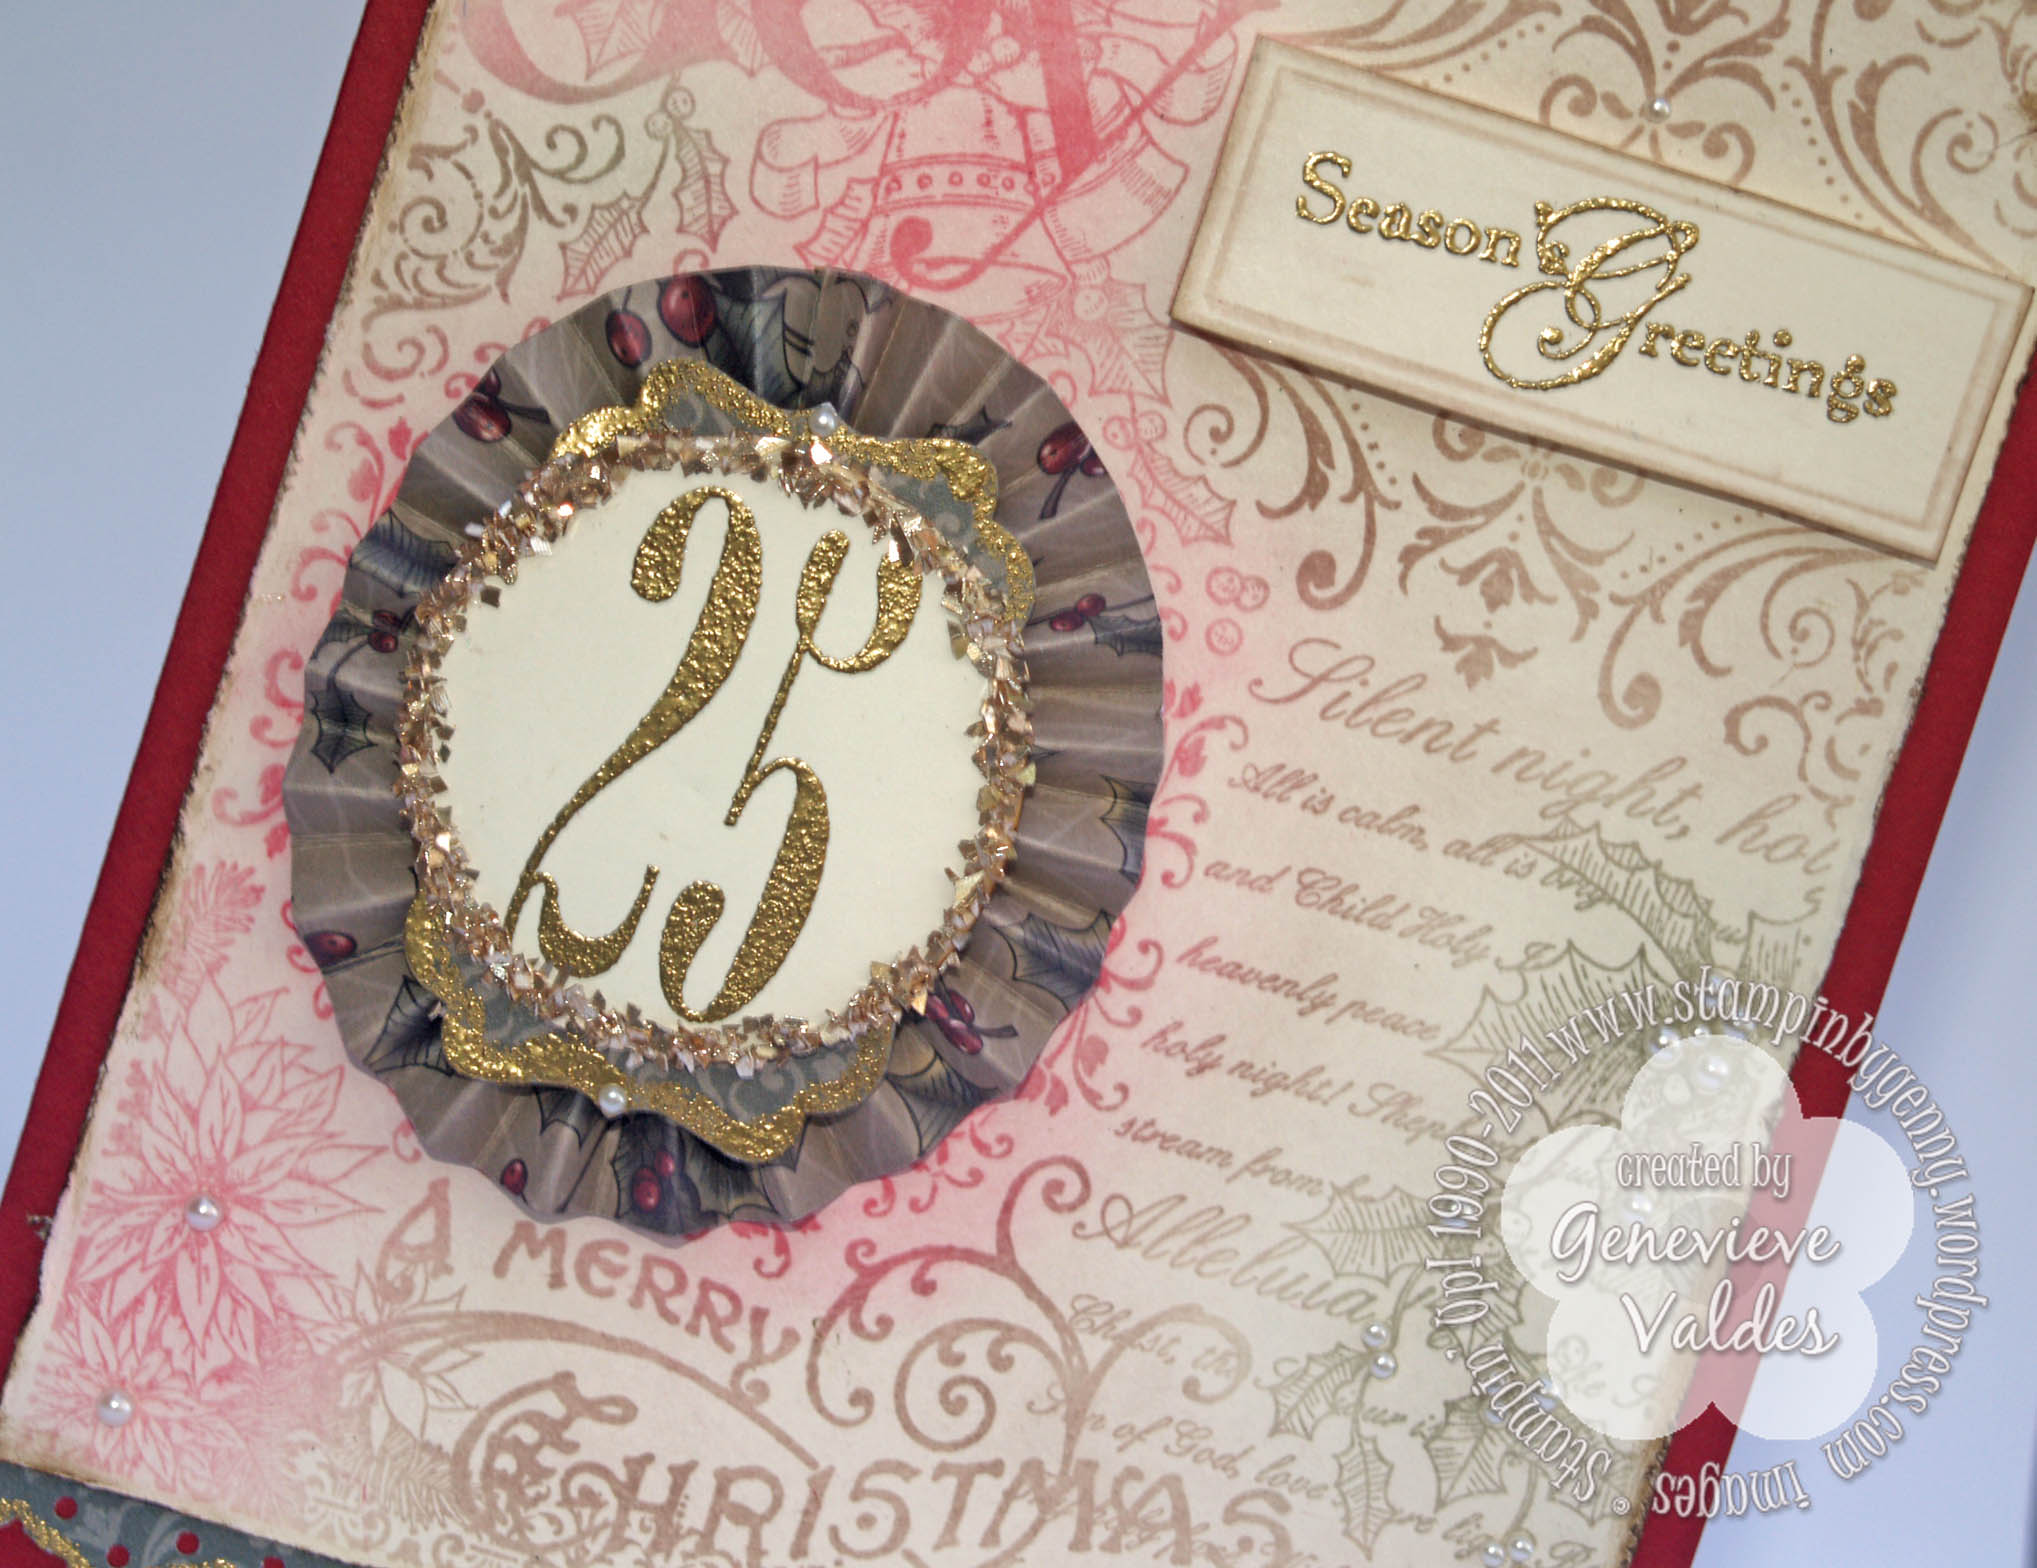
This week at Hand Stamped Sentiments we have a technique challenge.  You have your choice of making a project with a shaving cream, crayon or pastel technique  I chose to do the poppin’ pastel technique.  This is a very easy technique.  You stamp your image then use a sponge dauber with pastels and color away.  So easy!

For my card this week I chose to do a Christmas card with the Christmas Collage background stamp.  I inked up the stamp with Versamark then used Real Red, Always Artichoke and Chocolate Chip pastels to add color.  I distressed the edges then sponged with Soft Suede.

click image to enlarge

I then stamped again just the 25 with Versamark and heat embossed with gold.  I punched it out with the 1-1/2″ circle punch then glittered the edges with Champagne glass glitter.  I had some leftover scraps of retired Deck the Halls dsp and punched with my Decorative Label punch.  I used the Versamark pen to outline the edges then heat embossed with gold.  I made a lollie from another scrap of 1″ x 12″ scrap of retired Deck the Halls DSP.  I then assembled my 25 then adhered to my card.  To frame the image I used the Eyelet border punch and punched some scraps from retired Deck the halls and heat embossed the edges with gold.  Such a pretty detail.

The sentiment Seasons Greeting is from Snow Swirled and I also heat embossed with gold.

click image to enlarge

Hop on over to HHS and see more inspiration for this challenge from our talented Design Team.

All Stampin’ Up! supplies below may be ordered from my website or email me to place your order.

All products are Stampin’ Up! unless noted.

Christmas Collage Card

Size:  6.5o”  H x 5.00” W

Stamp sets: Christmas Collage, Snow Swirled

Paper: Cherry Cobbler Card base, Very Vanilla, retired Deck the Halls DSP

Ink: Versamark pad and pen, Stampin’ Pastels – Real Red, Always Artichoke, Chocolate Chip

Accessories: Basic Pearls, Champagne Glass Glitter, Gold Embossing Powder, Decorative Label Punch, 1-1/2″ inch circle punch, Eyelet Border Punch, Heat tool, Simply Scored

Think Pink ! October is Breast Cancer Awareness Month

This week at Hand Stamped Sentiments the challenge is to Think Pink!  Create any project with pink.  October is Breast Cancer Awareness month and HSS would like to remind you that early detection is the key.

For my card this week I was inspired by having a friend to encourage and remind you to do your monthly exams and to schedule a mammogram.  So my card this week features two owl friends or in this case bosom friends.

click image to enlarge

I hope you participate in this challenge.  Hop on over to HSS and see more inspiration from our design team.  Think Pink!

All Stampin’ Up! supplies below may be ordered from my website or email me to place your order.

All products are Stampin’ Up! unless noted.

Bosom Friends Owl Card

Size:  4.50” H x 4.50” W

Stamp sets: With all my Heart, Tiny Tags

Paper: Whisper White, Melon Mambo, Regal Rose, DSP; Pretty in Pink and Old Olive printed from My Digital Studio

Ink: Melon Mambo

Accessories: Big Shot, Scallop Circle die, Circle Scissor Plus, Paper Piecer Tool, Mat Pack, Jewelry Tag Punch, Owl Builder Punch, Bird Builder Punch, , Itty Bitty Shapes Punch Pack, Scallop Oval Punch, Modern Label Punch, Butterfly Punch, Basic Pearls, Whisper White Satin Ribbon

If the Shoe Fits…Wear it for Halloween

This week’s challenge at Hand Stamped Sentiments is Halloween!  I love this holiday and this year Stampin’ Up! has some very fun and spooky stamp sets.  Check them out in the holiday mini.

Since I love shaped cards I made a template of a witch’s boot.  I based it on the boot in the Spooky Bingo Bits  stamp set.  See card recipe below for template. I cut the boot out then embossed it with the Spider Web Embossing Folder then Smooched it.  I laced it up with Lucky Limeade ribbon and embellished with a fan fold.  I then  stamped the head of the witch in the Howl-O-Ween Creeps set on watercolor paper, with a blender pen I colored it with Pumpkin Pie and Lucky Limeade classic ink then used the Dazzling Details to add some sparkle.  Finished off the boot with Black Satin ribbon, taffeta orange ribbon and Rich Razzleberry button.

click image to enlarge

Click image to enlarge - inside of card

Join us at Hand Stamped Sentiments and take the challenge.  We’d love to see your projects.

All Stampin’ Up! supplies below may be ordered from my website or email me to place your order.

All products are Stampin’ Up! unless noted.

Witch Boot Card

Template:  Click here for template.

Size:  4.25” H x 5.50” W

Stamp sets: Howl-O-Ween Creeps, Tiny Tags, Wicked Cool

Paper: Basic Black, Digital DSP Frightful Sight Spiders, Watercolor paper, Whisper White

Ink: Whisper White Craft Ink, Pumpkin Pie, Lucky Limeade, Rich Razzleberry

Accessories: Black Satin Ribbon, Pumpkin Pie Taffetta ribbon, Rick Razzleberry button, Jewelry Punch, Scallop edge punch, 1-3/8″ Circle Punch, 2-3/8″ Scallop Circle Punch, Scallop Trim Border Punch, Dazzling Details, Iridescent Ice Embossing Powder, Blender Pen, Dazzling Details, Silver Foil Smooch Crop-a-dile

A Charming Thank You

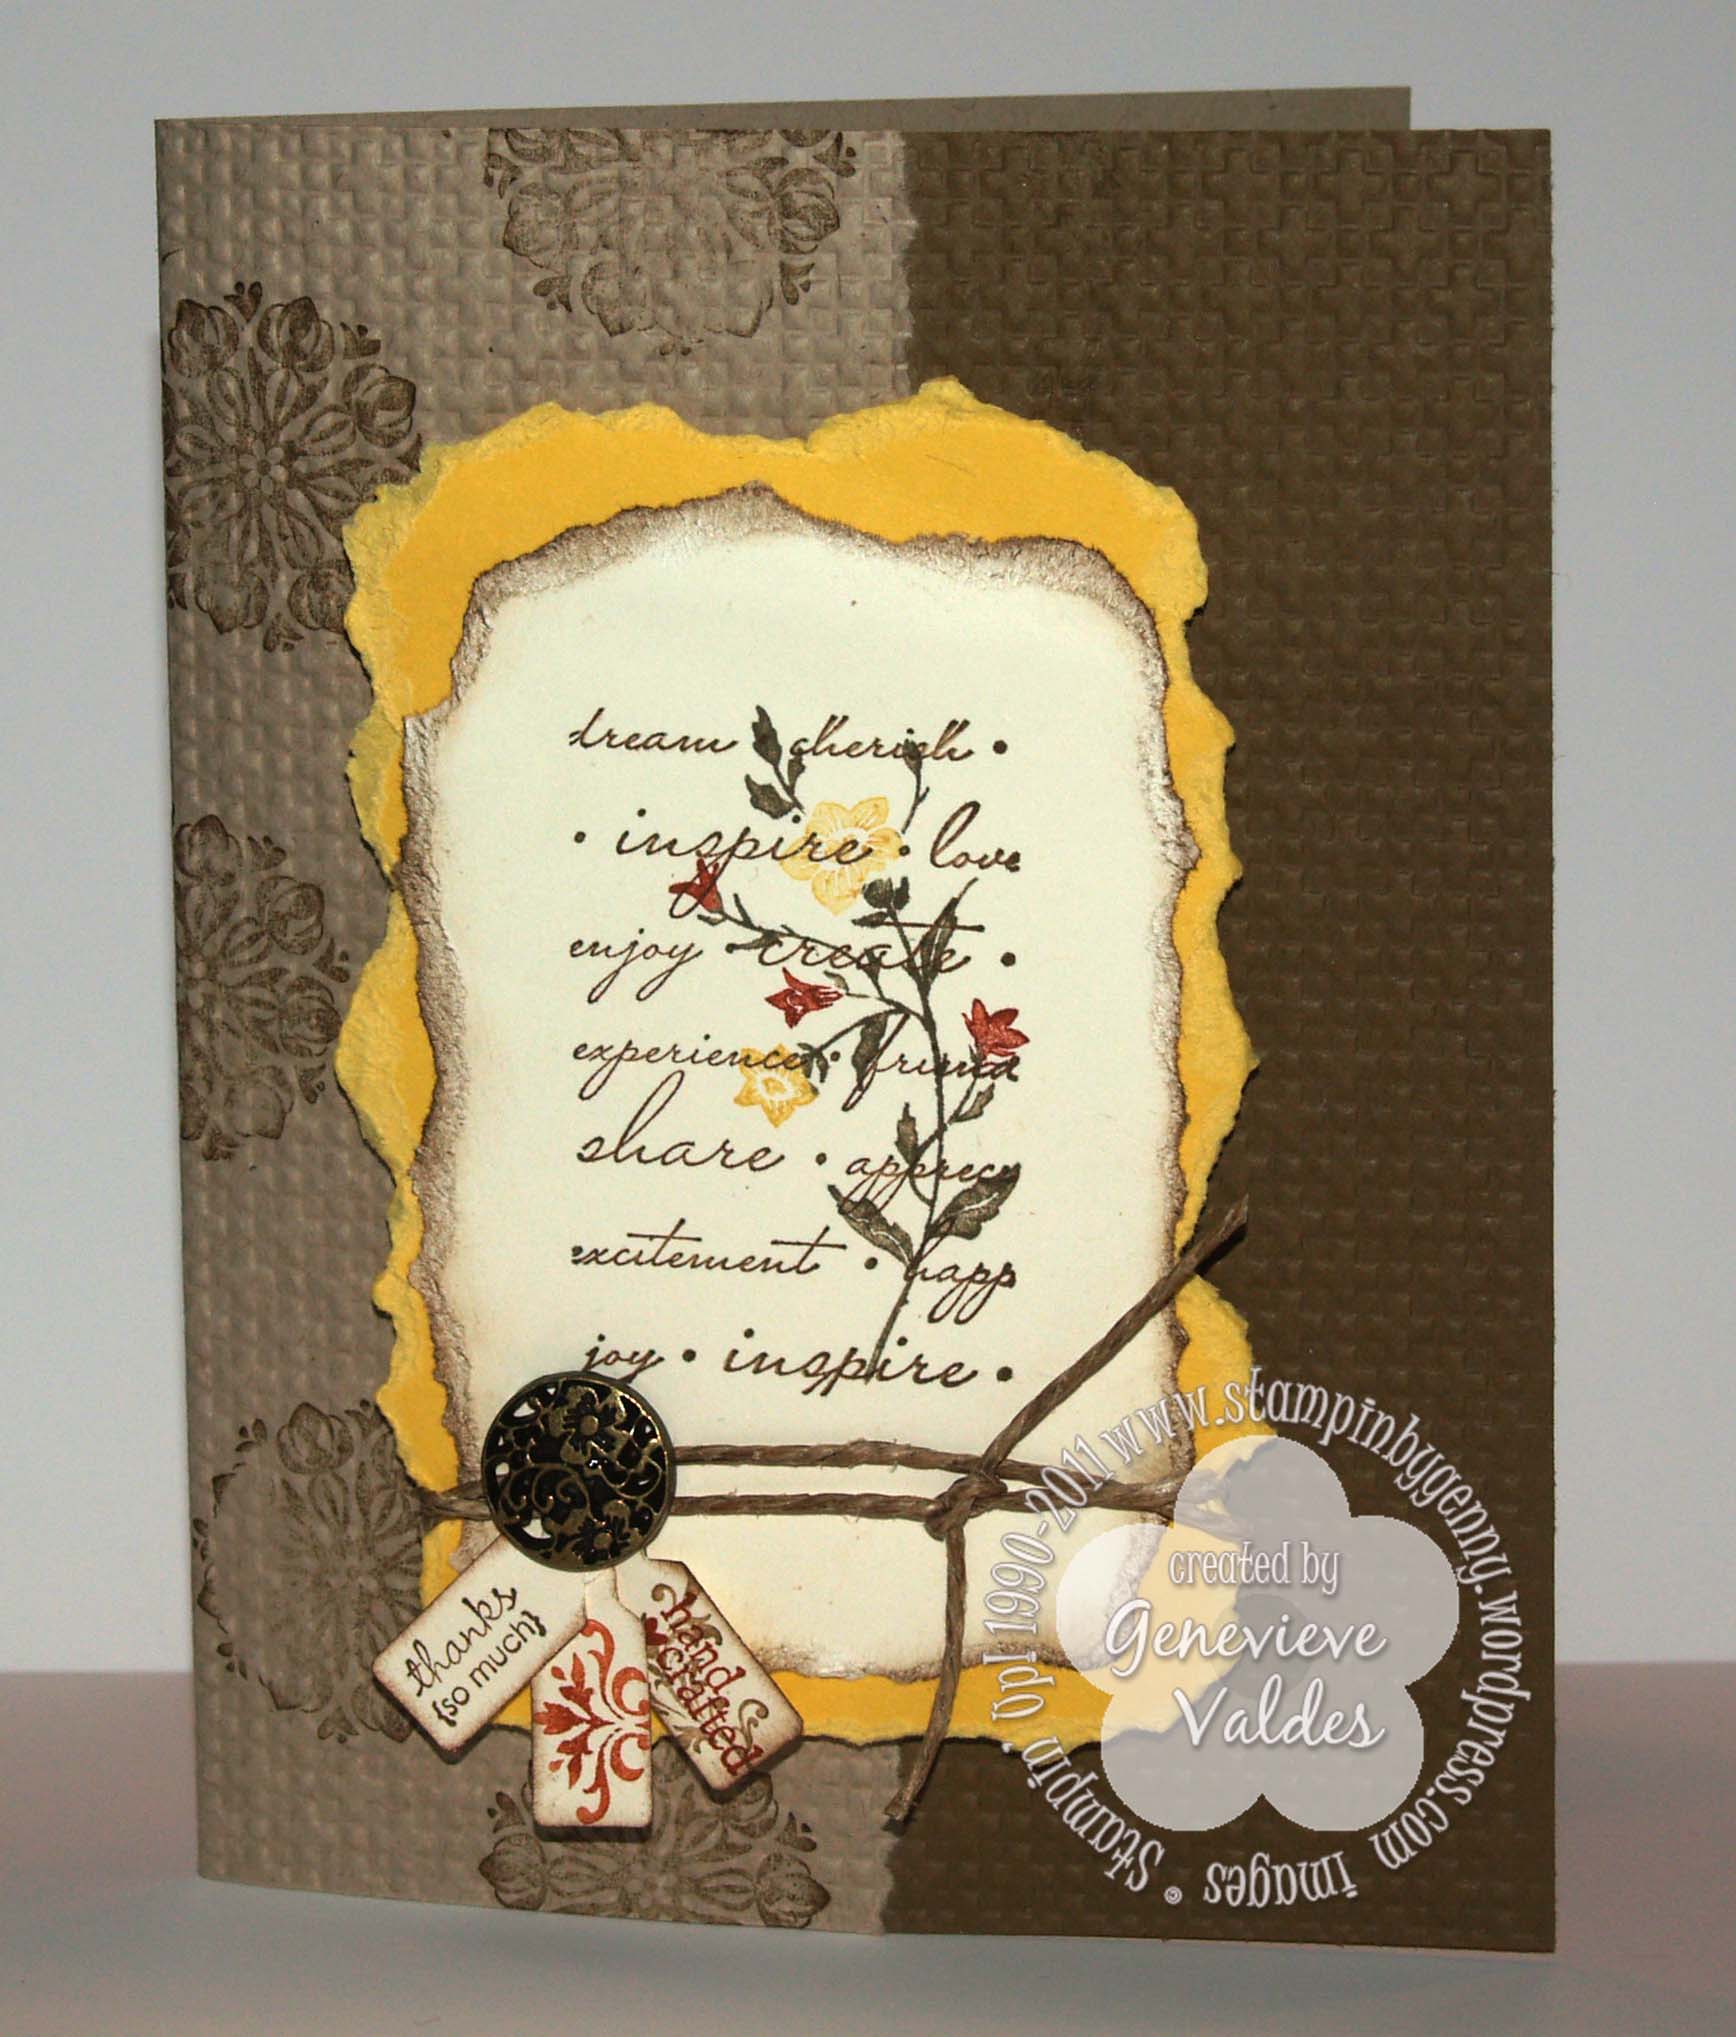
This week at Hand Stamped Sentiments we want to be impressed.  Create any project with dry or heat embossing.  For my project I was inspired by a gift from a dear friend.  She brought it over this evening and I am so fortunate to have such a wonderful friend.  I had a different card planned for this week’s challenge but I’ll show you that card for next week’s challenge.

This card I CASED from my upline Tara Bazata.  I basically used the same layout but changed up a few detail.  I used the Charming stamp set which hasn’t seen ink for a few months.  I stamped the medallion and  embossed the background and used torn edges and sponging to the layers to add more texture.

Charming Thank You card

click image to enlarge

Hop on over to Hand Stamped Sentiments and see all the wonderful inspiration from our design team.  We’re prepared to be impressed by your projects.

All Stampin’ Up! supplies below may be ordered from my website or email me to place your order.

All products are Stampin’ Up! unless noted.

A Charming Thank You

Size:  4.25” H x 5.50” W

Stamp sets: Charming, Tiny Tags

Paper: Card base:  Crumb Cake, Soft Suede, Daffodil Delight, Very Vanilla

Ink: Cajun Craze, Soft Suede; Flower and stems were inked with Cajun Craze, Daffodil Delight and Soft Suede markers

Accessories: Hemp Twine, Antique brads, Jewelry Tag punch, Sponge Daubers, Dimensionals, Big Shot, Square Lattice Embossing Folder

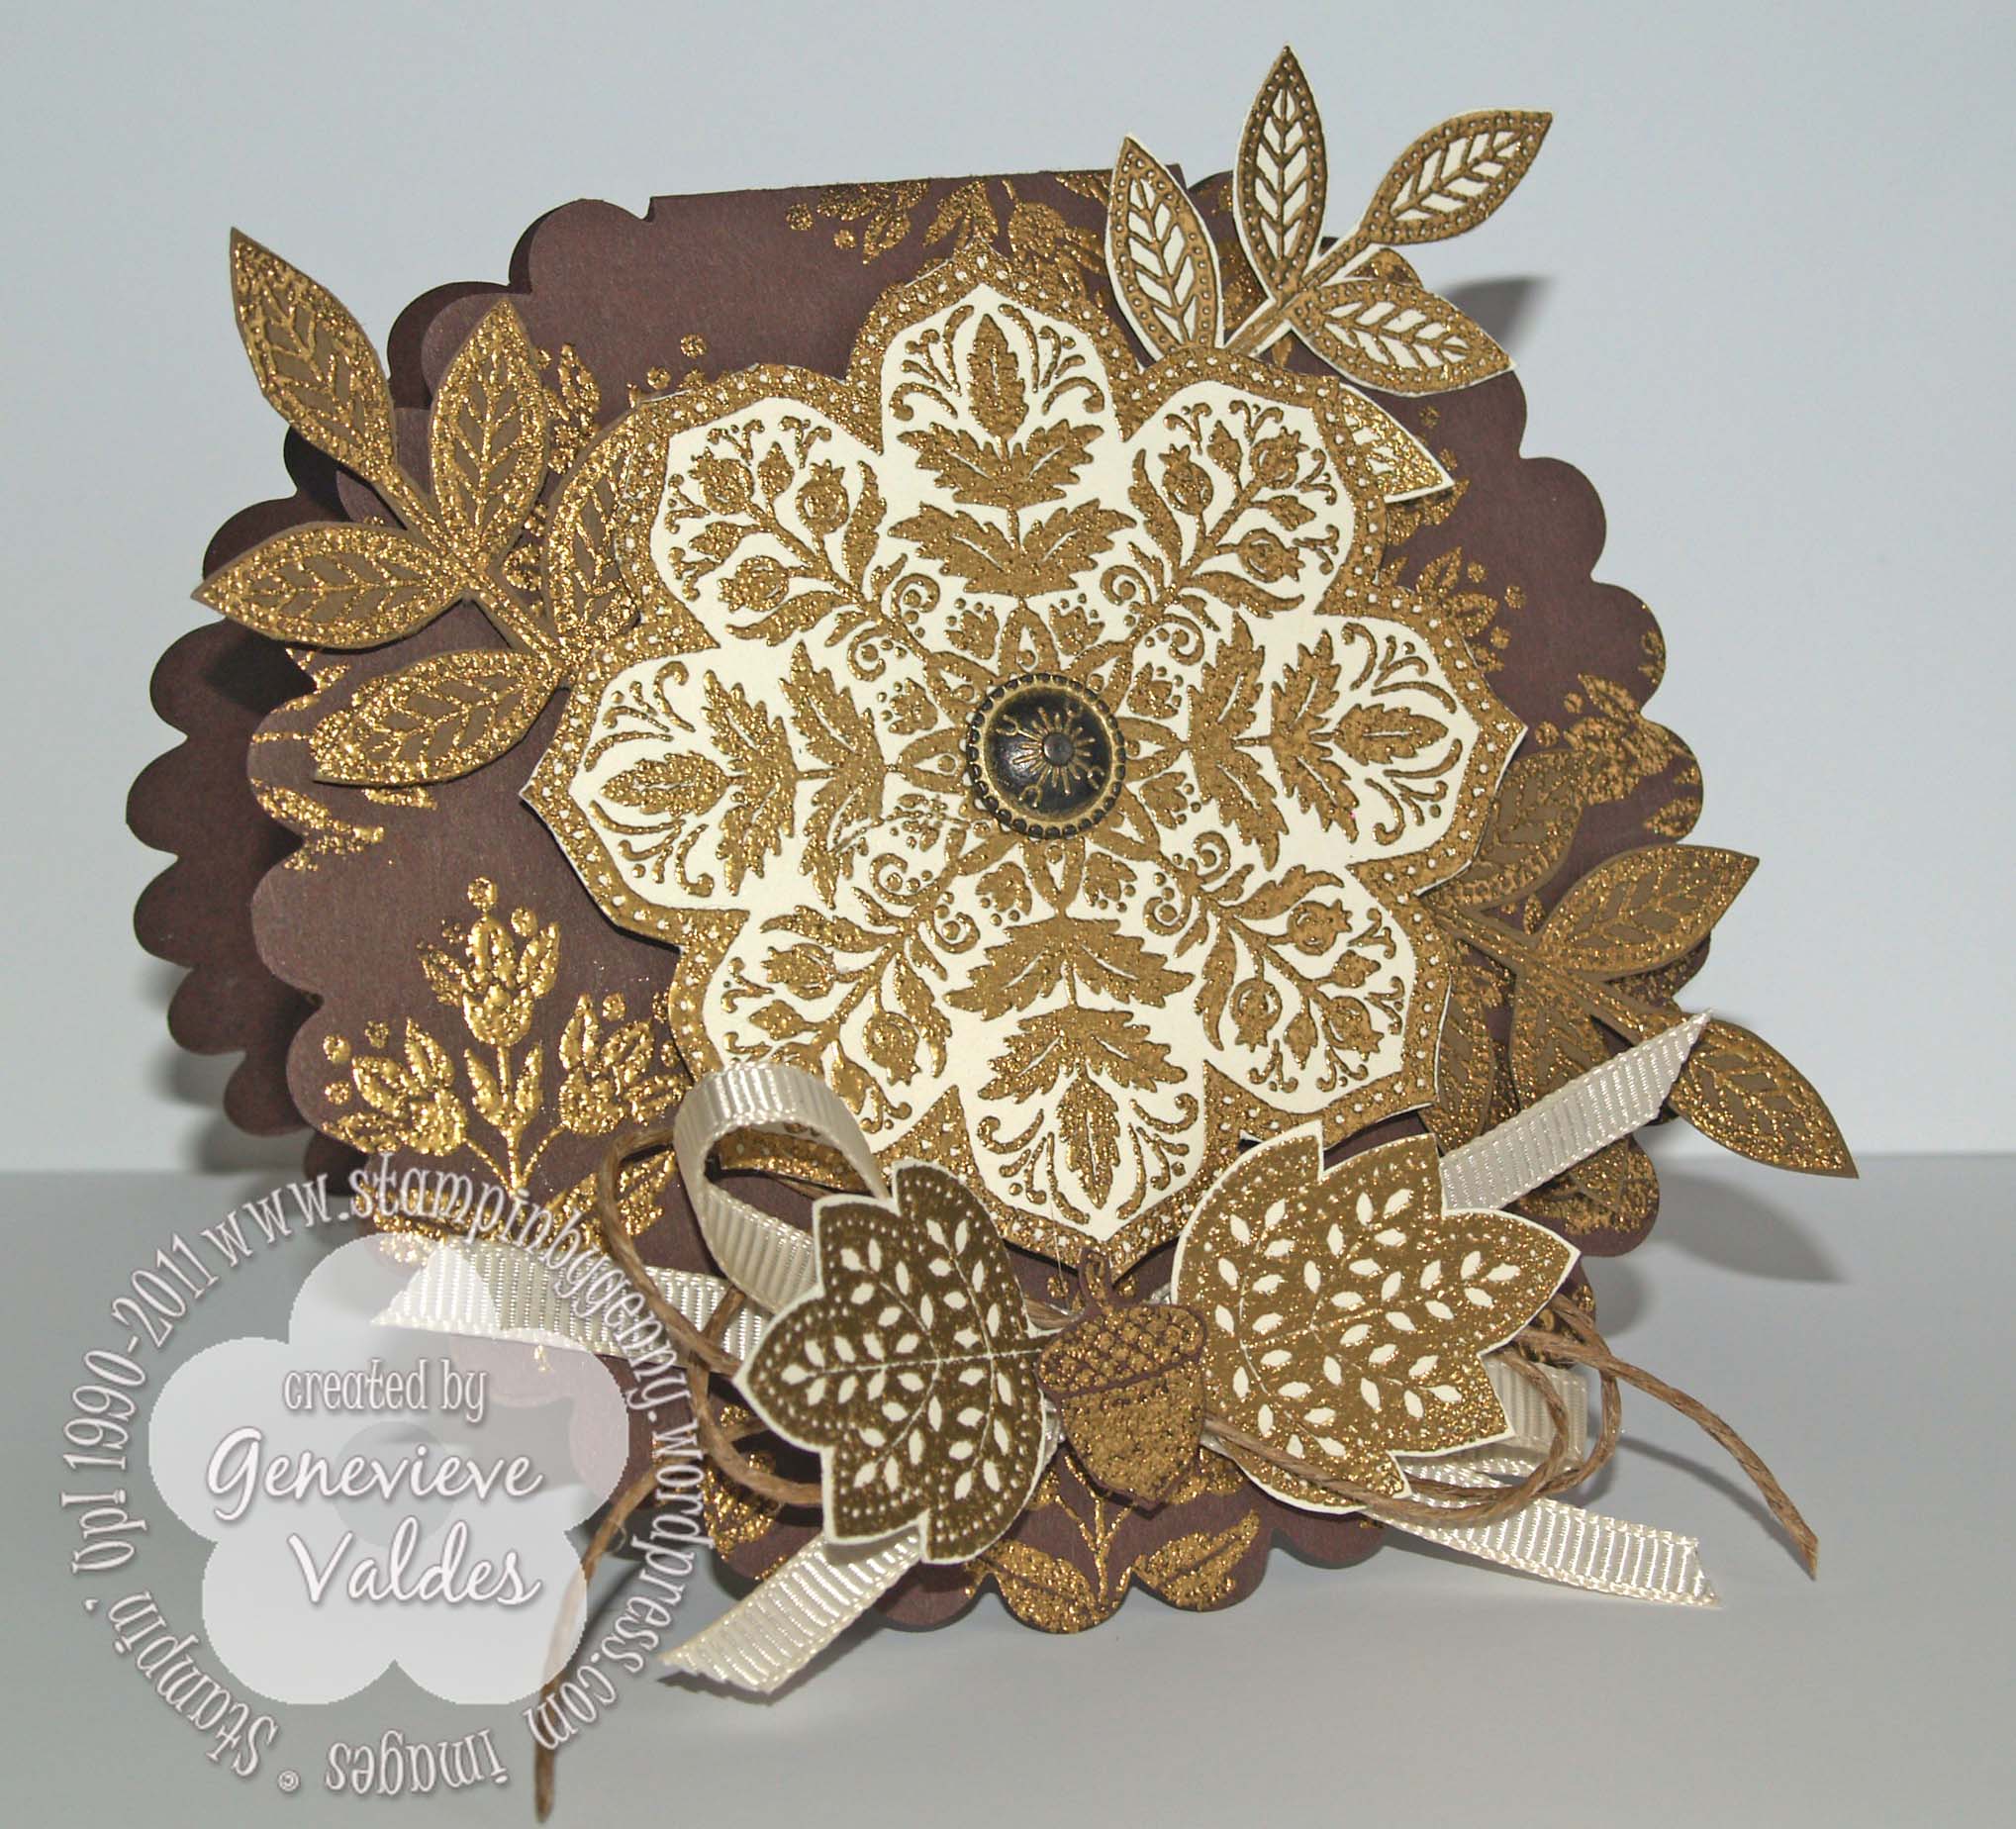
A Golden Fall

This week at Hand Stamped Sentiments we have a fall challenge.  The weather here in San Antonio,Texas is still hot but the mornings are cooler and it’s starting to feel like fall weather is getting closer.  I have another fall inspired project created with the Days of Gratitude stamp set.  I wanted to use it in different way so I decided to heat emboss all the images in gold embossing powder.  Here’s my project.

Day of Gratitude gold fall card

click to enlarge

click to enlarge

All Stampin’ Up! supplies below may be ordered from my website or email me to place your order.

All products are Stampin’ Up! unless noted.

Golden Fall Card

Size:  4.00” H x 4.50” W

Stamp sets: Day of Gratitude

Paper: Card base:  Chocolate Chip, Very Vanilla, Soft Suede

Ink: Versamark

Accessories: 1/4″Very Vanilla Grosgrain Ribbon, Gold Embossing Powder, Hemp Twine, Antique brad, dimensionals

Elegant Wedding Card

This week I was inspired to use a stamp set that I purchased but haven’t used. It’s the new Delicate Doilies stamp set featured in the Idea Book and Catalog. I love the versatility of this stamp set.  You can use this stamp set for almost any occasion.  This week at Hand Stamped Sentiments we have a Clean and Simple Challenge.  I created a card for a wedding.  I inked my doily stamp with Versamark and Basic Black ink then embossed it with Iridescent Embossing Powder then added Basic Rhinestones.  I also embossed the sentiment with Iridescent Embossing powder and added a small rhinestone to the ring.  So easy!  Click on the card image to see more details.

click image to enlarge

I hope you’re inspired to join us at Hand Stamped Sentiments and upload your clean and simple project.

All Stampin’ Up! supplies below may be ordered from my website or email me to place your order.

All products are Stampin’ Up! unless noted.

Happy I Do Day Card

Size:  5.50” H x 4.25” W

Stamp sets: Delicate Doilies, Word Play

Paper: Card base:  Whisper White

Ink: Basic Black, Versamark

Accessories: 5/8″ Black Satin Ribbon, 2-1/2 Circle punch, 3/16″ Corner Rounder punch, Basic Rhinestones, Iridescent Embossing powder, Heat Tool, Dimensionals

Wishing for Autumn

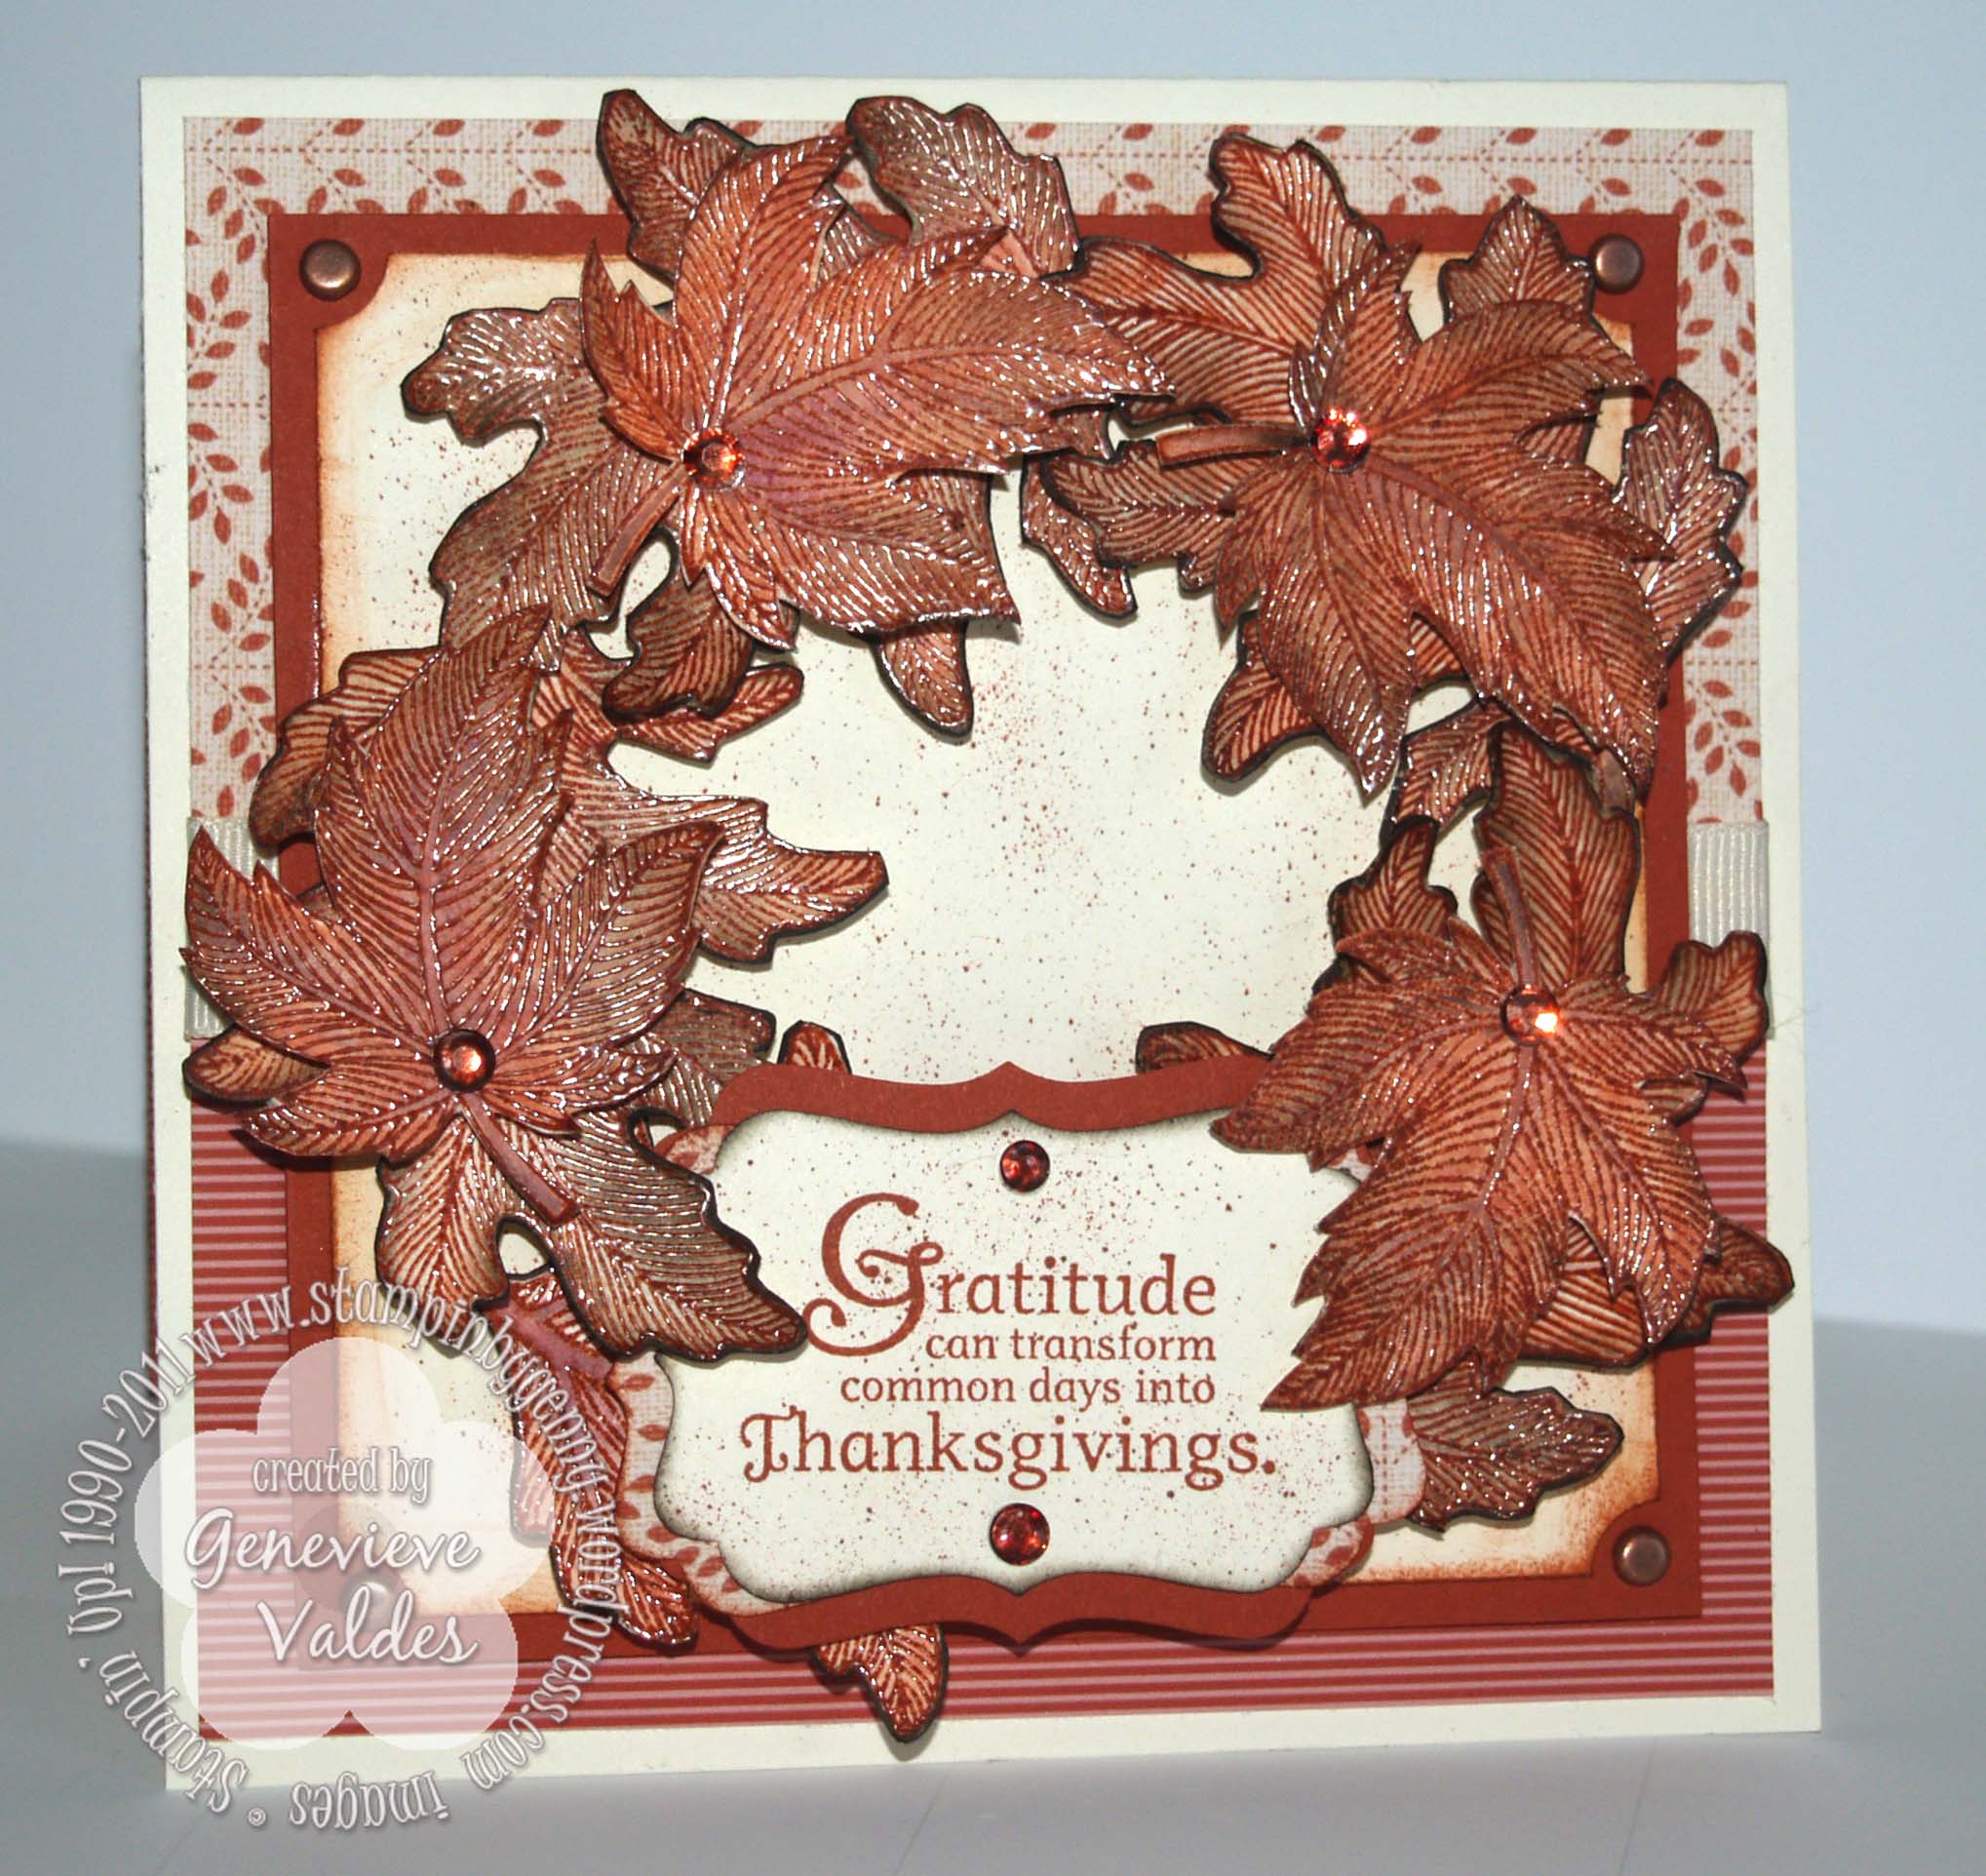
Here in San Antonio we’ve had record high temperatures.  110 degrees on Sunday!  Unbelievable!  All this heat has made me wish for autumn.  Cooler mornings and days is what everyone in San Antonio is wishing.  I can’t wait.  Later this week the temperature should drop to 90 degrees which will be wonderful.  So much for the weather and on to my project.  Wanting for autumn to arrive I decided this would be my inspiration for this week’s card for Hand Stamped Sentiments Monochromatic Theme Challenge. I used one of my favorite stamp sets, Autumn Splendor to create the leaves for an autumn wreath.  I stamped the leaves with Versamark and Cajun Craze then heat embossed with clear embossing powder.  To add more color to the leaves I used my blender pen with Cajun Craze, Early Espresso and Calypso Coral.

autumn wreath card

Click image to enlarge

autumn wreath inside card

click to enlarge

To see more fabulous projects for  this monochromatic challenge go to Hand Stamped Sentiments.

All Stampin’ Up! supplies below may be ordered from my website or email me to place your order.

All products are Stampin’ Up! unless noted.

Autumn Wreath Card

Size:  5.00” H x 5.00” W

Stamp sets: Autumn Splendor, Day of Gratitude

Paper: Card base:  Very Vanilla, Cajun Craze; DSP; Digital Paper from Autumn Spice Digital kit, Digital Paper Craze stripe

Ink: Cajun Craze, Early Espresso, Calypso Coral

Accessories: Decorative Label Punch, Ticket Corner Punch, Basic Rhinestones (colored with brown Sharpie), Metallic brads, 5/8″ Very Vanilla Grosgrain Ribbon