• my photo

    Click photo for About Me

  • Enter your email address to subscribe to this blog and receive notifications of new posts by email.

    Join 1,190 other subscribers
  • Pinterest

    Follow Me on Pinterest
  • Amazing Deals

    Click image for Amazing Deals!

  • Share this blog

    Bookmark and Share
  • Archives

  • Categories

  • Recent Posts

  • Blog Stats

    • 466,980 hits
  • Meta

  • Disclaimer

    All content found at Stampin' by Genny is the sole responsibility of Genevieve Valdes, a Stampin’ Up! Independent Demonstrator. Stampin’ Up! does not endorse, edit, or otherwise contribute to this website.

Memorial Day Thank You Card

This week at Hand Stamped Sentiments we remember and are grateful to our service men and women who have given their lives for our nation’s service.  Join the challenge and create a project for Memorial Day.

I wanted to create a bold card with a gold star so I made this 3D star to put on the front of my card and my sentiment is simply ‘grateful’.  I’m thankful to our military fallen heroes.  So this Memorial Day while you’re with your family remember those that are not with us.

click image to enlarge

All Stampin’ Up! supplies below may be ordered from my website or email me to place your order.

All products are Stampin’ Up! unless noted.

Memorial Day card

3D Star instructions:  Click here for video.

Size: 5.00″ x 5.00″

Stamps:  retired Small Script

Paper:  Card Stock:  Crumb Cake, Not Quite Navy, textured Cherry Cobler; Gold Cardstock

Ink:  Cherry Cobbler, Soft Suede, Versamark

Accessories: mini Glue Dots, Antique brads, clear embossing powder, heat tool, sponge dauber, Distressing Tool from Cutter kit

Technique: Stamping, Heat embossing

Floral Fest Birdhouse

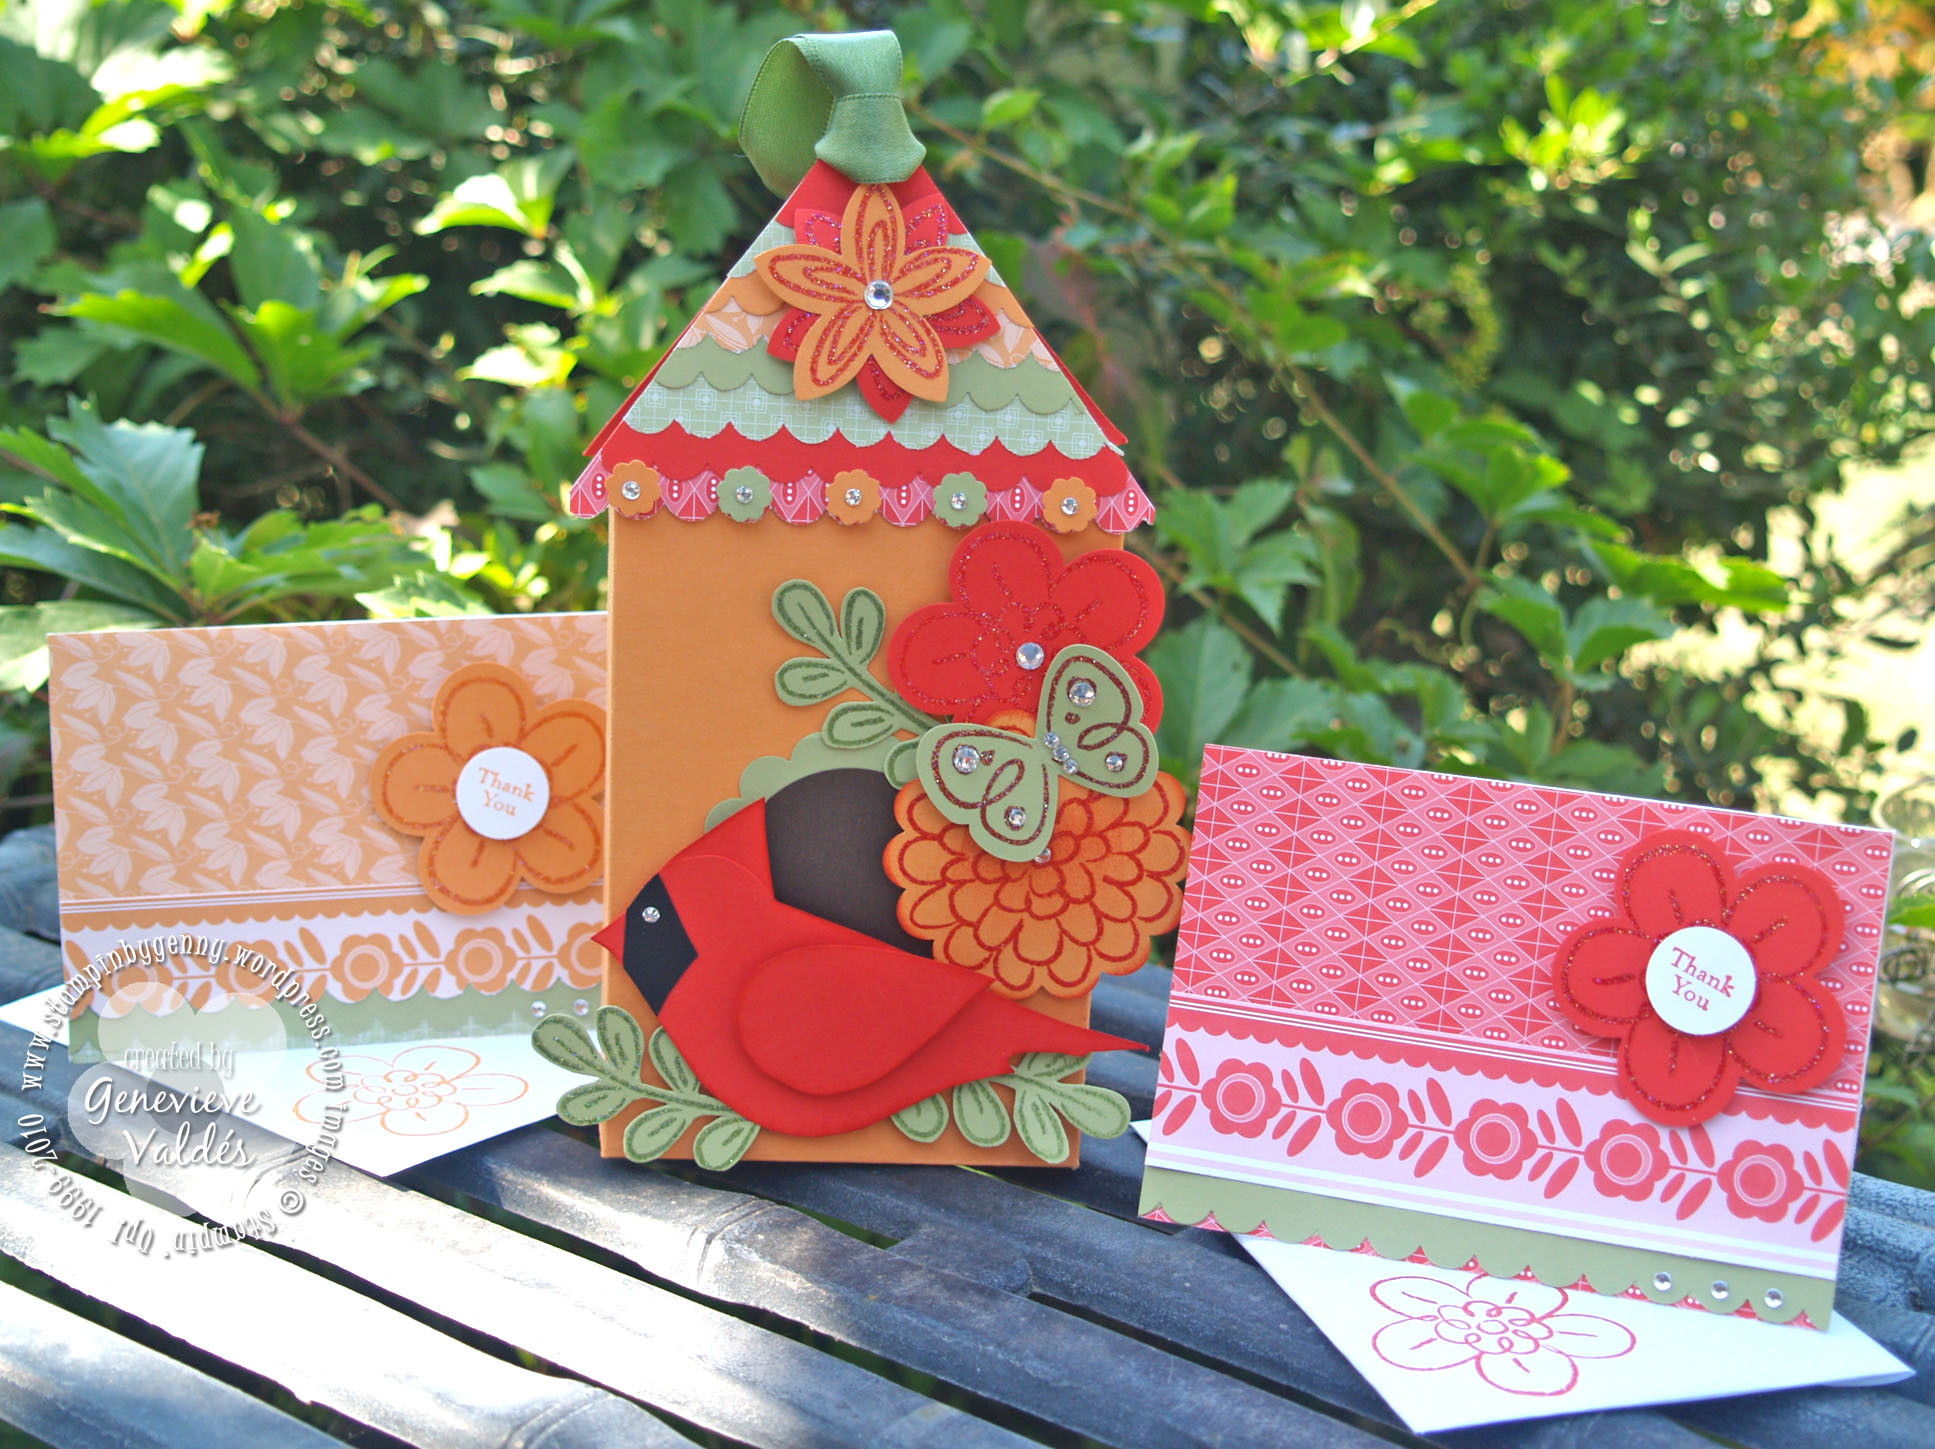
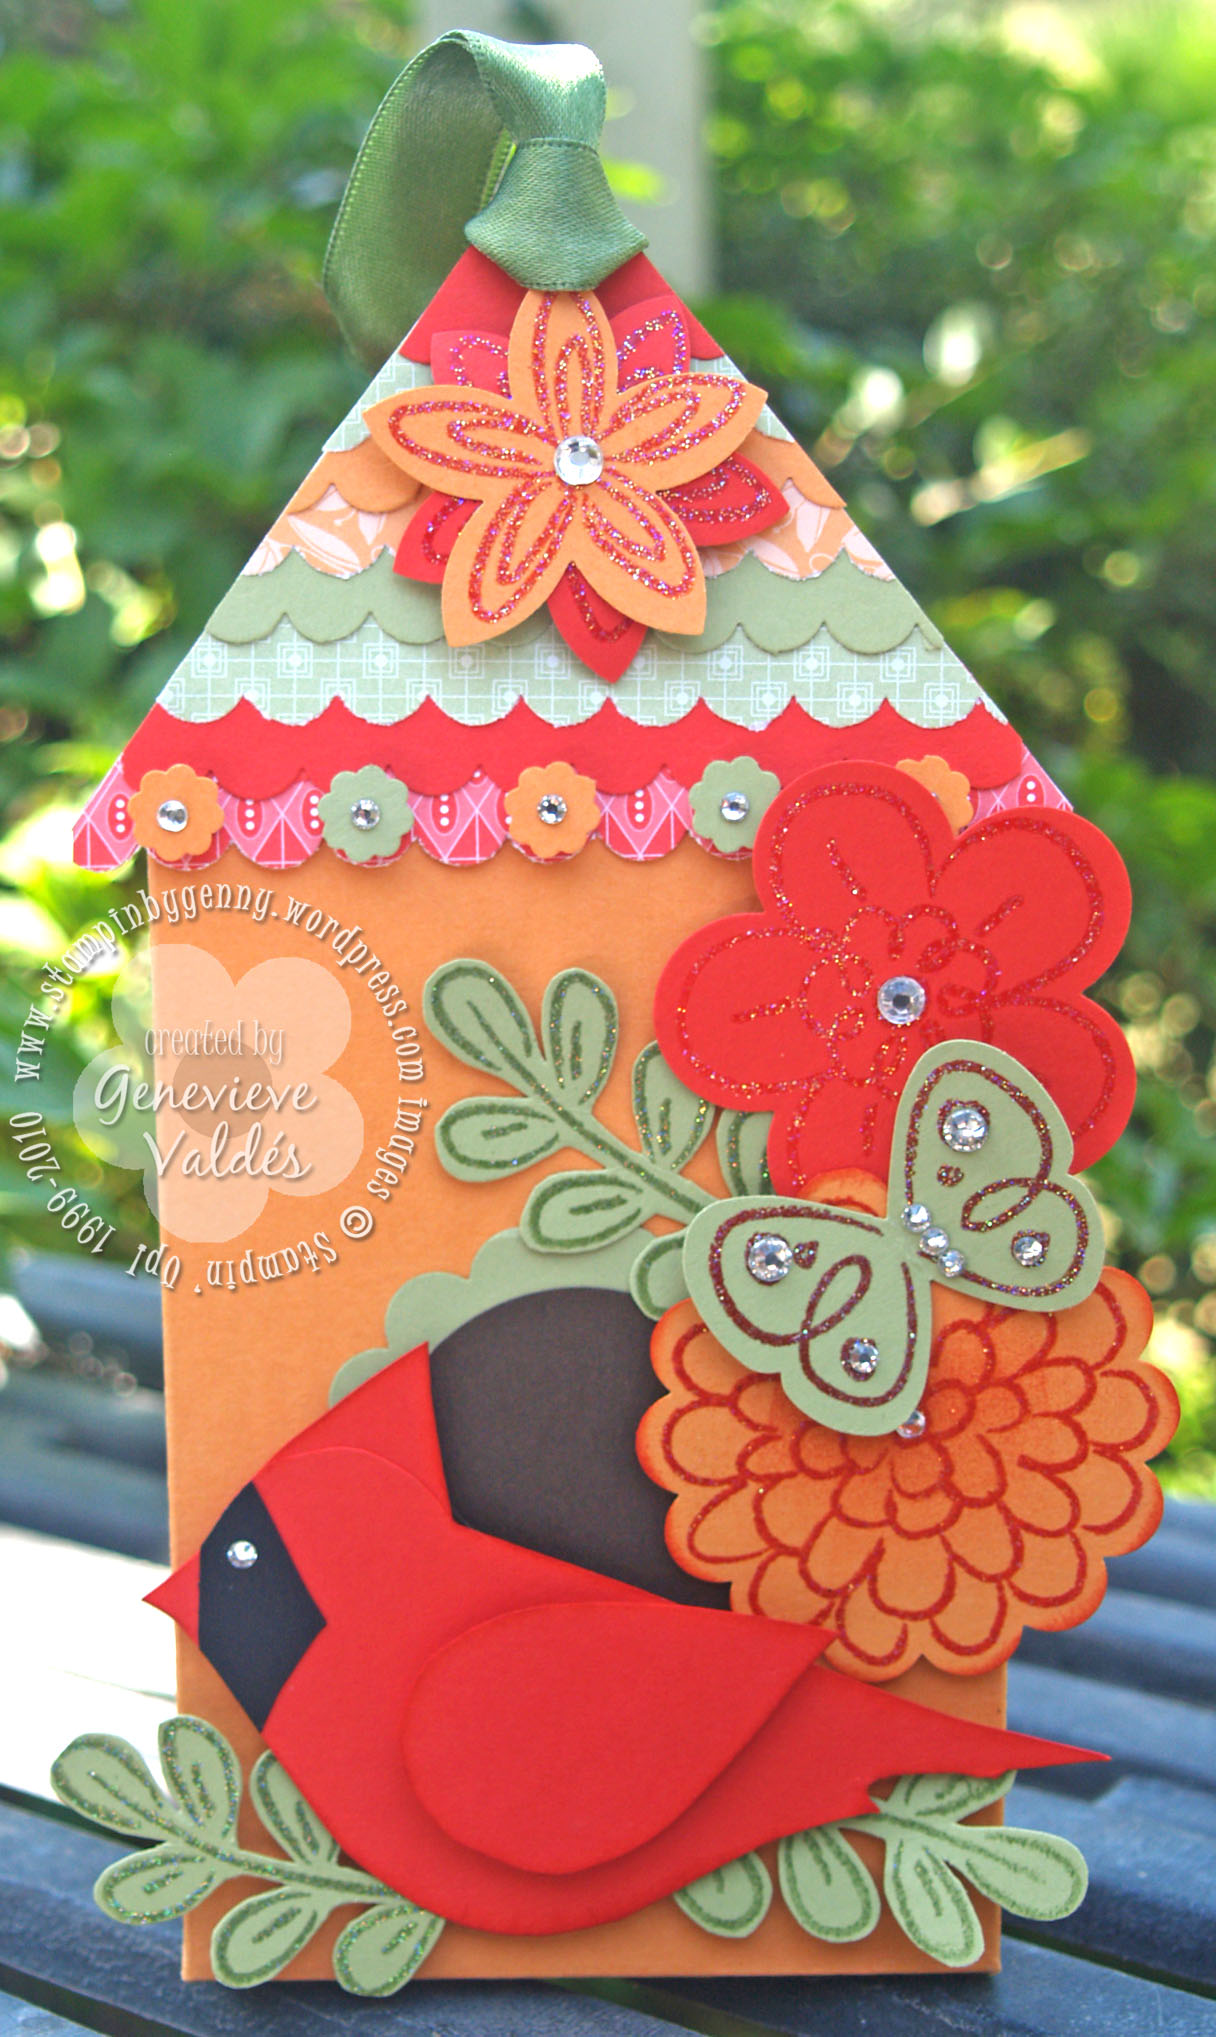
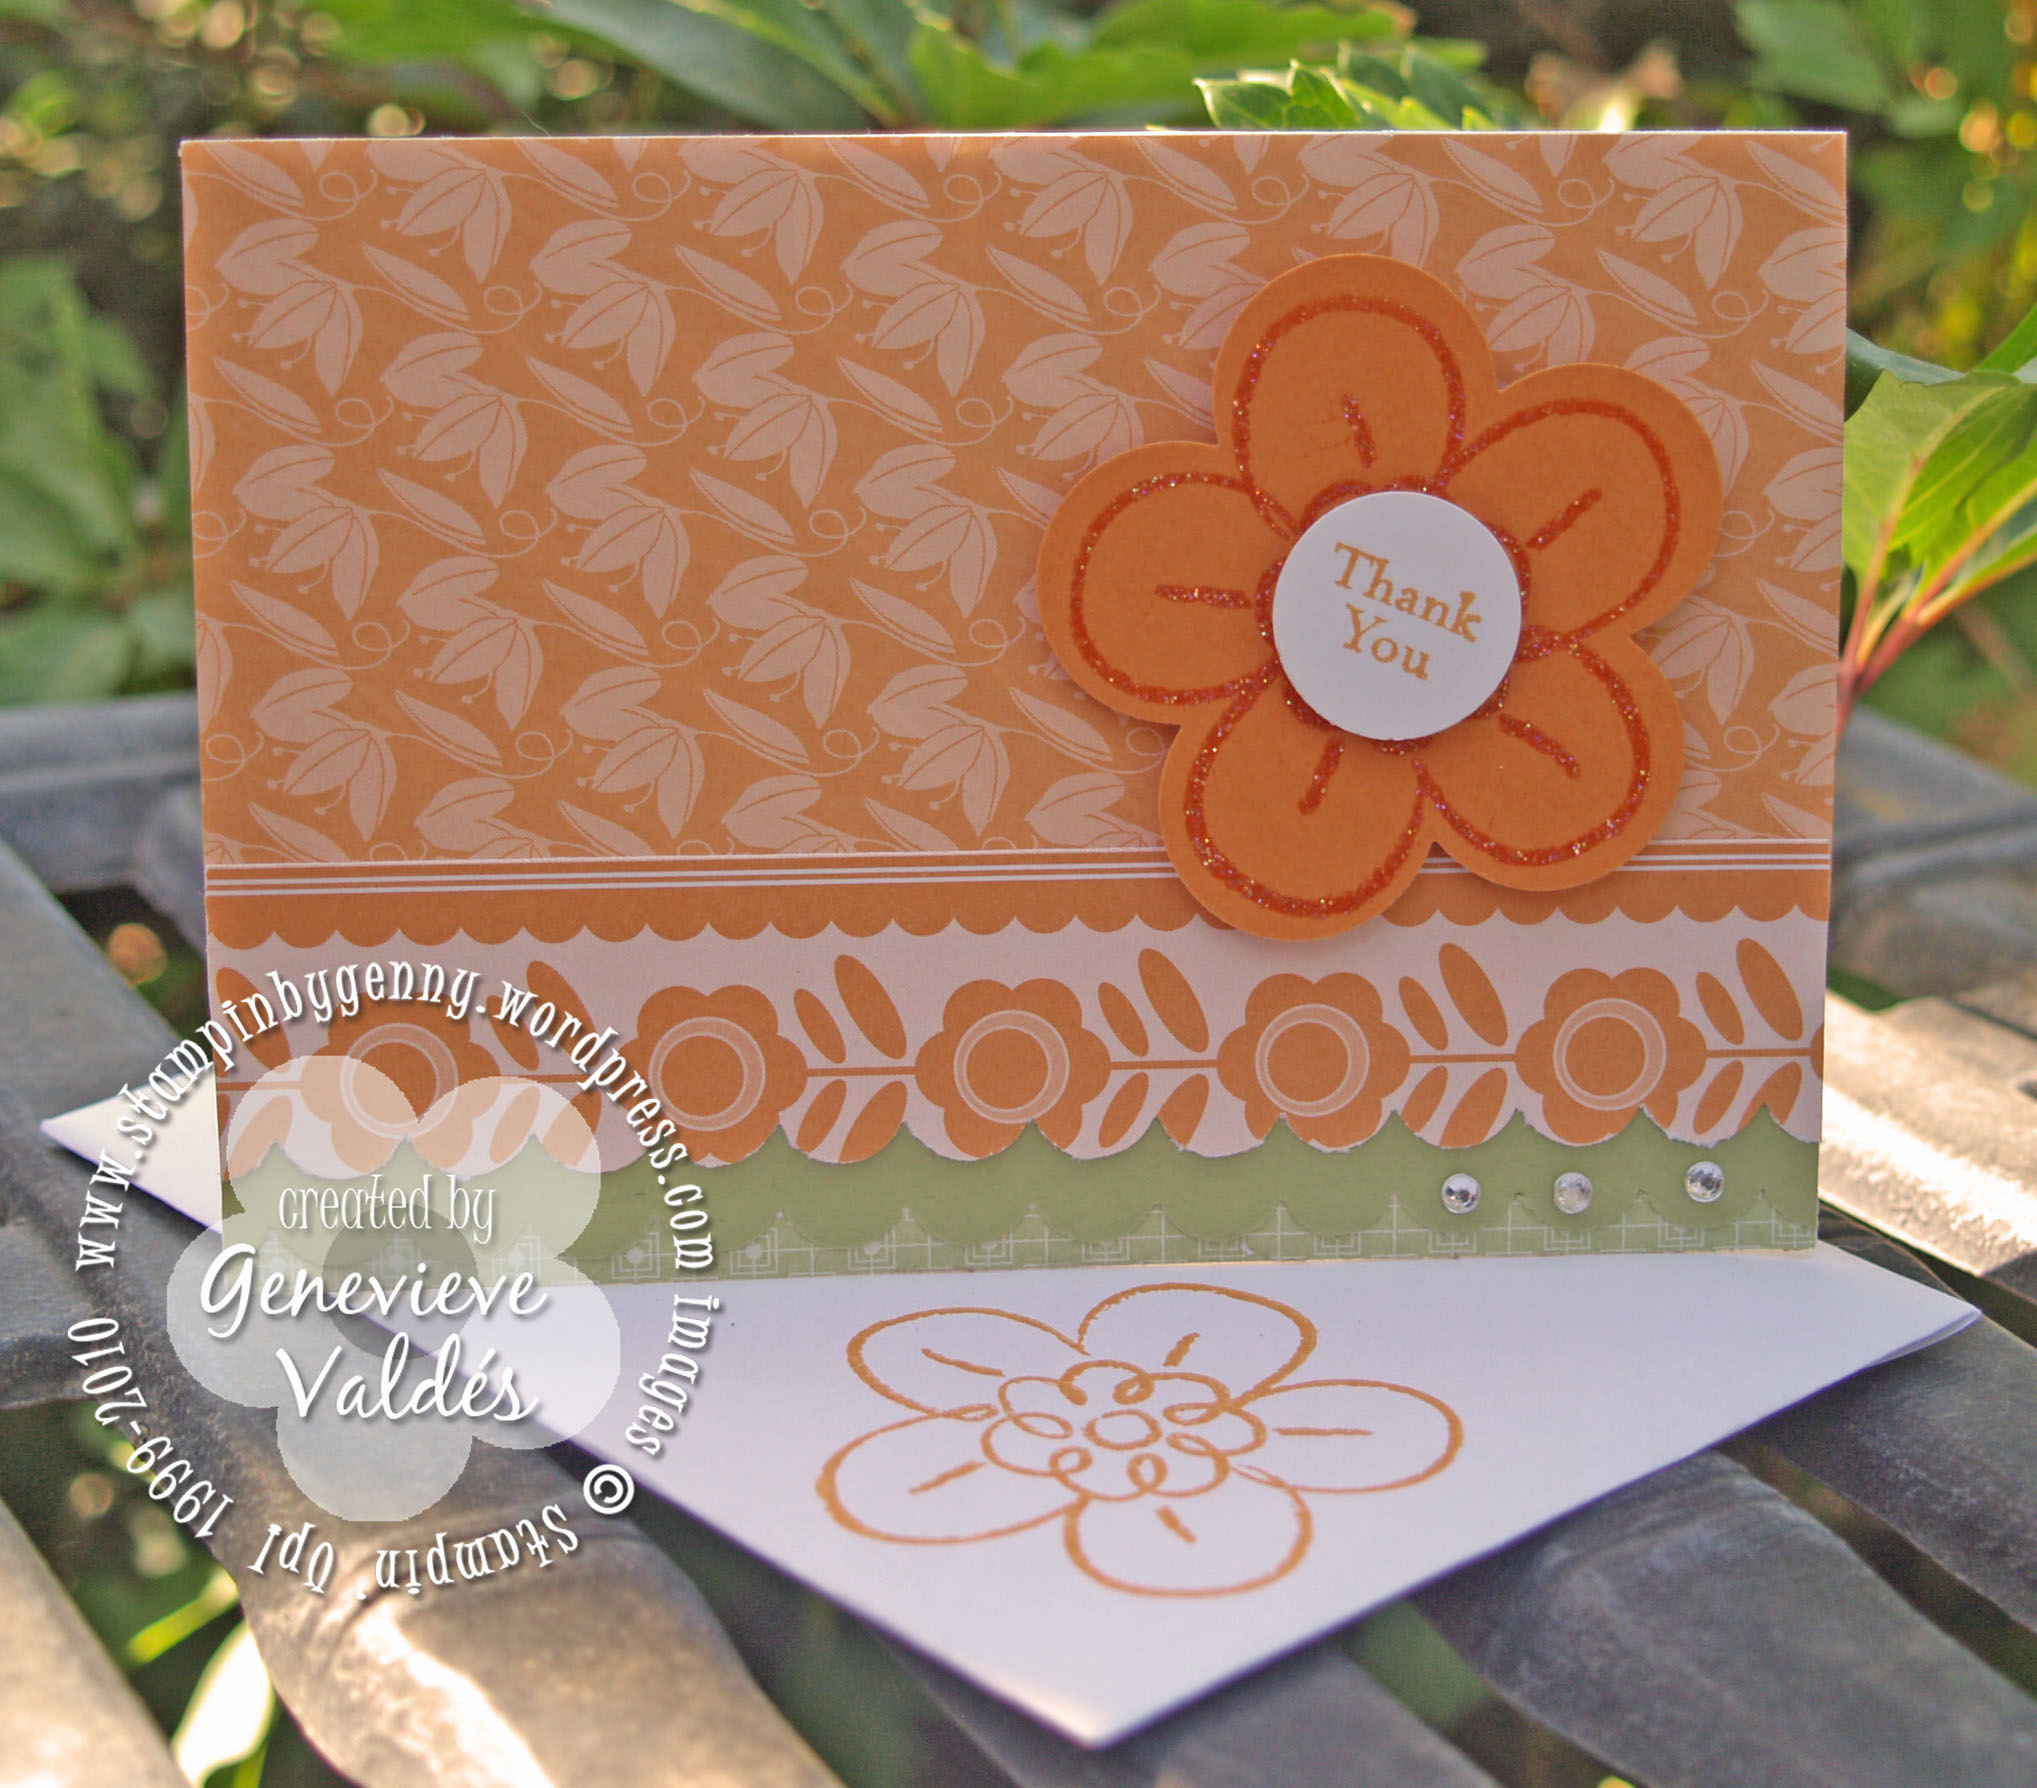
I recently received the Flower Fest stamp set and I was so excited to get creative with it.  I was looking for inspiration for color and PPA had one of my favorite color combos – Poppy Parade, Pear Pizzazz, Peach Parfait.  These colors together are great together for summer projects.  I put together this project for Hand Stamped Sentiments Anything Goes Challenge.  The box and Cardinal are from a template I created then stamped the floral and leaf images with Versamark and matching classic ink as the card stock and heat embossed with iridescent powder for that shimmery look.  I also added clear rhinestones for additional bling.    Hop on over to HSS get inspired and upload your project.

Birdhouse box and cards

click image to enlarge
Birdhouse box

click image to enlarge

Peach Parfait card

click image to enlarge

Poppy red card

click image to enlarge

All Stampin’ Up! supplies below may be ordered from my website or email me to place your order.

All products are Stampin’ Up! unless noted.

Floral Fest Birdhouse Box

Birdhouse and Cardinal Template:  I am selling this template for $1.95.  Click here to go to my Tutorials, Templates, Instructions page to purchase.

Size:  3-5/8″ w x 8″ h

Stamps:  Flower Fest

Paper:  Card Stock:  Peach Parfait, Poppy Parade, Pear Pizzazz, Basic Black; DSP Hostess level 1 In Color 6″ x 6″ paper pack

Ink:  Peach Parfait, Poppy Parade, Pear Pizzazz, Versamark

Accessories: Dimensionals, Basic Clear Rhinestones, Fancy Flower Punch, 2-3/8 Scallop Punch, Butterfly Punch, Five Petal Flower Punch, Punch Pack, 2-1/2″ Circle Punch, Scallop Border Punch, Whisper White Satin Ribbon dyed with Pear Pizzazz classic ink, regular hole punch

Technique: Stamping, Die Cutting, Heat embossing

Floral Fest Thank You Cards

Size: 5″ W x 3-1/2″H

Envelopes: The envelopes were made with a template I created.

Stamps:  Floral Fest, Silhouette Sentiments

Paper:  Card Stock:  Whisper White, Peach Parfait, Poppy Parade, Pear Pizzazz; DSP Hostess level 1 In Color 6″ x 6″ paper pack

Ink:  Peach Parfait, Poppy Parade

Accessories: Dimensionals, Basic Clear Rhinestones, Fancy Flower Punch, Scallop Border Punch, 3/4″ Circle Punch

Technique: Stamping, Die Cutting

A Vintage Rose for my Friends

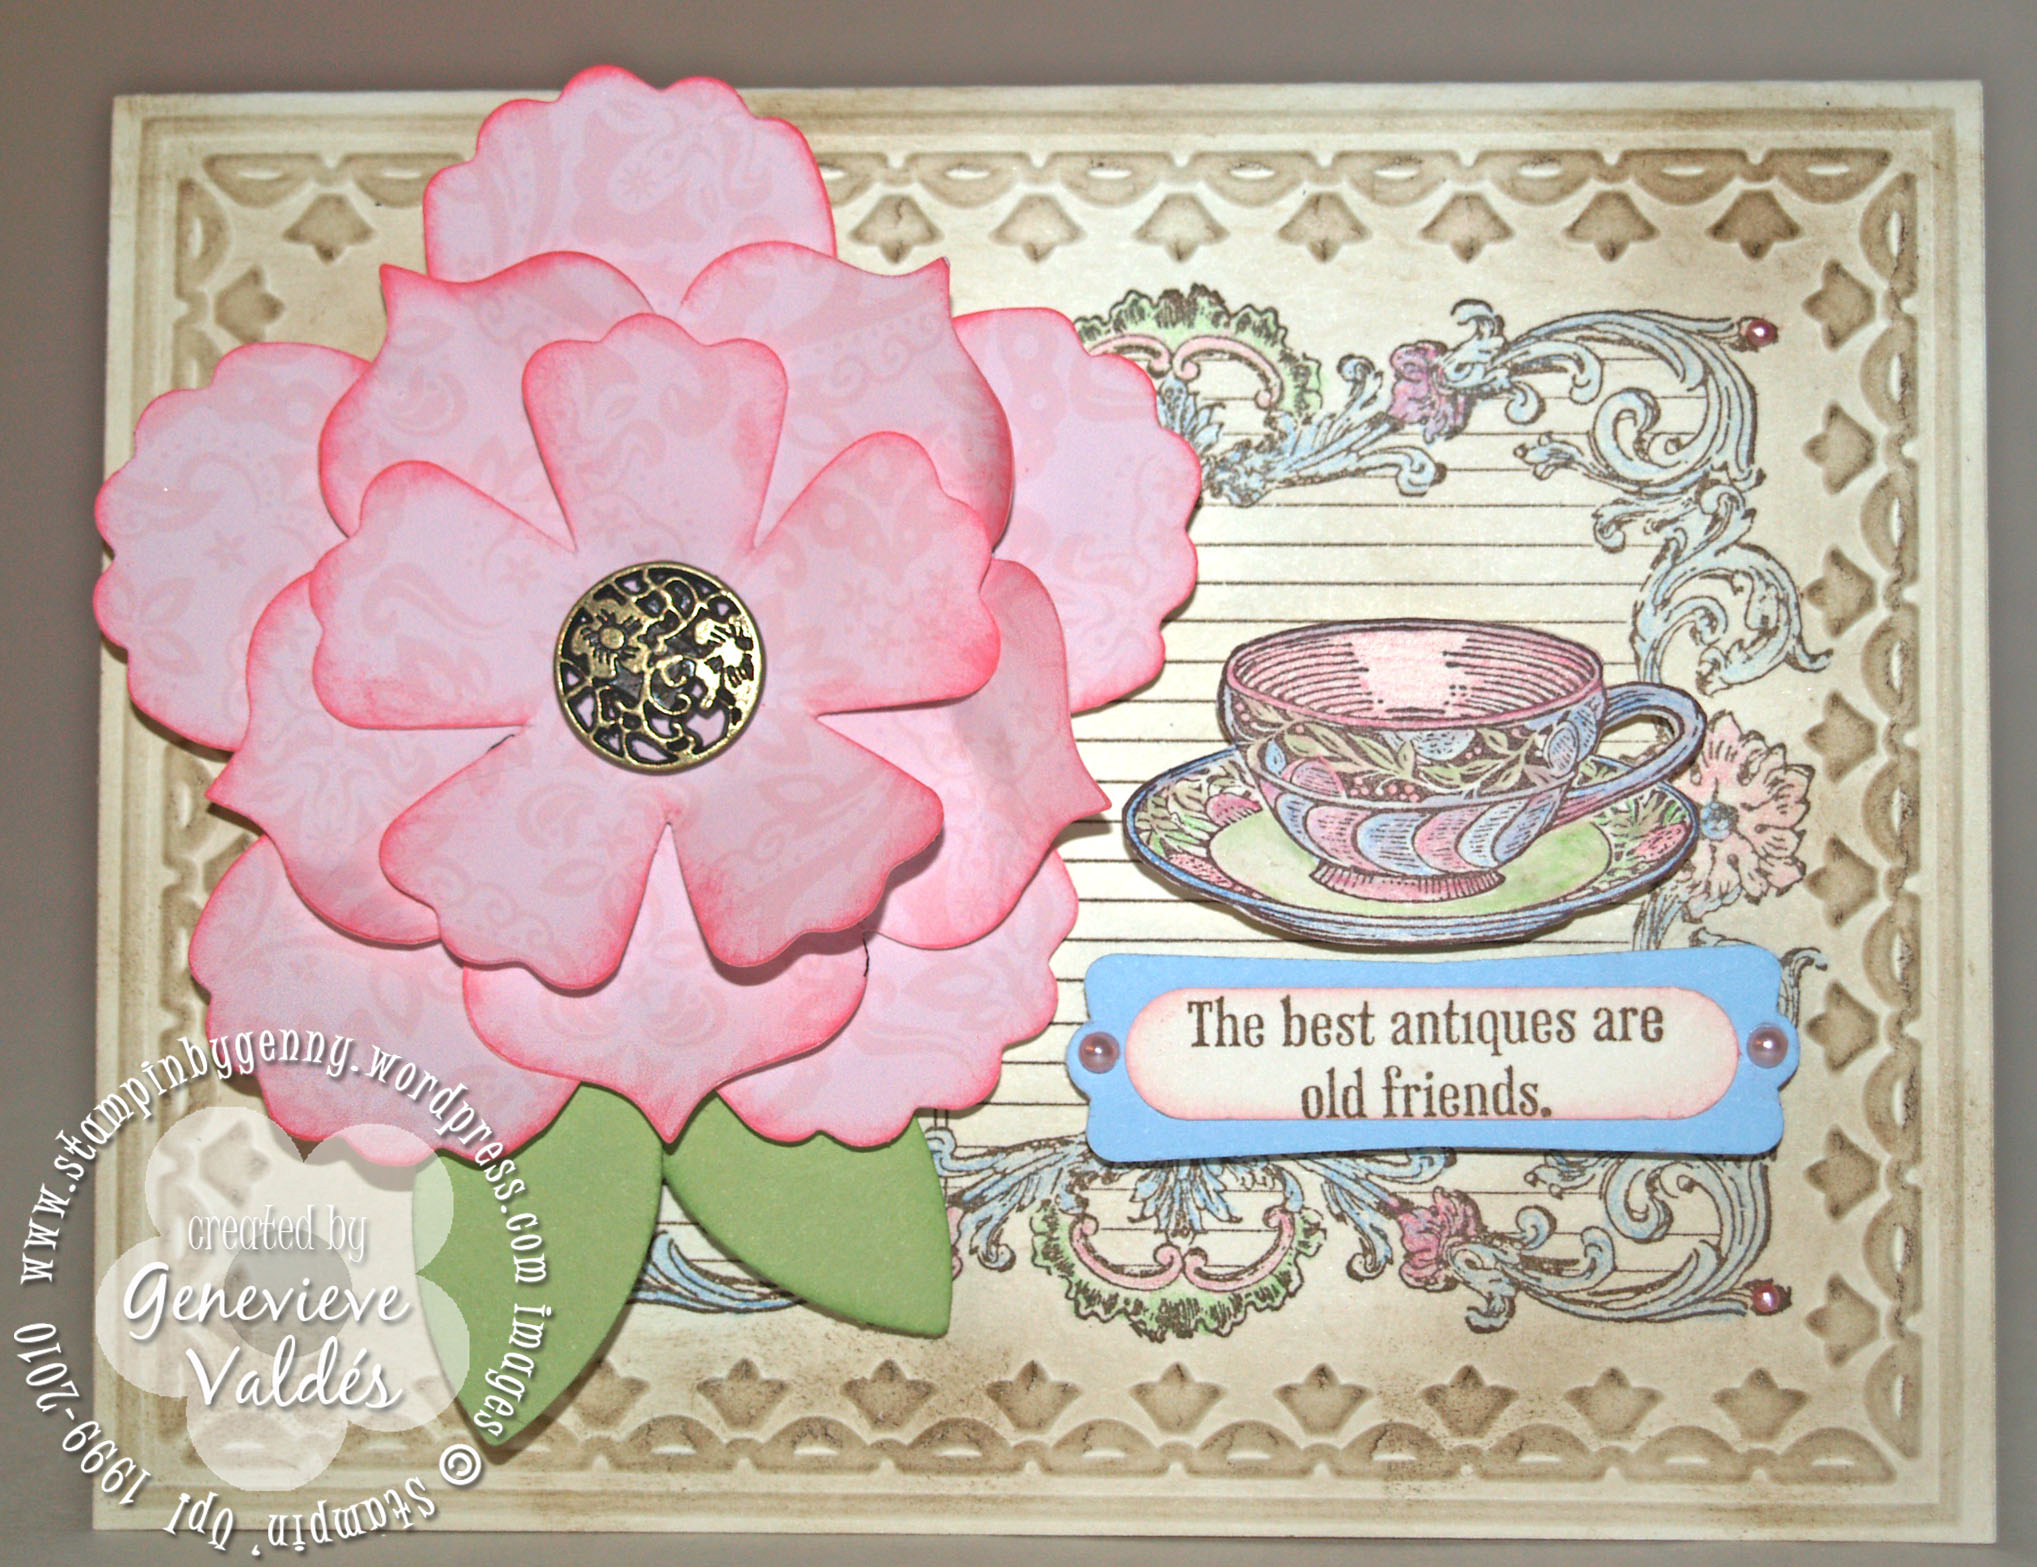
This week at Hand Stamped Sentiments we have a Color Splash Challenge.  Use the colors of Pretty in Pink, Certainly Celery and Bashful Blue to create a card or paper project.  A few weeks ago I received the stamp set Timeless Treasures from my dear friend Amy.  I’d been dying to use it so I created this card.  Although we met about two years ago through Stampin’ Up! I feel we’ve been friends for a long time.  The same goes for my other stamping friends.  I’ve made such wonderful friendships through Stampin’ Up!  So this card is dedicated to all of my stamping friends.  I am so fortunate to have them in my life.

Vintage rose and teacup card

click image to enlarge

All Stampin’ Up! supplies below may be ordered from my website or email me to place your order.

All products are Stampin’ Up! unless noted.

Vintage rose for my friends card

Size:  5.0″ w x 4.25″ h

Stamps: Timeless Treasures, Notably Ornate

Paper: Card stock:  Very Vanilla, Bashful Blue; DSP:  Digital Pretty in Pink Brocade

Ink:  Soft Suede, Pretty in Pink; Watercolor pencils:  Pink, Green, Blue

Accessories: Big Shot, Framed Tulips Embossing Folder, Fun Flowers die, Word Punch, Modern Label Punch, Antique brad, Basic Pearls (colored with Stampin’ Up! markers)

Technique: Stamping, die cutting

A tisket a tasket a Mother’s Day basket

This week we’re celebration mom at Hand Stamped Sentiments.  The challenge is to make any project – card, gift set, gift card holder, scrapbook page or any 3D project with mom in mind.  We’d love to see your creativity.

I’m so excited about my project this week because it is a sneak peek for the Strength & Hope Stamp set which donates $2 from every purchase of this set to The Breast Cancer Research Foundation.  This set is so beautiful.  I also used the Four Frames set which is available through the end of April and it is a set that will next be available with new 2011-2012 Idea Book & Catalog.  I would love to see how you’re going to show mom how much you care.  I can’t wait to see your creation.

The basket is from a template I saw on Sassy Scrapper’s blog.  I embellished the basket with a rose I made using the Fancy Flower punch and the butterfly from the new Strength & Hope Stamp set which will be available on May 1st.  The card featured DSP from the Strength and Hope Digital Download.  If you’re wondering how I made the butterfly two-tone, I sponged the lighter color of Pear Pizzazz then Marina Mist on the outer edge, stamped then heat embossed with clear embossing powder.  For great instructions on how to make the quilled rose.  Go to Tara Bilbao, she has a great instructional video on her blog on how to make them.

Click image to enlarge

Click image to enlarge

All Stampin’ Up! supplies below may be ordered from my website or email me to place your order.

All products are Stampin’ Up! unless noted.

Mother’s Day Basket

Templates & Tutorials: click here for basket template.  Click here for rose tutorial.

Stamps: Strength & Hope, Four Frames, Three Little Words, Charming

Paper: Whisper White, Strength & Hope digital DSP download

Ink: Marina Mist, Pear Pizzazz, Melon Mambo, Soft Suede, Versamark

Accessories: Whisper White Satin ribbon, Eyelet border punch, Decorative Label punch, Fancy Flower punch, Two-Step Bird punch, Basic pearls, non-SU white tulle

Technique: Stamping, Embossing

Mother’s Day Card

Quilled Rose tutorial:  Click here for video tutorial.

Stamps: Strength & Hope

Paper: Whisper White, Strength & Hope digital DSP download, Rose Red

Ink: Marina Mist, Pear Pizzazz, Melon Mambo, Soft Suede, Versamark

Accessories: Whisper White Satin ribbon, Eyelet border punch, Two-Step Bird punch, 1″ circle punch, Basic pearls

Technique: Stamping, Embossing

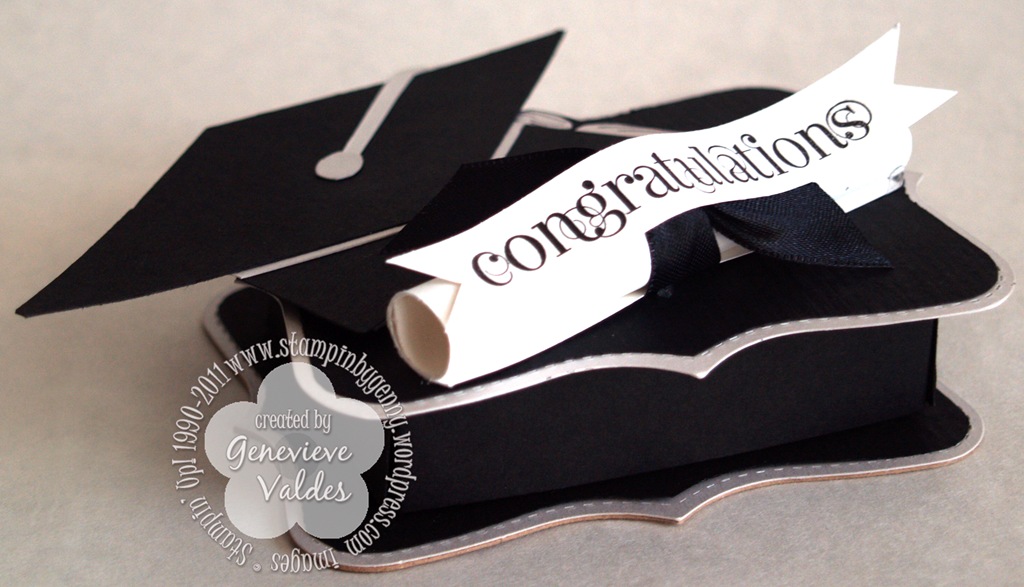
For the Graduate

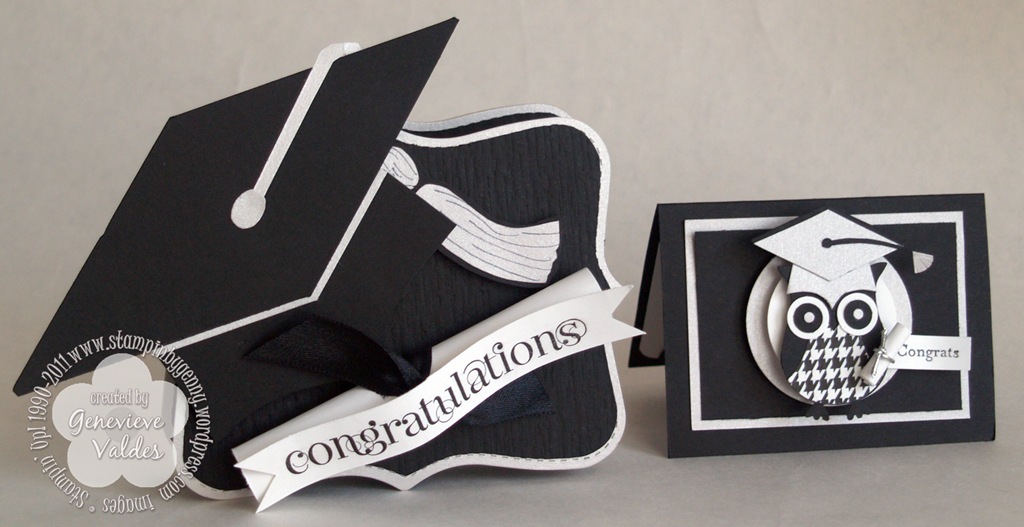
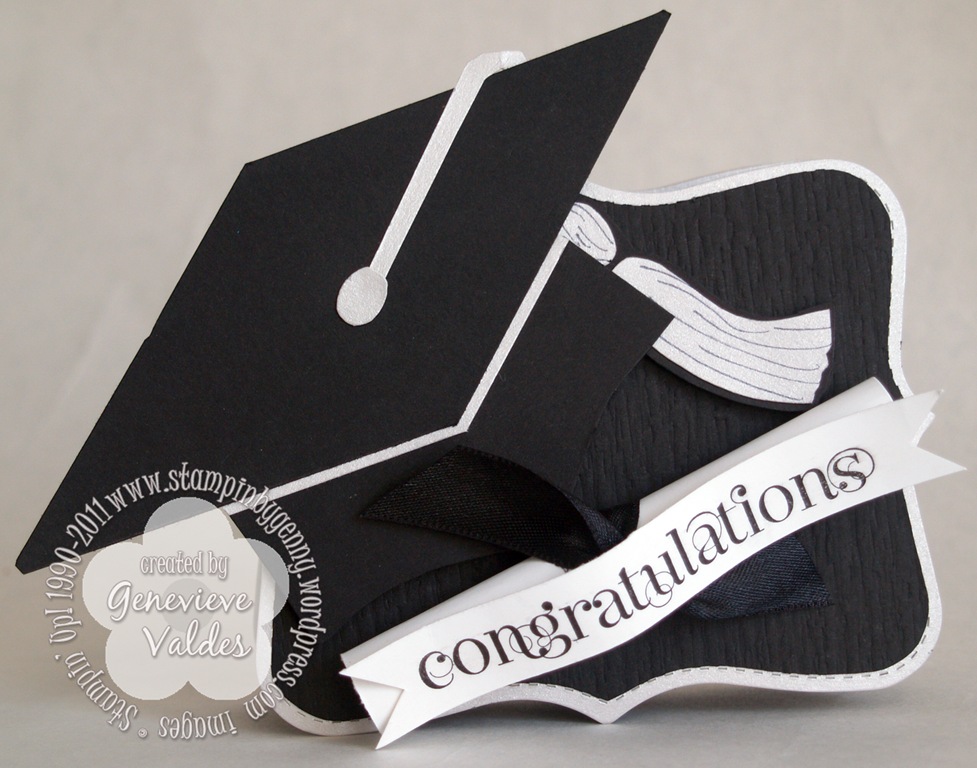
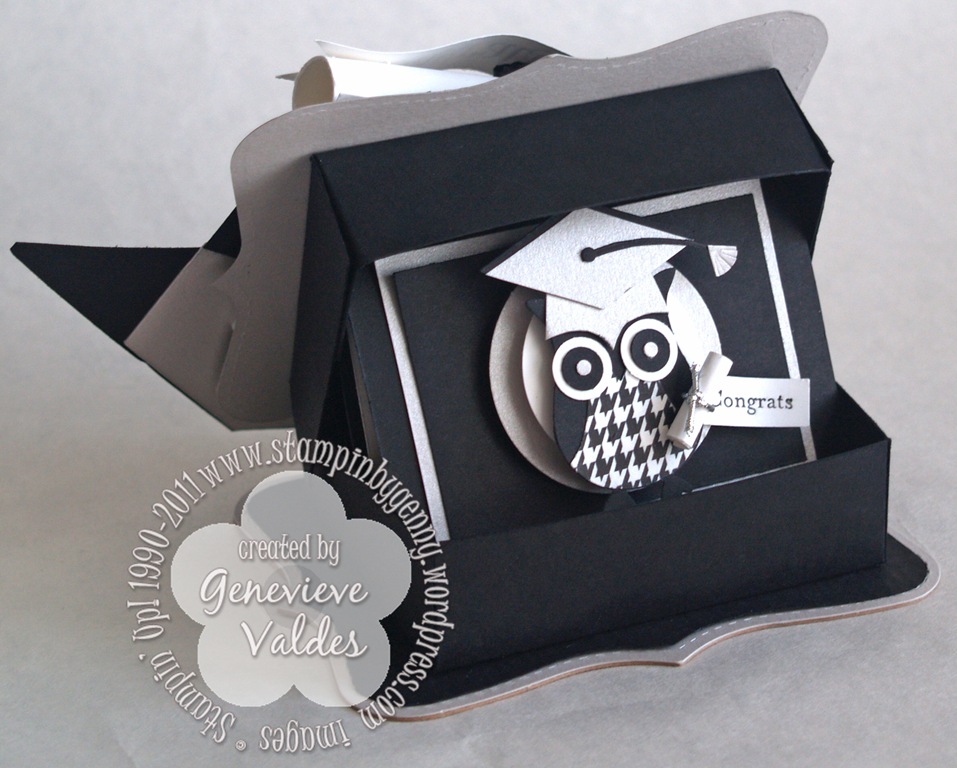
This week at Hand Stamped Sentiments we’re celebrating graduates.  Create any project – card, gift set, card holder, money holder, scrapbook page, or any 3D item with a graduation theme.  For my project I wanted to make a gift set using my Top Not die.  I used Basic Black, Silver and Whisper White card stock.  After die cutting the Basic Black Top Notes I textured them with the Texture Plates Kit #4 Distressed plate.  I die cut two more Top Notes in Silver to outline the black ones.  Cut along he perforated line on the Basic Black Top Note then adhere the silver Top Note behind the Basic Black one. The graduation cap silhouette is one I created.  See below for template.  I rolled some Whisper White paper for the diploma and tied with Basic Black Satin ribbon.  I then stamped the sentiment (Curly Cute) and created the banner.

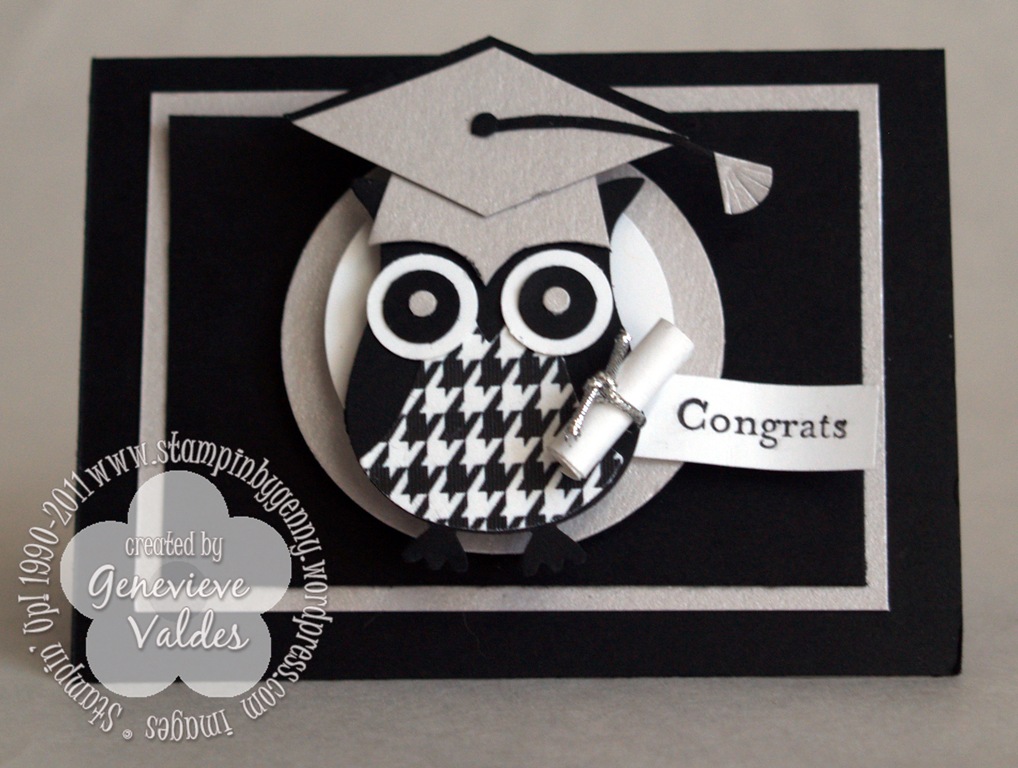
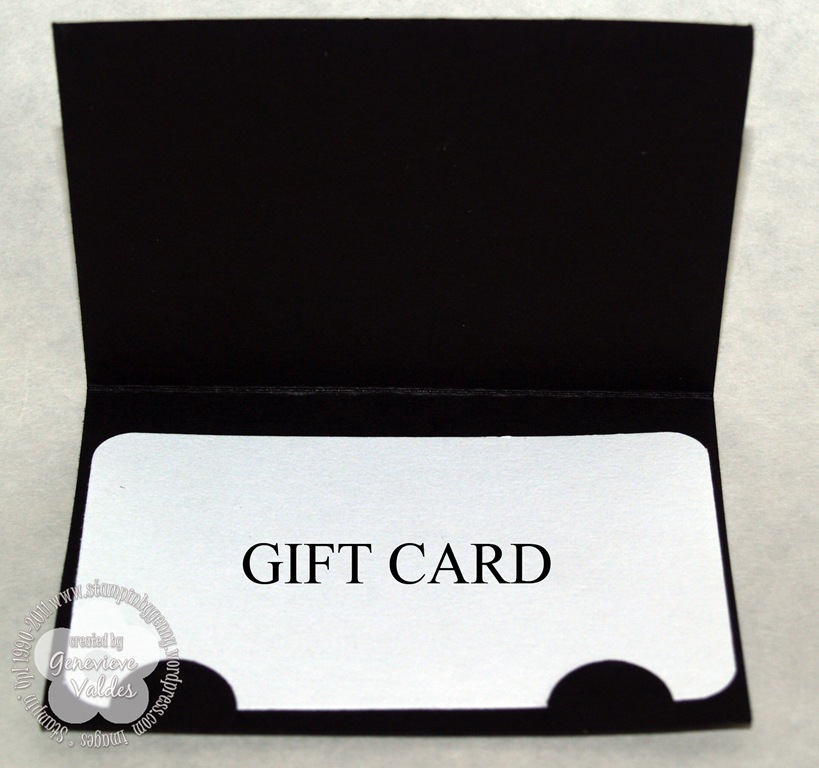
I created the card to hold a gift card.  I used the Two-step owl punch and created the cap from silver card stock.  The diploma is a strip of Whisper White then wrapped with retired silver cording.  I then adhered the owl to circle layers with dimensionals.

I hope you’re inspired to make your own graduation gift sets.  Hop over to Hand Stamped Sentiments, be inspired, create and upload your project.

Here’s my project.  Click the images to enlarge.

OLYMPUS DIGITAL CAMERA         OLYMPUS DIGITAL CAMERA
Top Note box and gift card holder Top Note box
OLYMPUS DIGITAL CAMERA         OLYMPUS DIGITAL CAMERA
Top Note box side view Gift card holder inside Top Note box
OLYMPUS DIGITAL CAMERA         OLYMPUS DIGITAL CAMERA
Outside of gift card holder Gift card holder inside

All Stampin’ Up! supplies below may be ordered from my website or email me to place your order.

All products are Stampin’ Up! unless noted.

Top Note Box

Templates: click here for box template; click here for grad cap template

Size: 3-1/2” L x 2-1/2″ W x 1” D

Stamps: Curly Cute

Paper: Basic Black , Silver, Whisper White

Ink: Basic Black

Accessories: Very Black Satin Ribbon, Big Shot, Texture Plates Kit #4 Distressed plate

Technique: Stamping, Die Cutting, Embossing

Congrats Gift Card holder

Size: 3-1/2” W x 2-5/8”H

Stamps: Silhouette Sentiments

Paper: Basic Black , Silver, Whisper White, Digital DSP Night and Day houndstooth pattern

Ink: Basic Black

Accessories: 1-3/4” circle punch, 1-3/8” circle punch, Two-Step Owl punch, retired Slit punch, Very Black Satin Ribbon, retired silver cording, dimensionals, MIni-glue dots

Technique: Stamping, Die Cutting, Embossing

Easter Favors to dress up your party

This week at Hand Stamped Sentiments we have an Easter theme challenge. Create any Easter project – cards, 3D projects, party favors, baskets, gift sets…you get the idea. There are so many projects you can create to dress up this holiday.
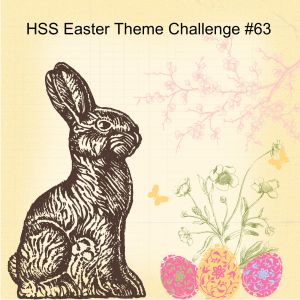
For this challenge I created a small bunny basket perfect for Easter candy. I printed the chocolate bunny, Spring Vintage DSP and sentiment from My Digital Studio. I dressed him up with ivory grosgrain ribbon and adhered him to the front of the box. I punched the sentiment with the oval punch and layered it over a Regal Rose Scallop oval. I modified this box template by cutting off the back and made a handle from Regal Rose CS with the Dotted Scallop Ribbon border punch.

My other project is the carrot box made with Stampin’ Up’s Petal Cone die.  Love this die.  I textured the Pumpkin Pie CS with Texture Plates Kit #4.  The carrot top was created by cutting two Old Olive banners in half length-wise and curling them around a paper piercing tool.  I adhered them with mini glue dots to the inside of the flaps so the flaps could still be folded under each other to close the box.  The bunny was stamped and clear embossed then punched with 1-3/8 circle punch then layers on Peach Parfait DSP from the Hostess level 1 paper pack.  For the larger scallop I used Old Olive Polka dot DSP from Jolly Holiday.

Bunny and Carrot Box

Click image to enlarge

I hope you’re inspired to create hand made Easter favors and gifts.  Hop on over to Hand Stamped Sentiments to be inspired by our design team.

All Stampin’ Up! supplies below may be ordered from my website or email me to place your order.

All products are Stampin’ Up! unless noted.

Bunny Box

Template: click here for template

Size: approx. size 2-3/16″ H x 2-5/16″ W

Stamps: Chocolate Bunny Digital Stamp, Sentiment Text printed using My Digital Studio

Paper: Digital Download Spring Vintage, CS:  Rose Red, Photo Paper

Ink: Digital ink:  Rose Red, Early Espresso

Accessories: Basic Pearls, 1/4 ” Very Vanilla Grosgrain, Dotted Scallop Ribbon border punch, Oval Punch, Scallop Oval Punch

Technique: Stamping, Digital crafting

Petal Cone Carrot Box

Size: approx. size 4″ H x 2-3/4″ W

Stamps: Forest Friends, Sentiment printed using My Digital Studio

Paper: Digital Download Spring Vintage, CS: Pumpkin Pie, Very Vanilla, Old Olive, DSP: Jolly Holiday Old Olive dotted paper, Peach Parfait Hostess level 1 paper pack

Ink: Digital ink:  Early Espresso, Versamark, Early Espresso

Accessories: Basic Pearls, 1-3/8 circle punch, Scallop Oval punch, 2-3/8 Scallop Oval Punch, Big Shot, Petal Cone die, non-SU satin ribbon

Technique: Stamping, Digital crafting, Die cutting

I’m in the PINK!

This week at Hand Stamped Sentiments we have a fun color splash challenge with PINK!  Create any project with all the shades of pink.

Pinkalicious challenge 62-001

Since pink is such a feminine color I decided to create a teapot shaped card and candle for mother’s day.  The template for the teapot can be found here.   I enjoyed creating this project with the help of My Digital Studio.  I printed the DSP from the Spring Vintage DSP download.  To embellish the teapot I used the Blossom Petal punch and coordinating stamp set.  The butterflies were die cut from the Beautiful Wings Embosslits.  Take the challenge and show us your pink-a-licious projects.

OLYMPUS DIGITAL CAMERA

OLYMPUS DIGITAL CAMERA

Teapot Card and Candle for Mom

Size: approx. size 7.75″ H x 6.5″ W

Stamps: Build a Blossom, All Holidays Digital Brush Set

Paper: Digital Download Spring Vintage, Rose Red CS, Pretty in Pink CS, Pear Pizzazz CS

Ink: Pear Pizzazz, Sponged edges with Pretty in Pink

Accessories: Basic Rhinestones, Very Vanilla Satin ribbon, Beautiful Wings Embosslits,  Blossom Petal Punch, 1/2 circle punch, Big Shot, Decorative Label Digital Punch

Technique: Stamping, Die Cutting

Candle:  purchased from craft store and wrapped in DSP, embellished with ribbon, flowers cut-out from DSP, Butterflies, Basic rhinestones

Shadow Box Card for Mom

This week’s challenge at Hand Stamped Sentiments is a shadow box technique challenge.  There are a couple of ways to create these cards and the possibilities are endless for both.  See below for video tutorials on both shadow box techniques.

I wanted to create a card that would open like a gift so I went with the second technique.  I had a great time making my mother’s day card.  I have a printer that will print to the edge of the paper so I printed my DSP using My Digital Studio.  I used the Elegant Soiree digital DSP and printed on both sides of the paper.  I did use the rubber stamp set Nature Walk for the images and used a blender pen with Marina Mist classic ink pad to color the flowers on the image.  The layers for the inside of my card were created with Sizzix dies and SU punches.  The sentiments are from the retired stamp sets Vintage Labels and Fancy Flexible Phrases.  Hop on over and get inspired by our very talented design team and show us your shadow box technique.


click image to enlarge

Shadow Box Video tutorials:

htp://www.splitcoaststampers.com/resources/tutorials/shadow_box_card/

http://www.stampingvideos.com/2008/12/i-call-this-a-pull-out-shadow-box-card—-this-is-a-really-unique-card-to-give-someone-especially-at-christmas-as-you-ca.html

All Stampin’ Up! supplies below may be ordered from my website or email me to place your order.

All products are Stampin’ Up! unless noted.

Shadow Box Card for Mom

Video Tutorial: Click here for video tutorial.

Size: approx. size 4.25″ H x 4.25″ W

Stamps: Nature Walk, retired Sale-A-Bration Vintage Labels, retired Fancy Flexible Phrases

Paper: Elegant Soirée Designer Series Paper – Digital Download, CS:  Whisper White, Marina Mist, Crumb Cake, Early Espresso

Ink: Early Espresso, Marina Mist

Accessories: Basic Pearls, Scallop Circle Punch, 1″ Circle Punch, Scallop Trim Border Punch, 2-1/2 Circle Punch, 2-3/8 Scallop Punch, Decorative Label Punch, Word Punch, Big Shot, Sizzlits Scribbles Swirls die, Circles Scallop #2 die, Sticky tape, Mini Glue Dots, Dimensionals

Technique: Stamping, Die Cutting

Blooming Blossom Birdhouse

With spring finally here Hand Stamped Sentiments has a Blooming Blossoms Challenge.  Make any project with flowers.  Now how can you pass this up!  There are so many possibilities and endless ideas for this challenge.  I moved my craft area to a room in my house where I have a window and I can see and hear birds chirping.  It’s such a wonderful sound.  Recently I had a cardinal right outside my window.  I happen to love these birds with their bright colored red feathers. You can’t miss them.  This week my project is celebrating flowers and Cardinals.

I wanted to use bright happy colors so I went with Stampin’ Up! In Colors – Pear Pizzazz, Peach Parfait, Blushing Bride and Poppy Parade.  Love, Love, Love these colors.  At first I wasn’t sure I liked them together but as I was creating my project it all came together.  My birdhouse card features a large Blushing Bride flower punched with the Blossoms Petal Punch.  I also used the retired Trio Punch for the small flowers.  I was sad to see this punch retire but a good substitute is the flower punch from the Itty Bitty Shapes Punch Pack.  I also used the Fancy Flower Punch to frame the opening of the birdhouse.  For the branch and the Cardinal I used the Two-Step Bird Punch.

I’ve seen the Cardinal on many blogs so I made mine with the Two-Step Bird Punch.  I punched two wings and used one for the crest and colored the face with a Black Stampin’ Write Marker, sponged the edges for depth and added a Basic Clear Rhinestone for the eye.

click image to enlarge

I hope you’re inspired to join us on Hand Stamped Sentiments.  We’d love to see your Blooming Blossom projects.

All Stampin’ Up! supplies below may be ordered from my website or email me to place your order.

All products are Stampin’ Up! unless noted.

Birdhouse Card

Birdhouse Template: Click here to obtain birdhouse pattern.  I did a scalloped roof instead of the roof offered with the pattern,.

Size: approx. size 4.25″ H x 5.50″ W

Stamps: Tiny Tags, With All My Heart

Paper: CS: Peach Parfait, Pear Pizzazz, Poppy Parade, Blushing Bride; DSP:  In Color Hostess Level 1 Paper Pack

Ink: Poppy Parade, Chocolate Chip

Accessories: Basic Rhinestones, Blossom Petal Punch, retired Trio Punch, Scallop Border Punch, Two-Step Bird Punch, Jewelry Tag Medium, Fancy Flower Punch, 1″ Circle Punch

Technique: Stamping and Punch Art

Inspired by Nature

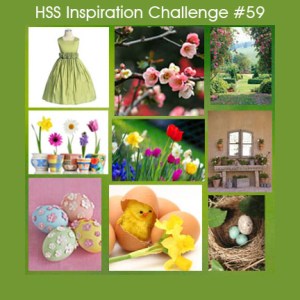
My card this week is inspired by Hand Stamped Sentiments inspirational challenge.  The photo below has so many wonderful images.  My project for this week is dedicated to Minnie Cieslak , Anne Marie Hile and Amy Lazzell.  These wonderful SU demos took time out of their day this past Saturday to come to my workshop.  They were great support in helping my guests with their make ‘n takes and providing lots of tips and ideas.  It was a fun and inspirational afternoon.  I’m so lucky to have them as friends and also as fellow design team members.  So hop on over to HHS and be inspired and also take a look at the wonderful inspiration provided by the design team.

I created this hybrid card and round box with My Digital Studio.  I used the digital Botanical Gazette DSP and the digital Nature Walk stamp set.  I love how easy it is to create beautiful cards.   I also love that almost every Tuesday there are new downloads.  Tuesdays now have become a favorite day.

click image to enlarge

inside of card - click image to enlarge

All Stampin’ Up! supplies below may be ordered from my website or email me to place your order.

All products are Stampin’ Up! unless noted.

Nature Walk card

Size: 4.25″ H x 5.50″ W

Stamps: Digital stamp set – Nature Stamp Brush Set, Friends 24/7 Brush Set

Paper: CS: Very Vanilla, Digital Botanical Gazette

Ink: Inkjet printer

Accessories: Victoria crochet trim, basic pearls

Technique: Digital crafting

Nature Walk box

Template: The template for the round box was obtained from czPaperCrafts

Size: 2.75″ H x 3.00″ W

Paper: CS: Very Vanilla, Digital Botanical Gazette

Ink: Inkjet printer

Accessories: Victoria crochet trim, basic pearls, Eyelet border punch

Technique: Digital crafting