

• my photo

    Click photo for About Me

  • Enter your email address to subscribe to this blog and receive notifications of new posts by email.

    Join 1,190 other subscribers
  • Pinterest

    Follow Me on Pinterest
  • Amazing Deals

    Click image for Amazing Deals!

  • Share this blog

    Bookmark and Share
  • Archives

  • Categories

  • Recent Posts

  • Blog Stats

    • 466,983 hits
  • Meta

  • Disclaimer

    All content found at Stampin' by Genny is the sole responsibility of Genevieve Valdes, a Stampin’ Up! Independent Demonstrator. Stampin’ Up! does not endorse, edit, or otherwise contribute to this website.

Hand Stamped Sentiments – Sketch Challenge

This week at Hand Stamped Sentiments we have a sketch challenge.  This sketch challenge comes to us from the April issue of the Success magazine.  This magazine is one of the freebies you receive each month as a Stampin’ Up! demonstrator.  What a fun sketch!
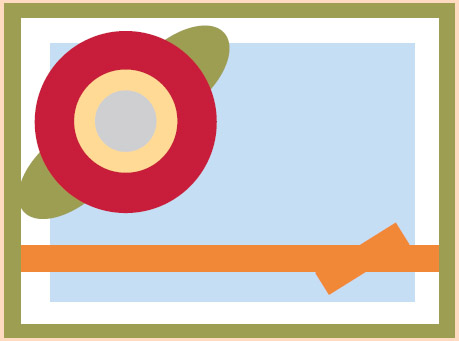
found in the April issue of Stampin' Up!'s Success magazine

Here is my project.
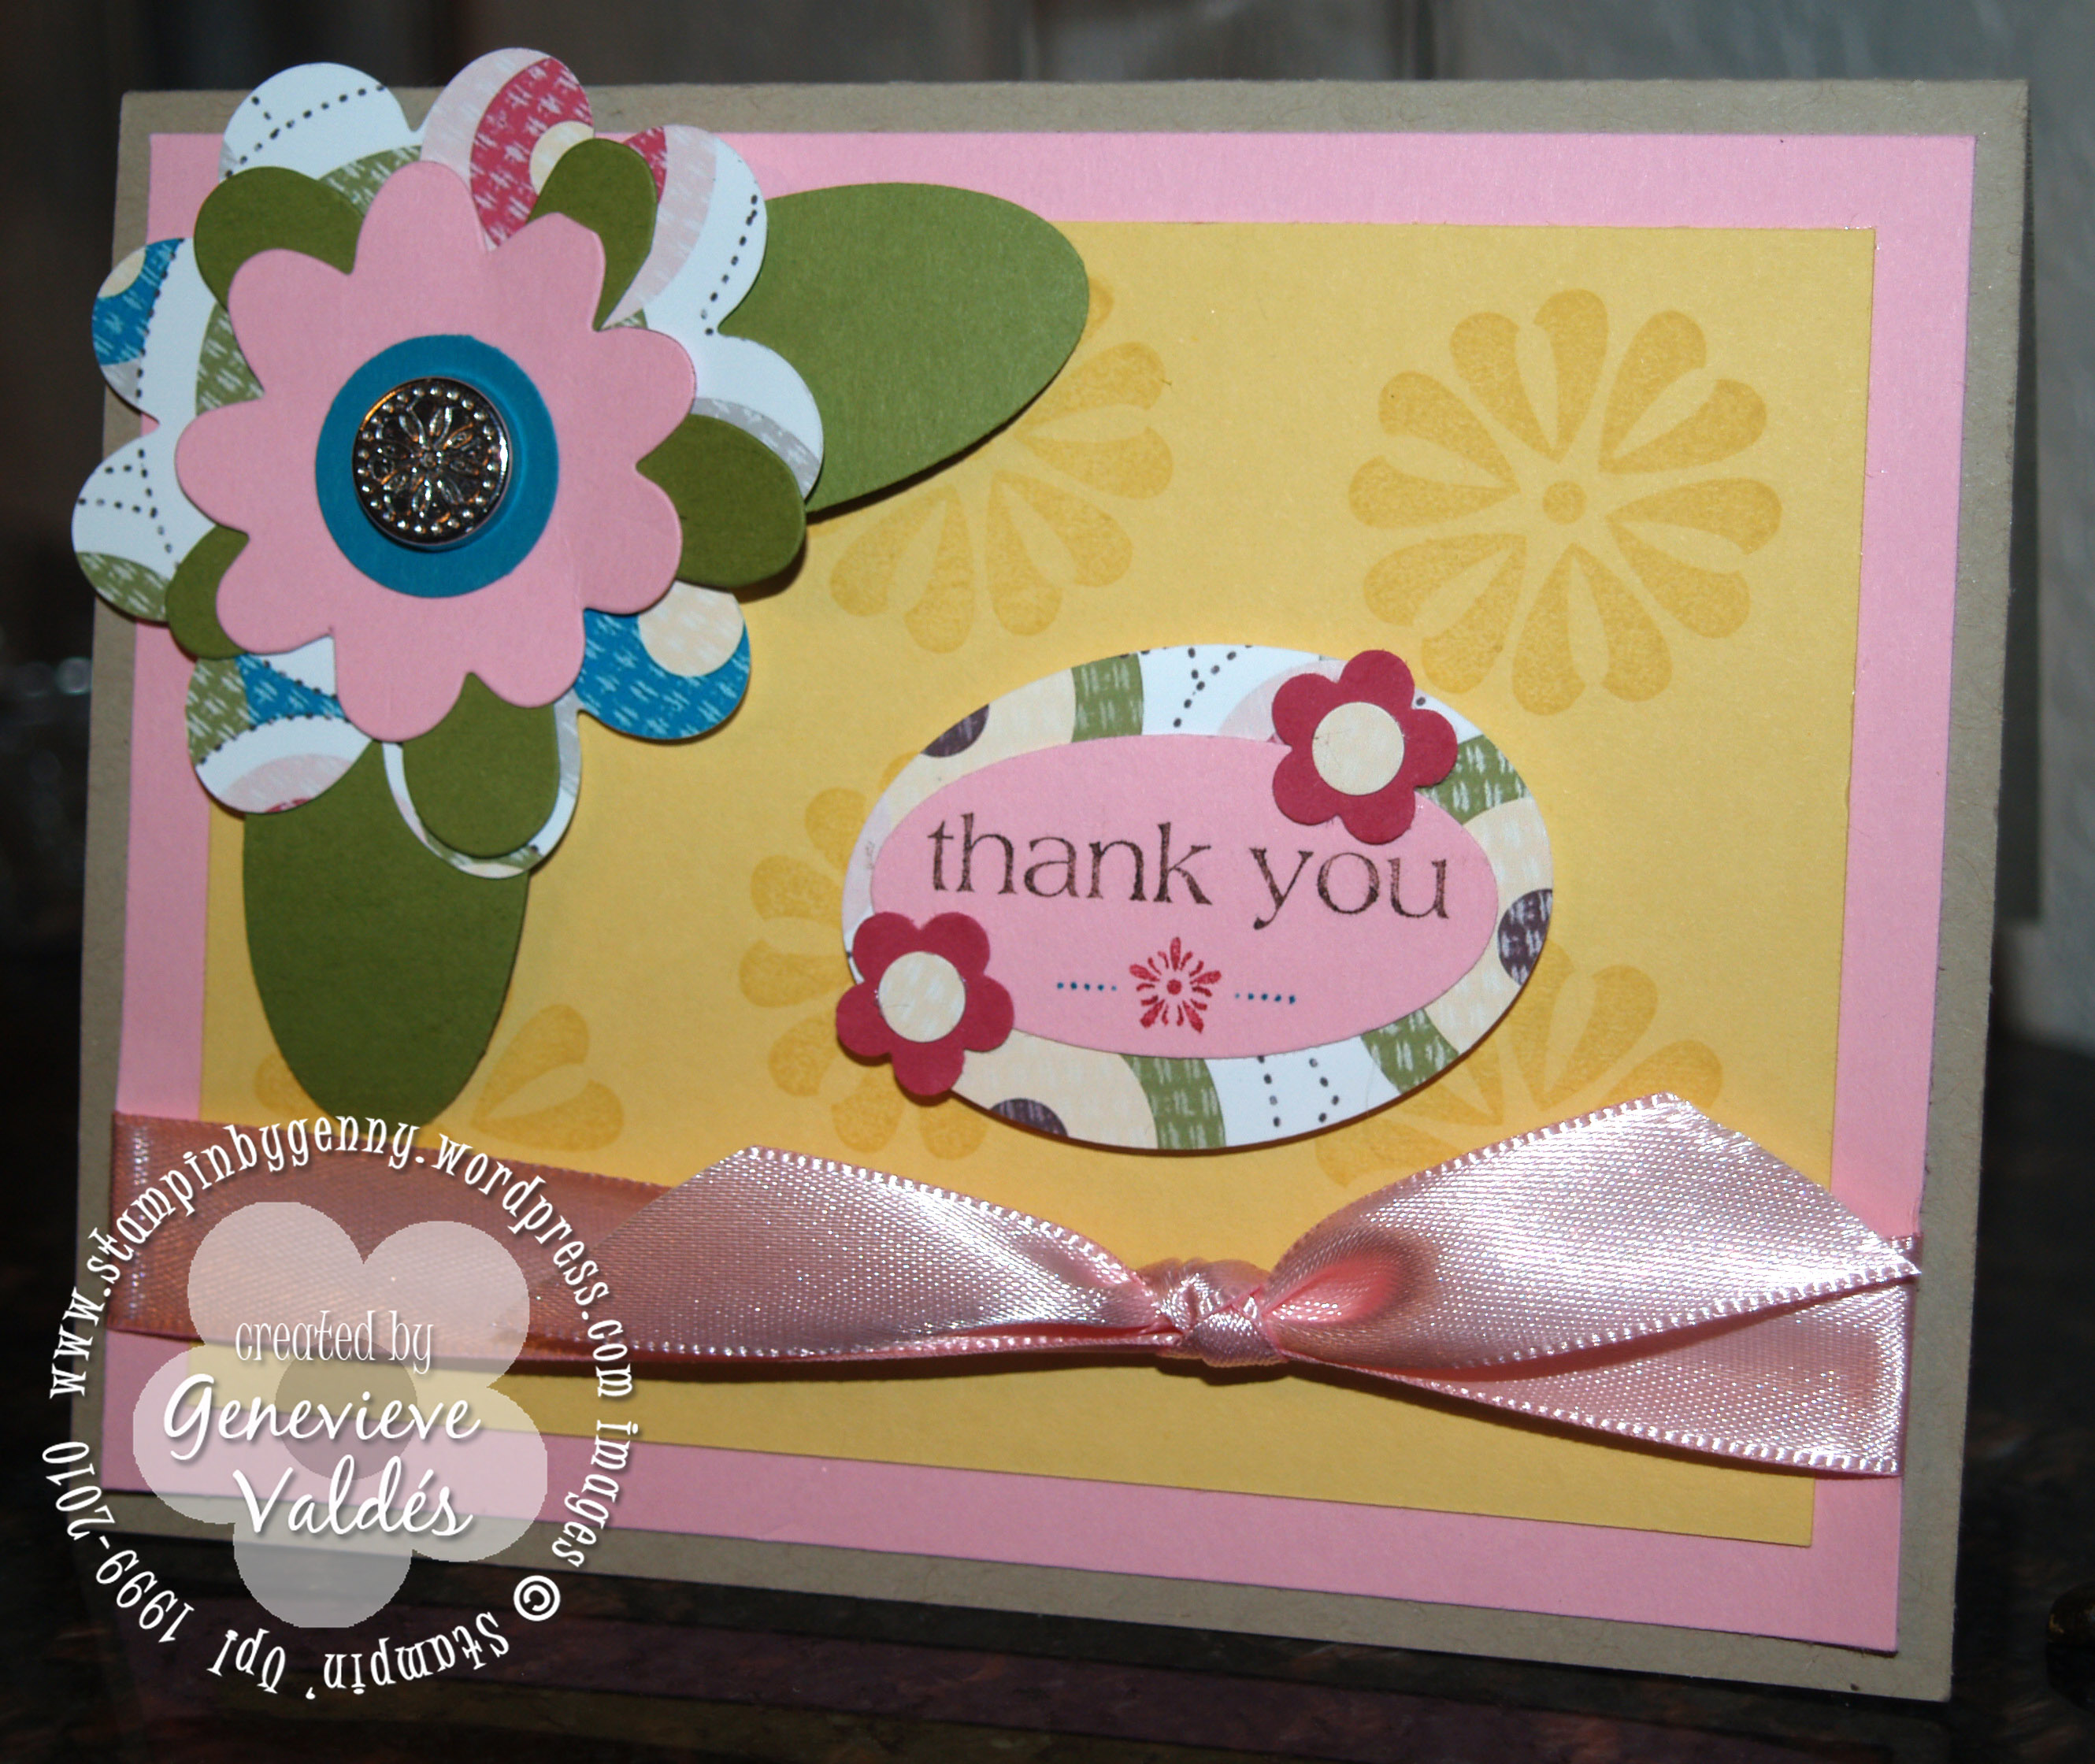
Sketch Challenge Thank You Card

click image to enlarge

All Stampin’ Up! supplies below may be ordered from my website or email me to place your order.

Project information:

Finish card size:  4.25″ H x 5.5″ W

The flower was made with the Flower Layers #3 Originals Die, Build A Flower Bigz Die and the Big Shot using the patterned paper, Old Olive and Pretty in Pink CS.  The center in Taken with Teal CS was punched using SU 3/4″ circle punch.  The flower is held together with a silver brad from the Hodgepodge kit.  The leaves were punched with the large oval punch then curled with the edge of a pair of scissors.

Stamped the flower background with So Saffron classic ink on So Saffron CS layer.

The sentiment stamp was inked with Regal Rose, Chocolate Chip, Taken with Teal markers then stamped on Pretty in Pink CS then punched with the large oval punch.  The Sweet Pea DSP oval was punched with the wide oval punch.  The outside wide oval is askew.  The small flowers were punched from Rose Red CS with the Trio flower punch.  The centers were punched from the lighter color on the DSP with a regular hole punch.  The sentiment was adhered with dimensionals.

Before adhering all the layers to the Kraft card base the Pretty in Pink satin ribbon was adhered.

All products are Stampin’ Up! unless noted.

Sketch Challenge 8 – Thank you card

Stamp Sets:  With All My Heart

Paper:  Kraft Brown, Pretty in Pink, So Saffron, Old Olive, Rose Red, Sweat Pea DSP printed from My Digital Studio on photo paper

Ink:  So Saffron Classic Ink, Chocolate Chip marker, Regal Rose marker, Taken with Teal marker

Accessories:  Wide Oval punch, Large Oval punch, Trio Flower punch, 3/4″ circle punch, Flower Layers #3 Originals Die, Build A Flower Bigz Die, Big Shot, regular hole punch, Flower brads from Silver Hodgepodge Hardware kit, Pretty in Pink satin ribbon

Techniques: Stamping

Hand Stamped Sentiments – Faux Metal Technique Challenge

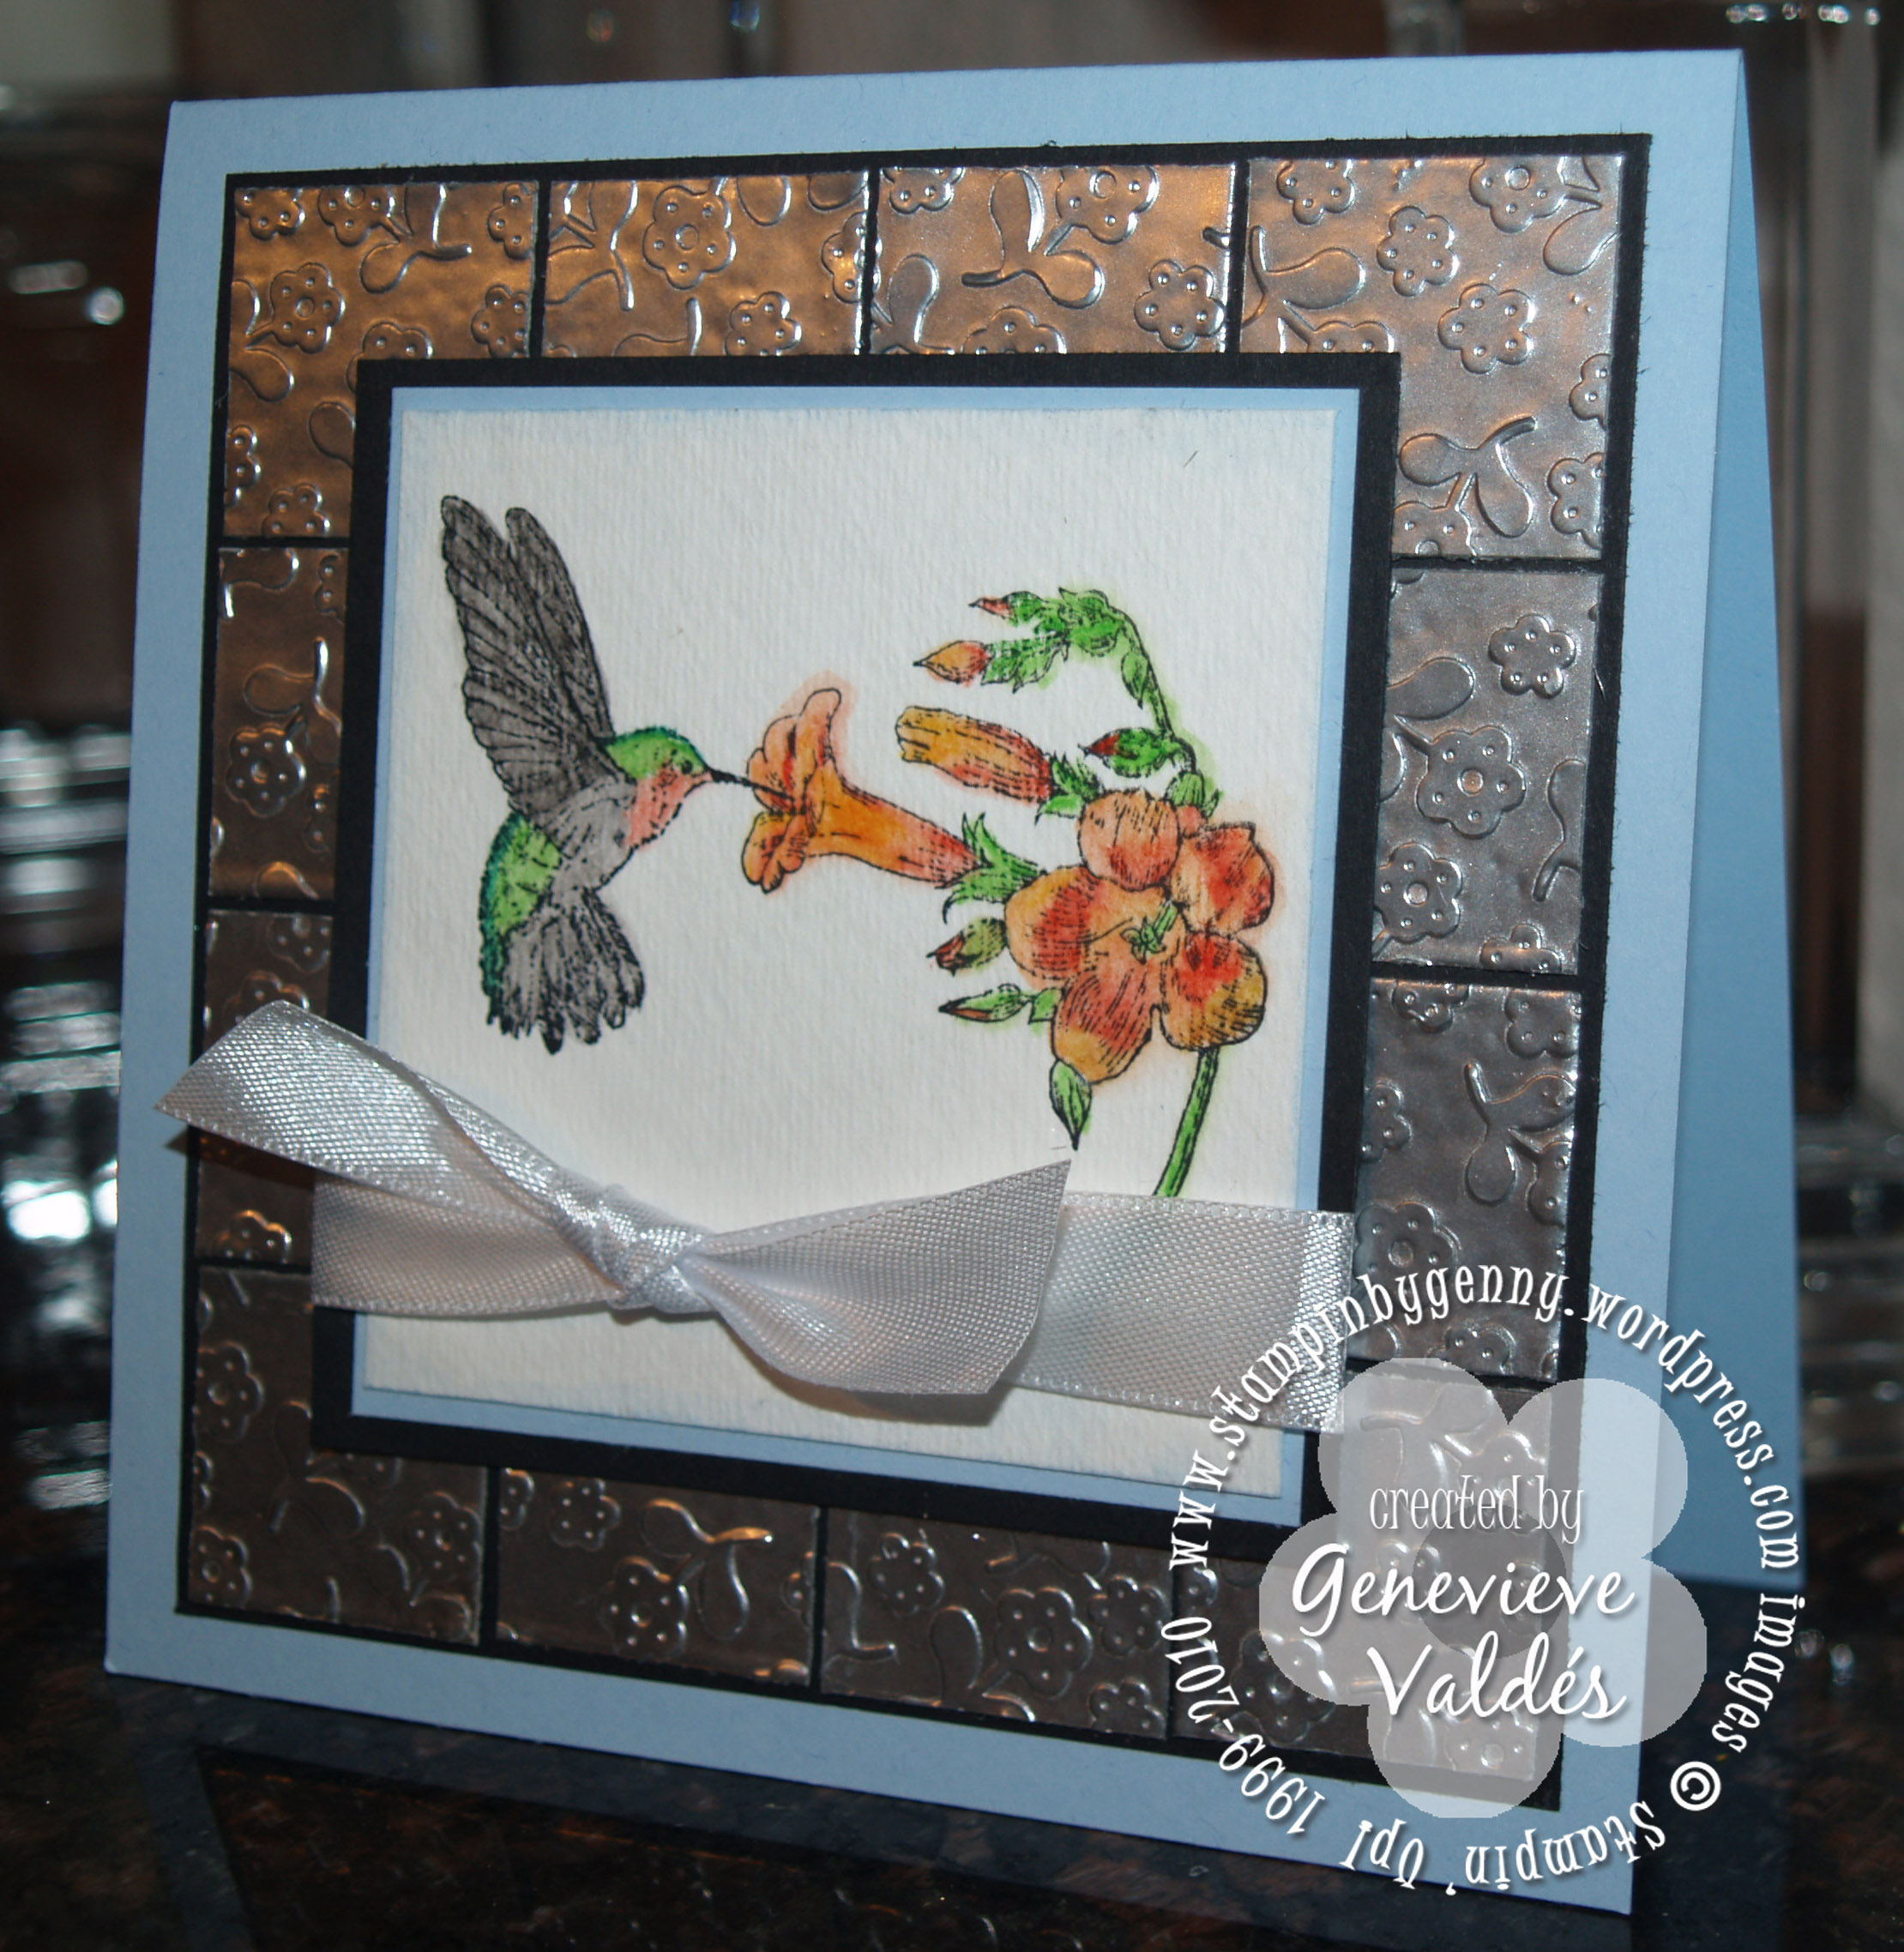
This week at Hand Stamped Sentiments we have a faux metal technique challenge.  Sounds complicated but it’s not.   I cased the idea for my card from Diana Gibbs.  I like the idea of the faux metal tiles because it looks like a tin ceiling.  This technique is a bit different from the usual faux metal technique in that instead of using a stamped image I used an embossing folder with the faux metal squares and put it through my Big Shot.  Super easy!

Faux metal technique hummingbird card

click image to enlarge

All Stampin’ Up! supplies below may be ordered from my website or email me to place your order.

Project info:

To make the faux metal tiles I inked a 3” x 10” piece of Going Grey with the Versamark then put silver embossing powder, removed excess then used the heat tool to set.  I repeated this procedure over the first layer of silver embossing.  Cut my tiles to 1-1/8”.  Put the faux metal squares in the embossing folder then put it through my Big Shot.  Adhered the tiles with SNAIL to Basic Black layer.

Stamped my hummingbird image with black StayzOn then colored with watercolor pencils.  Adhered this layer to the Bashful Blue layer then to the Basic Black layer.  Adhered ribbon to this layer.  Adhered these layers to the faux metal background.  Adhered to the Bashful Blue card base.

Faux Metal Hummingbird card

All products are Stampin’ Up! unless noted.

Size:  finished card size 5-1/4″ x 5-1/4″

Stamp Sets:  Spring Song

Paper: Bashful Blue, Basic Black, Going Gray, Watercolor paper

Ink:  VersaMark, Black StayzOn ink, Watercolor pencils, Blender pen

Accessories:  Silver embossing powder, Heat tool, non-SU Flowers embossing folder, Big Shot, Whisper White Satin ribbon

Techniques: Stamping, Faux metal technique

Hand Stamped Sentiments – Inspiration Challenge

This week at Hand Stamped Sentiments we have an inspiration challenge – an outdoor room by Pottery Barn.  There are so many things in the photo that provide inspiration.  What stood out for me were the trees and all the green.  I created a card with a blooming branch and bird.  Spring is so close and one of my favorite things about it is the greenery and the flowers blooming.

Pottery Barn - Outdoor room

Hand Stamped Sentiments Inspiration Challenge

HSS Inspiration Challenge

click to enlarge

All Stampin’ Up! supplies below may be ordered from my website or email me to place your order.

Project info:

Stamps:  Tiny Tags, With All my heart

Paper:  SU CS Very Vanilla, Chocolate Chip, Old Olive

Ink:  SU So Saffron, Old Olive Classic Ink pads

Accessories:  SU Trio Flower punch, SU Two-Step Bird punch for leaves, bird clipart

Hand Stamped Sentiments Color Splash Challenge

This past Sunday the Olympics ended and to celebrate the athletes and the games over at Hand Stamped Sentiments we’re doing a color challenge with the graphic colors of these winter games – Bashful Blue, Not Quite Navy, Glorious Green, Green Galore, Brilliant Blue.

Hand Stamped Sentiments Color Splash Challenge

I’m really liking My Digital Studio software.  I was also inspired by the Olympic rings so I created the circles for this card with the software then punched them out with SU 1-3/8″ circle punch then embellished them.  The card I created for this challenge would be perfect for a birthday or graduation.

Celebrate card for Challenge #5

click to enlarge image

All Stampin’ Up! supplies below may be ordered from my website or email me to place your order.

Project info:

Stamps:  none; Circles were printed from My Digital Studio

Paper:  SU Card stock:  Bashful Blue, Whisper White

Ink:  none; Circles and stamp images were printed from My Digital Studio

Accessories:  SU Pretties Kit Star Brad, SU Silver Brad, SU Rhinestone Brad, Big Shot, Buttons #5 die, Stars #2 die, Trio Flower punch, Small heart punch, Two-Step Bird Punch, SU corner punch,  SU 1-3/8 circle punch, SU Perfect Polka Dots Texture Folder, SU Silver Cord, SU dimensionals

Hand Stamped Sentiments week 4 – Sketch Challenge

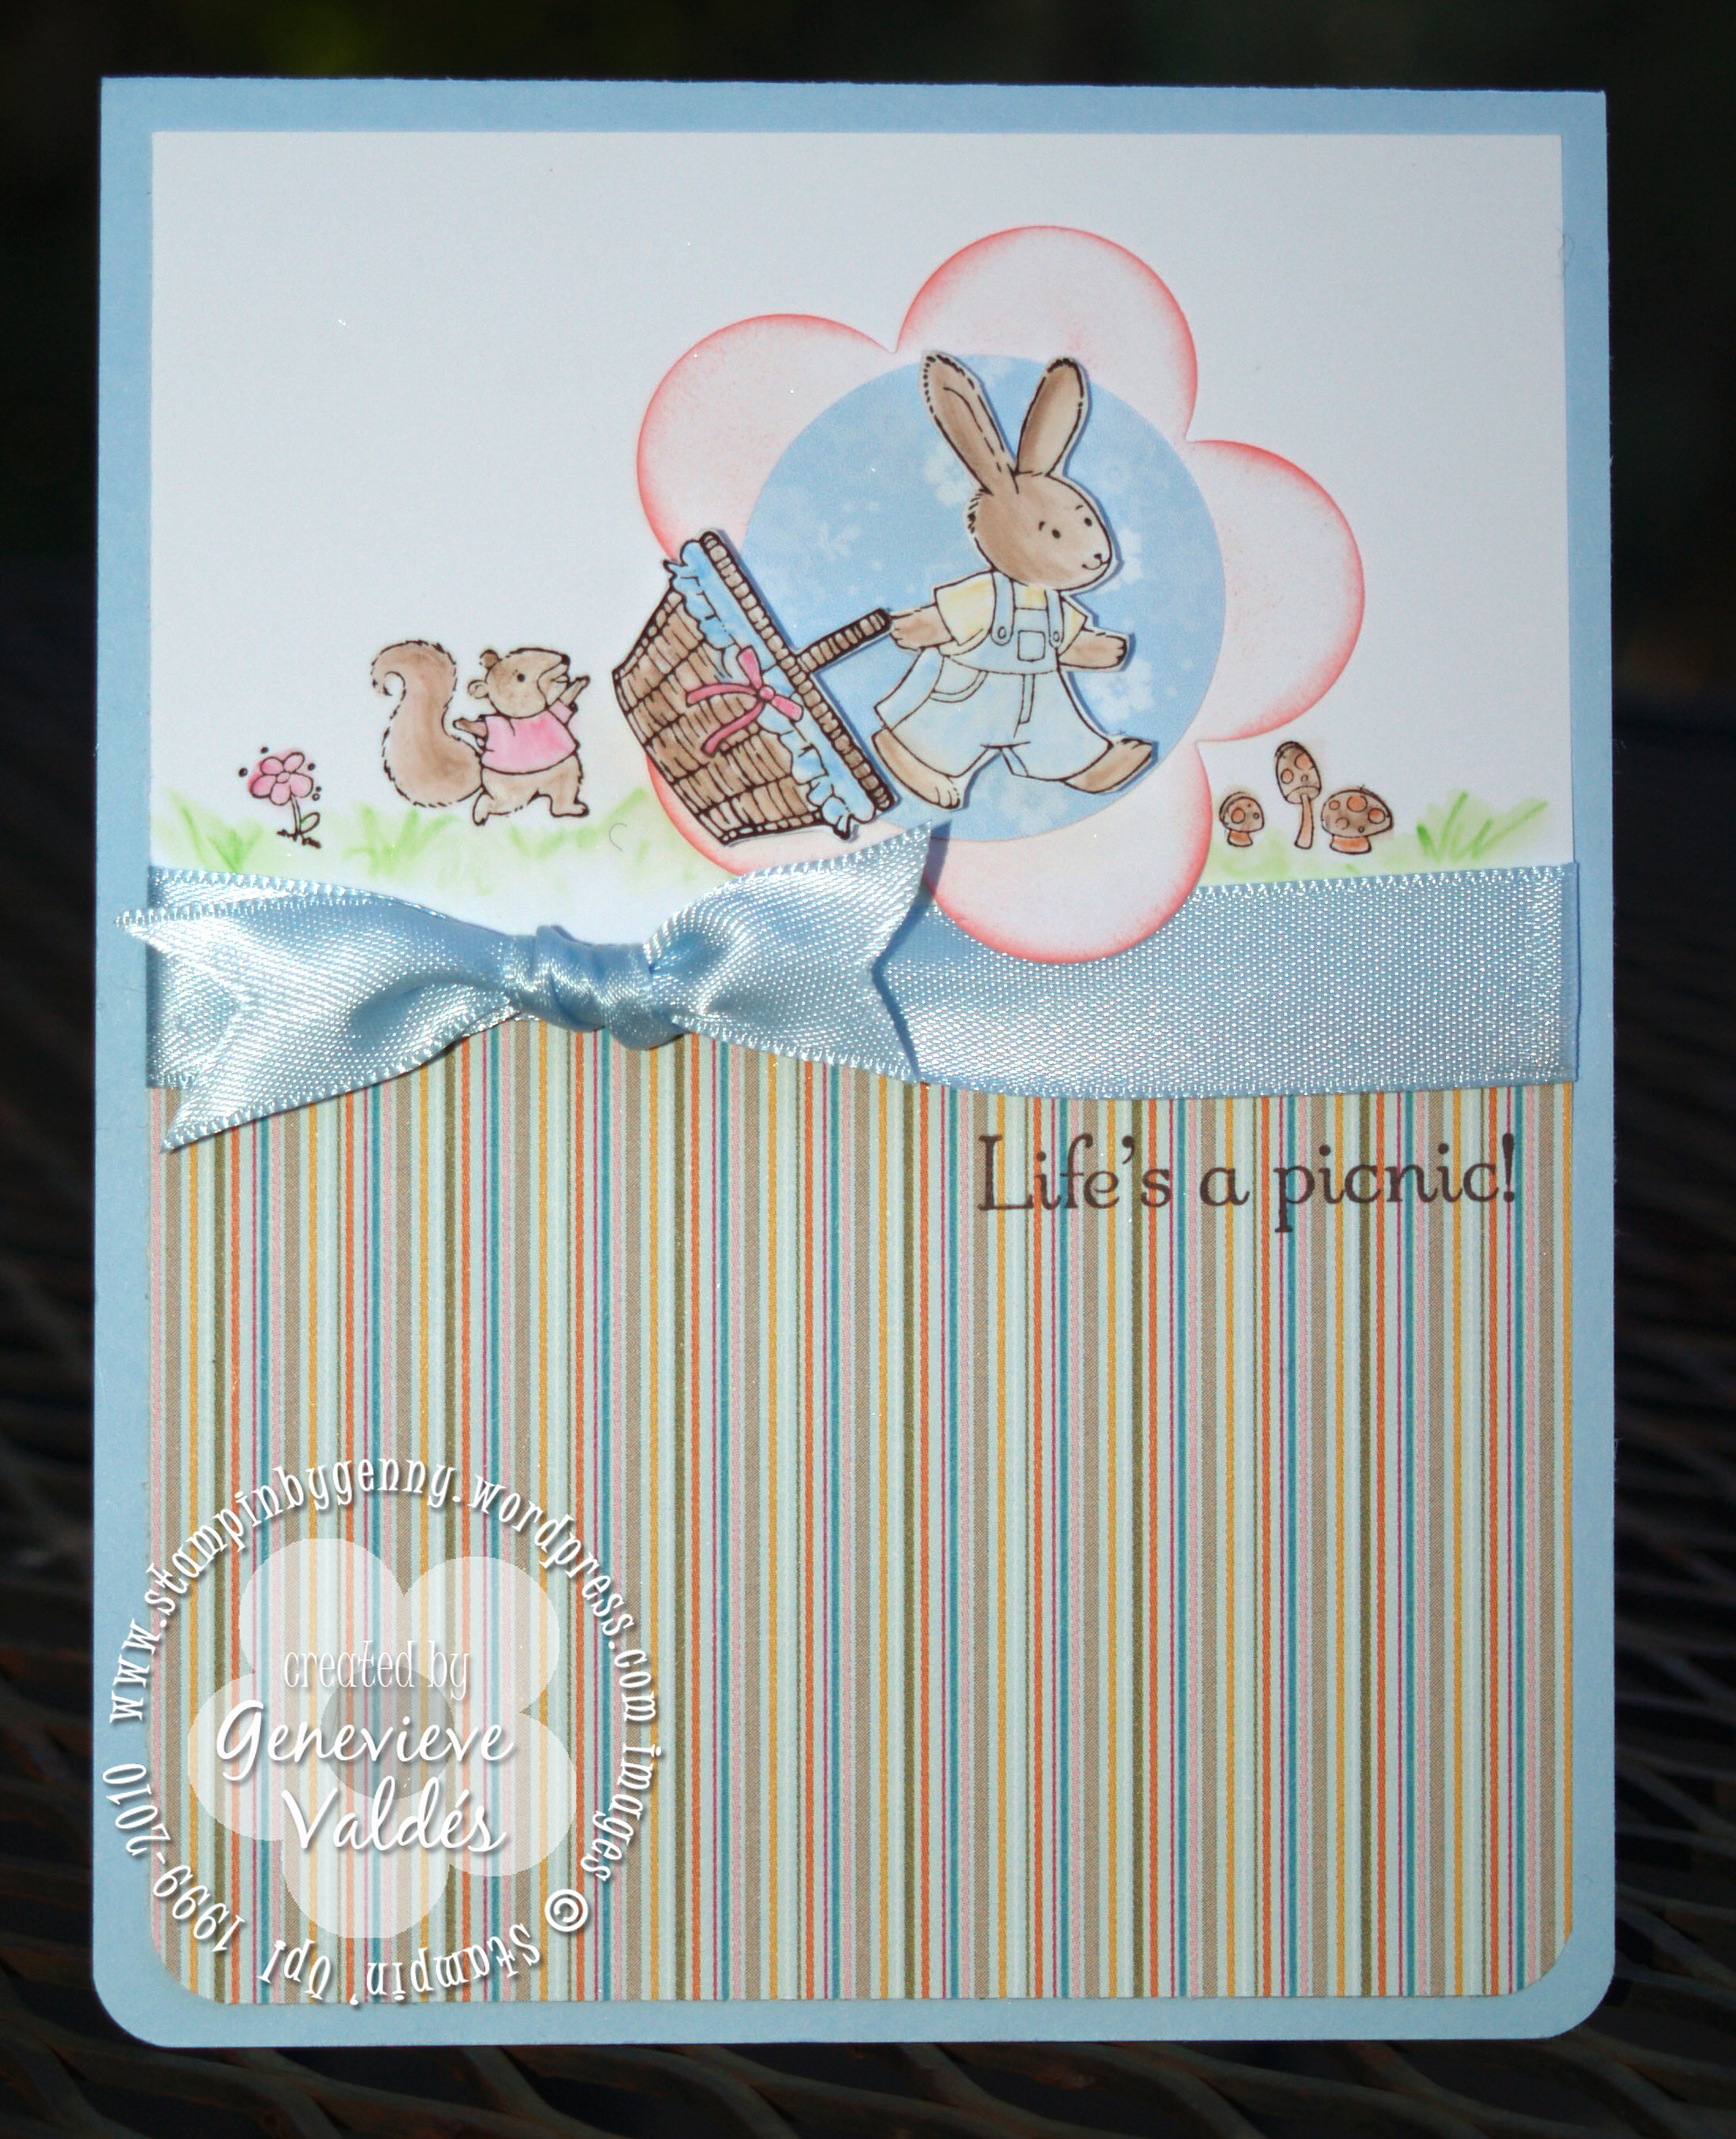
This week at HSS we’re having a sketch challenge.  This sketch is featured in the March Success, Stampin’ Up!’s magazine for demonstrators.  This magazine is one of the freebies you receive as a demonstrator which is a big plus because many projects are featured to give you ideas and it also provides tips on running your business from successful demonstrators.  Right now is a great time to become a demonstrator because the starter kit is discounted 15%.  See my blog entry Sale-a-bration for hobby stampers for more details.   Now on to the project.  As I mentioned we’re having a sketch challenge and I have been wanting to use my new stamp set Picnic Parade.  This stamp set is a hostess level 2 set and can only be earned by holding a workshop with sales of at least $300.  It’s a great value because it contains 15 stamps!  So versatile.  It can be used for so many occasions – Easter, Thank you, Get well, Hello, Welcome…  I had so much fun putting my project together.

First, I stamped the images on Whisper White card stock in Timber Brown StayzOn ink.  I used my SU water color pencils and blender pen to color in the images.  I wanted a soft spring look and the water color pencils provided just the look I was after.

I then used my paper snips to cut out the bunny and the basket.  I used the Extra Large Fancy Flower punch to punch the flower then sponged the edges with Pretty in Pink classic ink.  I also had a scrap from the Bashful Blue soft flower background I printed using My Digital Studio for my Pride and Prejudice card and used this for the center of my extra large Fancy Flower.

Before adhereing the top and bottom of my card to the base I adhered the top and bottom then placed my ribbon before adhering to the base.  I used SNAIL to adhere the large flower on the main image then adhered the bunny and the basket with dimensionals.  The bottom of the card is the  striped DSP from the Sale-a-bration Welcome Neighbor Paper Pad for the bottom of the card.  Stamped my sentiment in Timber Brown StayzOn ink so the browns would match.

That’s it.  Super easy and lots of fun!  I hope you’re inspired to start your spring projects.

sketch challenge 4

HSS sketch challenge week 4

Hand Stamped Sentiments challenge #4 - Sketch challenge

click to enlarge image

All Stampin’ Up! supplies below may be ordered from my website or email me to place your order.

Project info:

finished card:  4.25″ x 5.5″

Bashful Blue card base:  4.25″ x 5.5″

Whisper White top panel:  2.5″ x 4″

Stiped DSP bottom panel:  2.75″ x 4″

Stamps:  Picnic Parade (hostess level 2)

Paper:  SU card stock:  Bashful Blue, Whisper White, Sale-a-bration striped DSP from the Welcome Neighbor Paper Pad,

Ink:  Timber Brown StayzOn, Pretty in Pink Classic ink, SU water color pencils, Blender pens

Accessories:  SU punches:  Extra Large Fancy Flower punch, 1-3/8 circle; Bashful Blue satin ribbon, Dimensionals

Techniques:  Stamping, Water coloring

Hand Stamped Sentiments Technique Challenge – Resist Emboss

This week over at HSS we have a technique challenge – resist emboss.  It looks complicated but it is very easy.  My inspiration for my card this week came from Andy Warhol’s  work, Flowers.  I stamped the flower and cupcake images with Versamark on Whisper White CS then embossed the images with Stampin’ Emboss powder and set with SU heat tool.  I then used the Scallop Square punch to punch the images then sponged the color.  I used my Big Shot to texture the Melon Mambo background with the large dot Texturz Plate.  I used SU dimensionals to adhere the squares to the Melon Mambo background.  Next I adhered the Bermuda Bay background layer then adhered the Melon Mambo with the squares.  Then added the silver brads to the corners.  Very easy!  SCS has a tutorial for the resist emboss technique here.

Andy Warhol's Flowers

click to enlarge

All Stampin’ Up! supplies below may be ordered from my website or email me to place your order.

Project info

Happy Birthday card

Stamp Sets:  Out of the box (hostess level 1), Four Square

Paper: SU card stock:  Whisper White, Bermuda Bay, Melon Mambo

Ink:  SU Classic Ink –  Pumpkin Pie, Melon Mambo, Bermuda Bay, Versamark

Accessories:  SU silver brads, SU Scallop Square punch, SU Ticket Corner punch, SU Dimensionals, SU White Embossing powder, SU heat tool, Big Shot, SU Backgrounds 1 large dot texture plate

Techniques: stamping, sponging, resist embossing

Hand Stamped Sentiments Inspiration Challenge – Pride and Prejudice

This week over at HSS we are starting things off with an Inspiration Challenge from the Jane Austen book Pride and Prejudice. It’s sure to spark many ideas with so many themes throughout the book, (honesty, love, marriage, family), you will have no problem coming up with your creation.  Since Pride and Prejudice focuses on young ladies in search of husbands I chose to make a card for a bride-to-be.  Because I am big into fashion I tend to think about costumes of the period and the first thing I thought of were those wonderful dresses.  Very frilly and feminine with lace, organza and satin.    For my project I chose Whisper White to represent the upcoming wedding and Bashful Blue for luck.  I used the Final Press textured impressions embossing folder to create the white background then applied Bashful Blue SU pastel.  I love how it gives a hint of color.  I used My Digital studio to print the Soft Flower Bashful Blue background on Whisper White and made my own dress template and accessorized it with very feminine embellishments.  I had so much fun creating this card!  I can’t wait to see your creations.

Inspiration Challenge #2 -  Pride and Prejudice

Project info:

Happy For You card

For my dress template click here.

Stamp Sets:  retired Fancy Flexible Phrases

Paper: SU card stock:  Whisper White, Bashful Blue, printed Soft Flower Bashful Blue background from My Digital Studio on Whisper White

Ink:  SU Pastel Bashful Blue applied to the texture background, SU Marker Night Navy for sentiment

Accessories:  SU Hodgepodge Hardware oval, SU pearls from Pretties Kit, SU Organza Ribbon, SU Big Shot and SU Finial Press Textured Impression Folder

Techniques: stamping, digital crafting, dry embossing, paper crafting

New Creative Challenge blog! – Hand Stamped Sentiments

Looking for something new to do in paper crafting?  There’s a new place to go and play if you love creative challenges – Hand Stamped Sentiments!  Every week the designing team of Erin Gonzales, Shannon Eberhardt and me will post a new challenge for you to conquer.  Although we are dedicated to using Stampin’ Up! products in our creations, we want you to play no matter what your arsenal of supplies may consist of!

Winners will be awarded the Hand Stamped Sentiments (HSS) Top 5 Badge, to wear proudly on their blog.  If you don’t have a blog don’t worry.  You can post you’ve won on your public gallery.

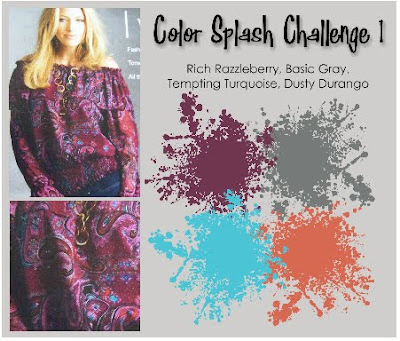
Our first challenge is a color splash challenge.

Color Splash challenge #1

Now on to the projects.

Spring Song bird card

Click image to enlarge

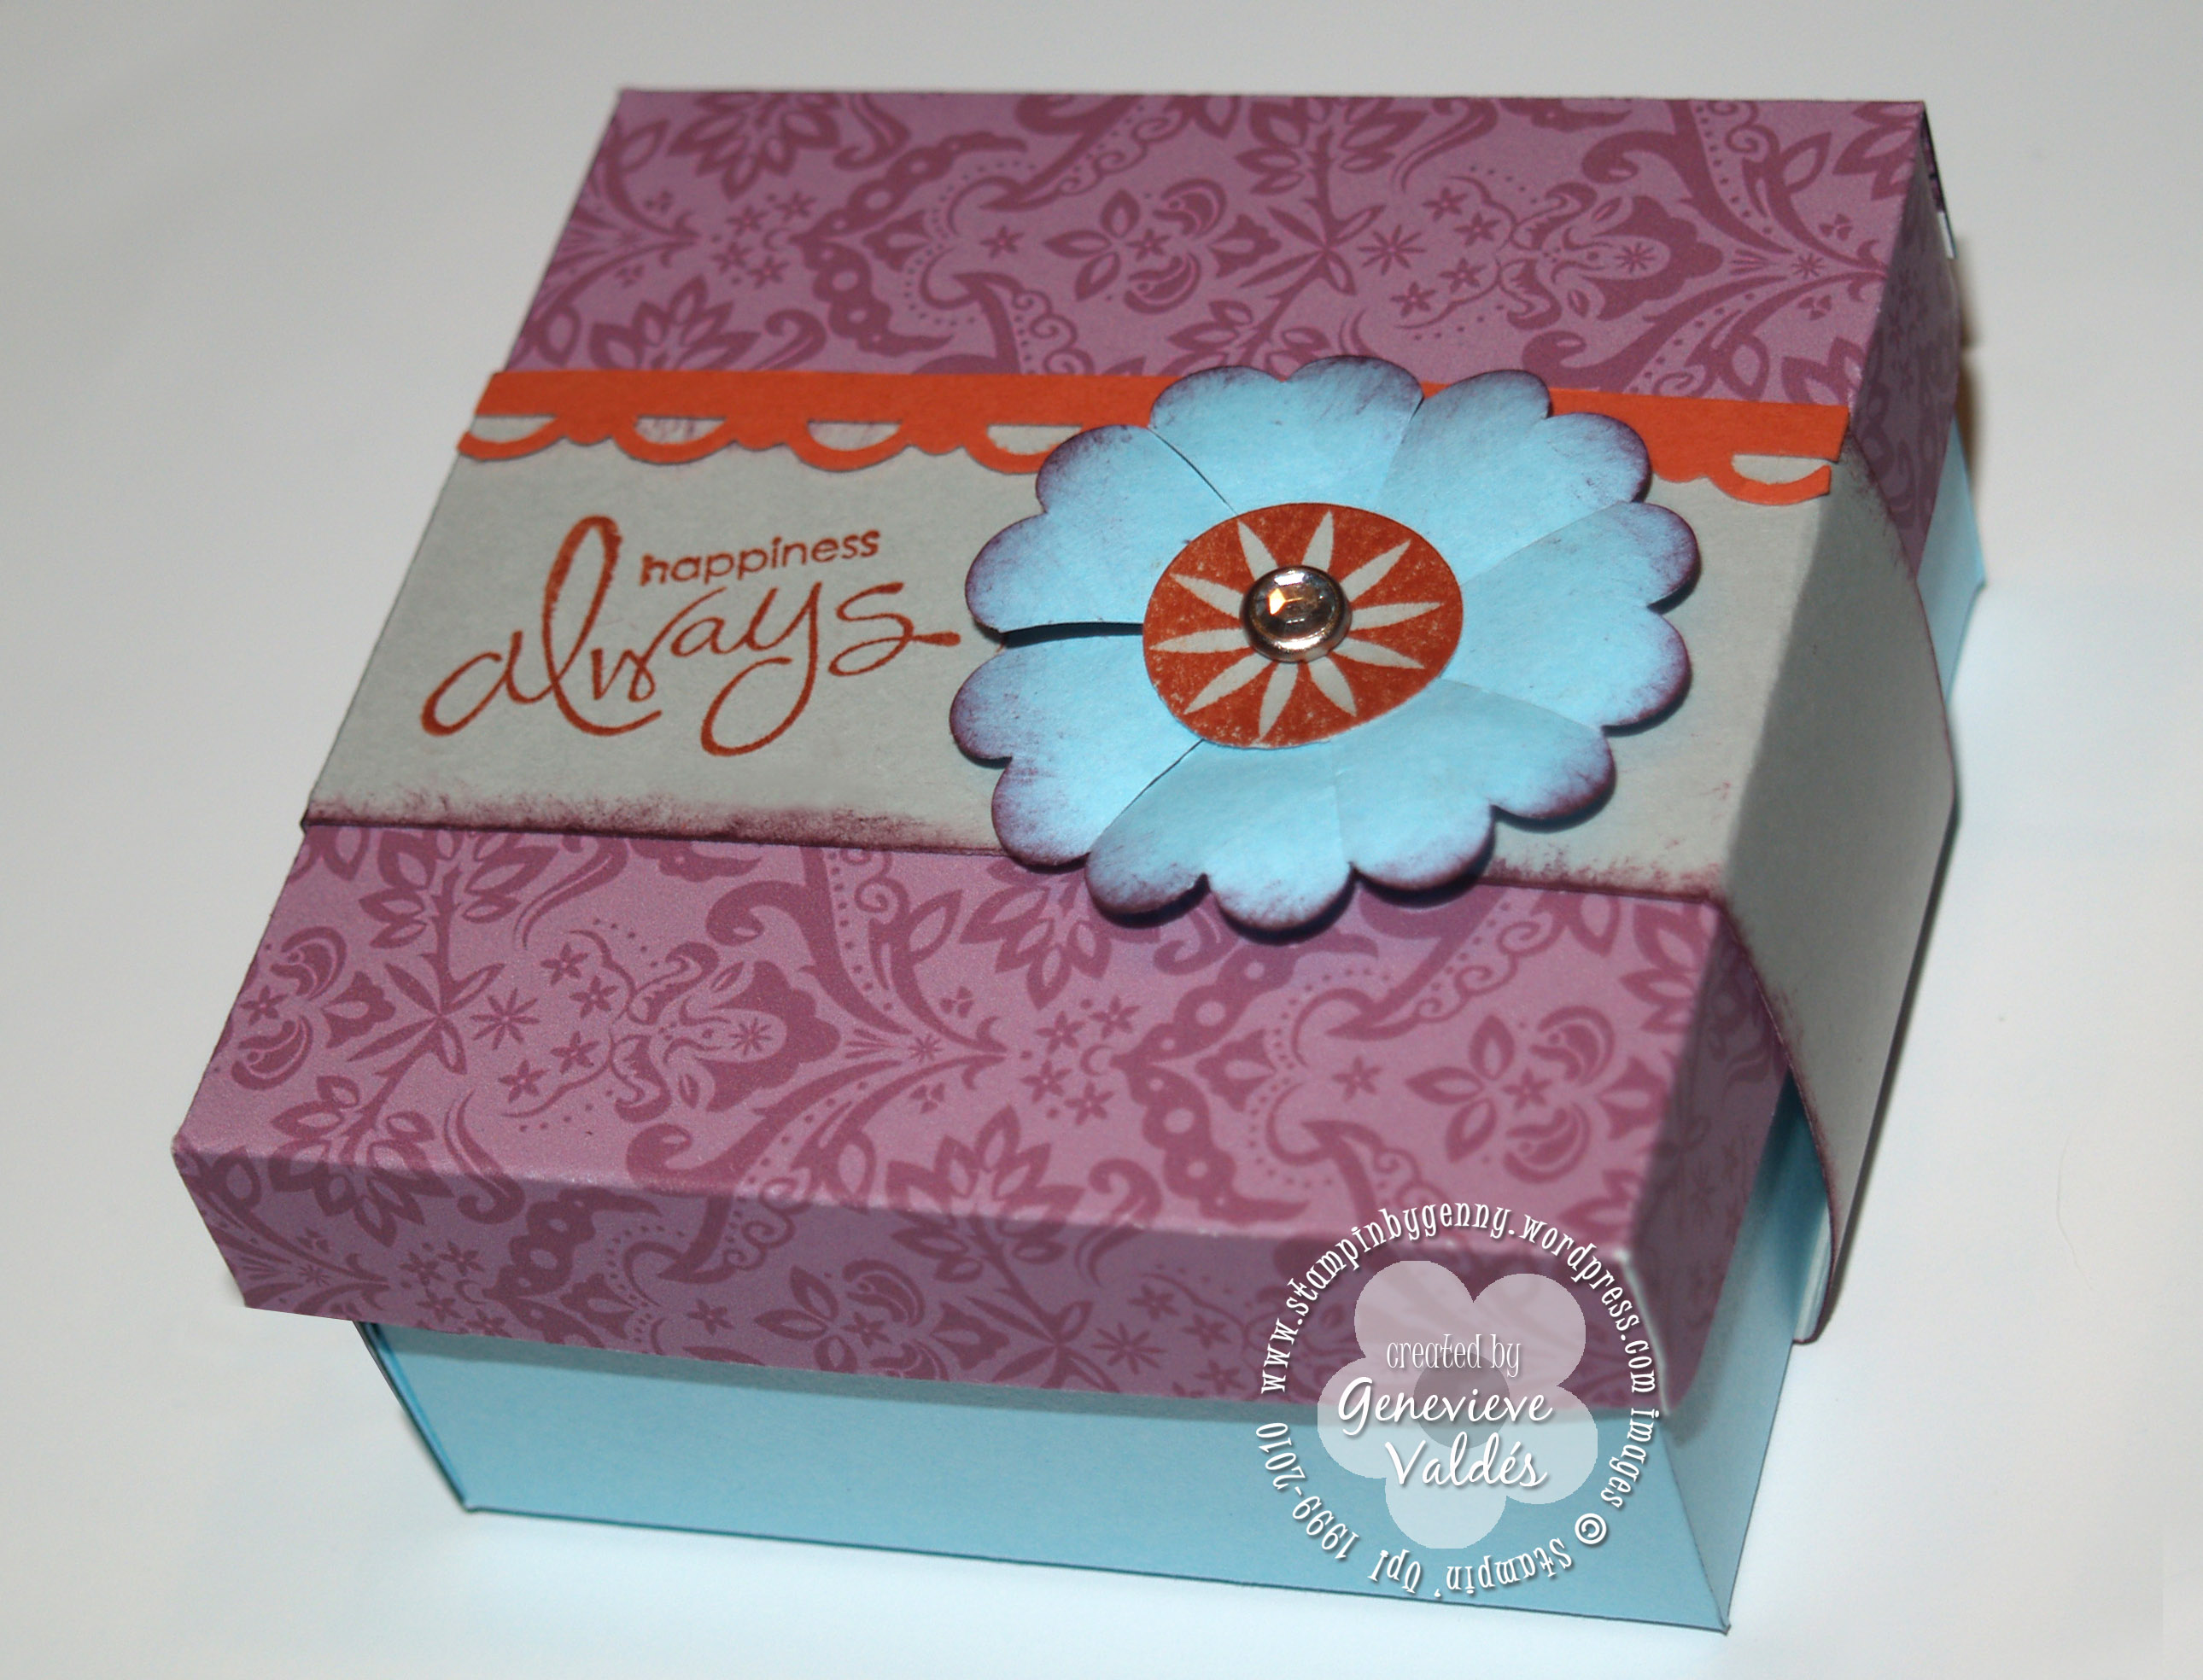
Happiness Always box

Click to enlarge

All SU products for these projects may be purchased on my online website or you may email me to place your order.

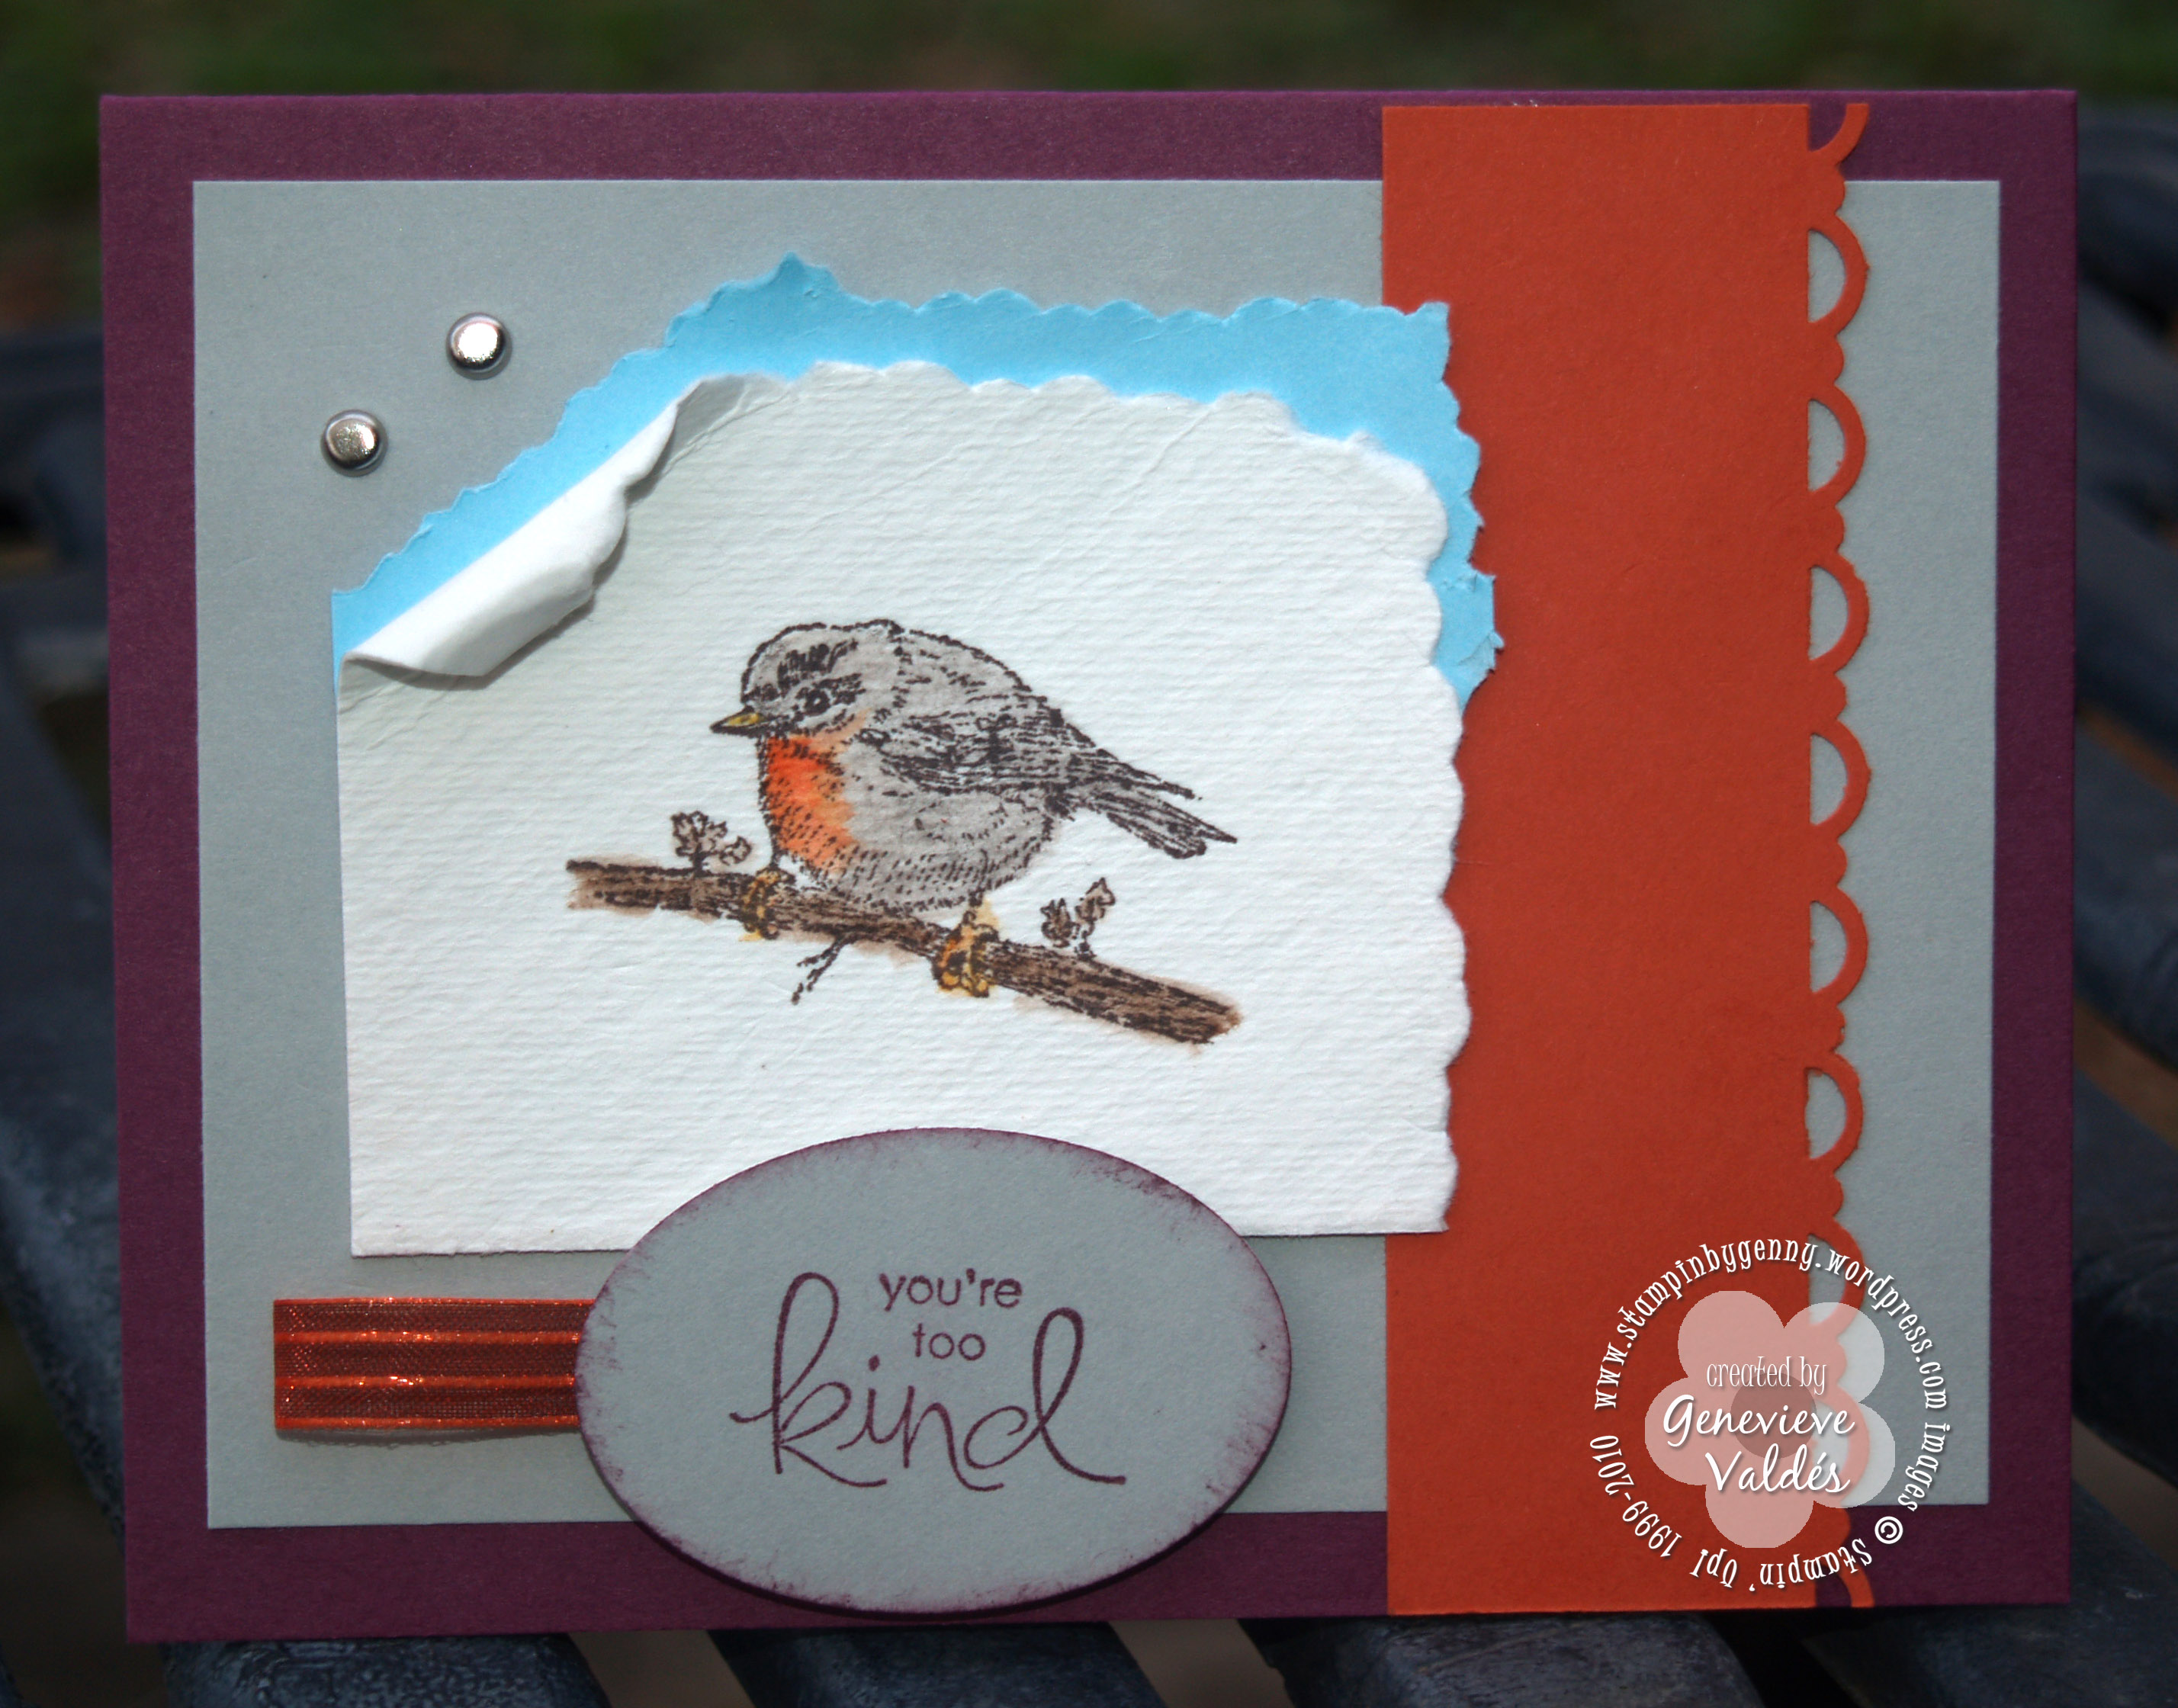
You’re too Kind card

I just received the Spring Song stamp set as a Sale-a-bration reward.  I just couldn’t wait to use it.  I love the little bird stamp and had to use the watercolor technique to color him.  I first stamped the image on SU watercolor paper with Stayzon Timber Brown and I used the Dusty Durango Classic ink and blender pen to color his chest then used the SU Basic Gray watercolor pencil and blender pen to color the rest of his body.  I used the Chocolate Chip and More Mustard watercolor pencils and blender pens to color in the branch and his claws.  Using SU’s watercolor pencils and blender pen is so much fun!  I used the SU the tearing edge to tear the edges of the watercolor paper and turquoise background paper then adhered these with SNAIL.  Before adhering the gray CS to the card base I punched two holes with my paper piercer for the SU silver brads then adhered the gray paper to Rich Razzleberry card base.

I used my new SAB Scallop Trim punch on the Dusty Durango CS and adhered this layer to the card then adhered the watercolor paper and turquoise CS layers to the gray CS.

Stamped my sentiment “you’re too Kind” with the Rich Razzleberry then punched it out with the SU Wide Oval punch.  I sponged the edges of the oval with Rich Razzzleberry ink.

Stamp Sets:  Spring Song, Whimsical Words from SAB brochure

Paper: SU card stock:  Rich Razzleberry, Dusty Durango, SU watercolor paper, non-SU grey and turquoise paper,

Ink:  Stayzon Timber Brown, SU Classic Ink pads – Dusty Durango, Rich Razzleberry, Chocolate Chip, SU watercolor pencils – Chocolate Chip, Basic Gray

Accessories:  SU Scallop Trim Punch from the SAB brochure, SU silver brads, SU wide oval punch, non – SU ribbon

Techniques: stamping, paper punching, watercoloring

Happiness Always Box

This little box is perfect for a gift or for yourself to store little treasures that make you happy.

I first made the box with these templates. Box top & Box bottom

I used SU’s My Digital Studio to print the Razzleberry Brocade print on SU Whisper White.  I then printed the box top template on the backside then cut it out.  I also printed the box bottom template on the turquoise paper then cut it out. I used SNAIL to construct the top and the bottom of the box.

The flower is punched out with the SU Scallop Circle punch.  I then sponged the edges with Rich Razzleberry ink then made a cut between every second scallop.  To get the petals to lift I placed the flower on top of my paper piercing mat.  You can also use a piece of foam.  You just need something pliable.  I made little circles all over the back side of my flower with the flat end of my paper piercer, not the sharp end.  There’s a really good video of  making this flower here.

I then stamped the center from the “Enjoy Every Moment” stamp set on the gray CS with Dusty Durango ink and used an SU clear rhinestone brad to attach the center to the Scallop flower.  Instead of ribbon I used a paper sleeve enclosure.  Then decorated the sleeve with the sentiment “Happiness Always” and Scallop flower.

Stamps:  Whimsical Words from SAB brochure, Enjoy Every Moment

Paper: Used my MDS to print out the Razzleberry Brocade print on SU Cardstock: Whisper White, Dusty Durango, non-SU gray and turquoise

Accessories:  SU rhinestone brad, SU Scallop Circle Punch, SU Scallop Trim Punch, ¾” circle punch, SU dimensionals

Techniques: paper punching, sponging, digital crafting