• my photo

    Click photo for About Me

  • Enter your email address to subscribe to this blog and receive notifications of new posts by email.

    Join 1,007 other subscribers
  • Pinterest

    Follow Me on Pinterest
  • Amazing Deals

    Click image for Amazing Deals!

  • Share this blog

    Bookmark and Share
  • Archives

  • Categories

  • Recent Posts

  • Blog Stats

    • 400,866 hits
  • Meta

  • Disclaimer

    All content found at Stampin' by Genny is the sole responsibility of Genevieve Valdes, a Stampin’ Up! Independent Demonstrator. Stampin’ Up! does not endorse, edit, or otherwise contribute to this website.

Owl Love You Valentine’s Day Card

For this next Hand Stamped Sentiments challenge we have an inspiration challenge.  See the bird photo below and see what your inspired to create.  I created a Valentine’s day card with the Owl builder punch.

stampin up owl valentine's day card
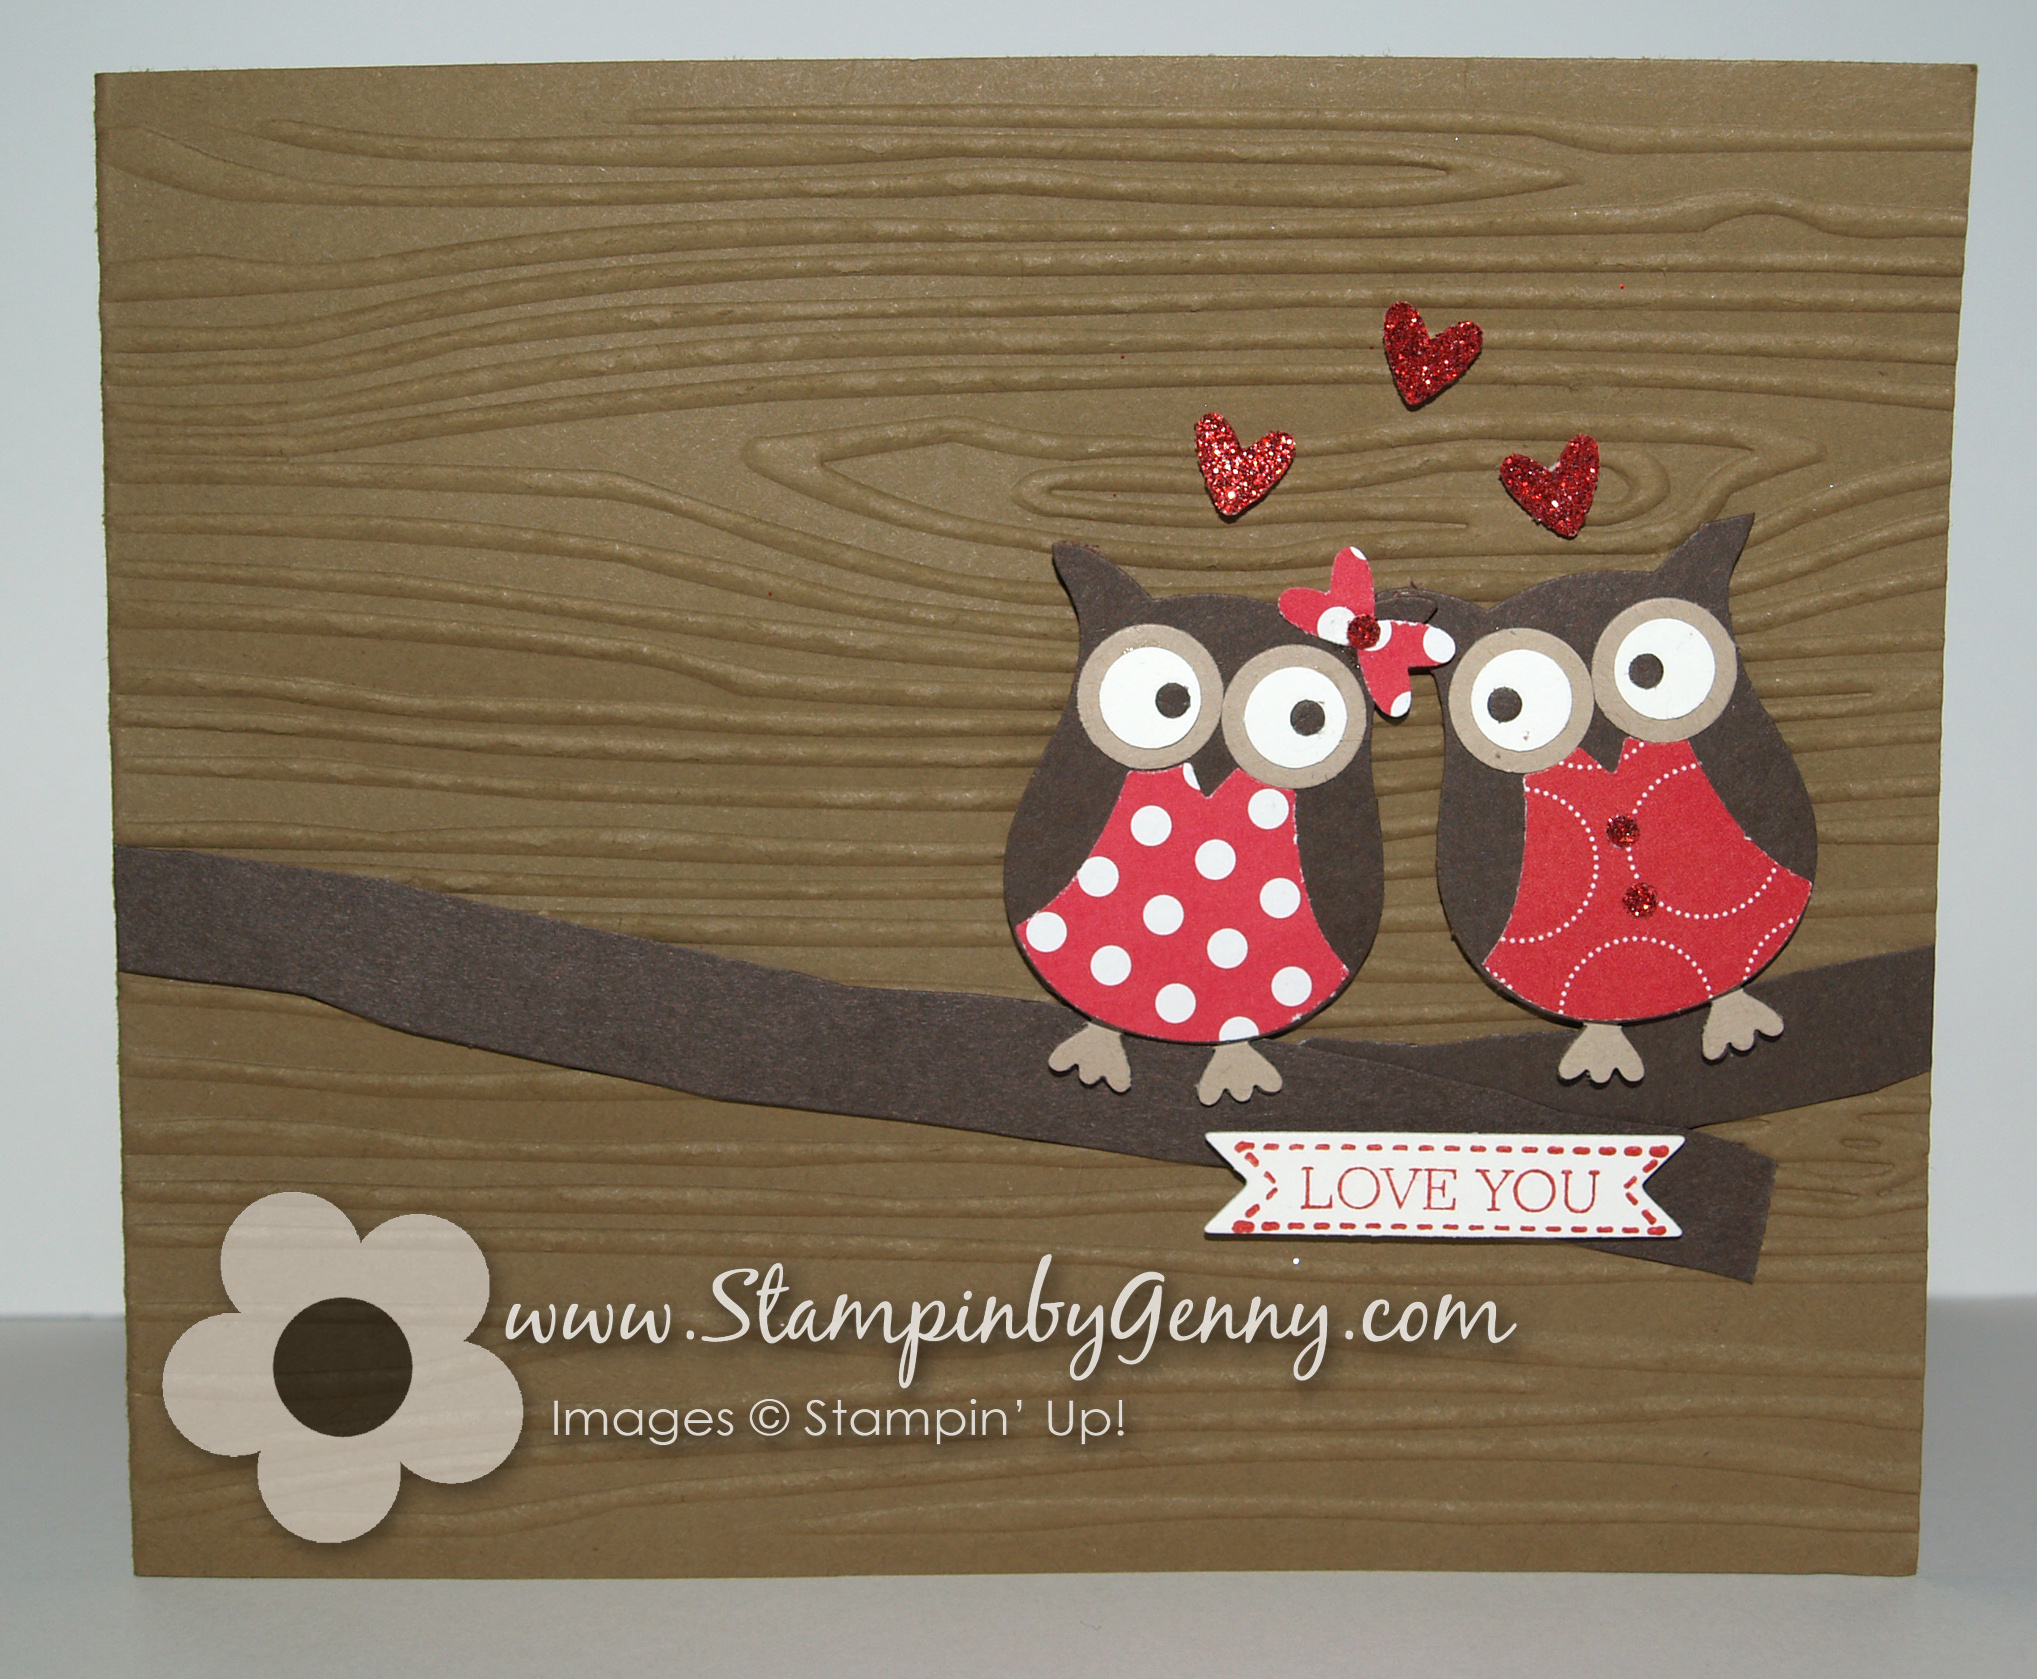
The punch was an easy way to create the owls on this card.  Don’t these owls look in love?  For texture I also used the Wood Grain embossing folder for the background.  Join us at Hand Stamped Sentiments for more inspiration from our talented designers.

Hand Stamped Sentiments Challenge blog

All Stampin’ Up! supplies below may be ordered from my website or email me to place your order.

All products are Stampin’ Up! unless noted.

Owl Love You Valentine’s Day Card

Size:  4.25″h x 5.50″ w

Stamp Sets:  Itty Bitty Banners

Paper:  Cardstock:  Soft Suede, Early Espresso, Whisper White, DSP; Polka Dot Parade, Red Glimmer paper

Ink:  Real Red

Accessories:  Owl builder punch, Wood Grain embossing folder, Bitty Banners Framelits

Simple Valentine Cards

I created these simple Valentine cards for a class.  These were very easy for my guests and they loved them.  These two-layer cards showcased the Big Shot for the embossed backgrounds.  I love the Vintage Wallpaper embossing folder and combines well with the Artistic Etchings stamp set.  I stamped the medallion in Riding Hood Red on Very Vanilla CS to make the background.  I then stamped the Eiffel Tower, glued the Red Glitter heart atop the tower and added a bit of Scallop Trim to the bottom and stamped ‘AMOUR’.  I also tore the edges of the Very Vanilla CS and sponged the edges in Riding Hood Red. For the finishing touch,  I adhered pearls and rhinestones to the corners.

For the “Just my Type” card   I used the Texture Plates Kit #4 which I had not used for awhile.  This set has a wonderful typed background which coordinates perfectly with the vintage typewriter image from Puns from the Past and the Newsprint DSP.  I punched the border of the Newsprint layer and sponged the edges in black.  I love the Tiny Tags stamp set and Medium Jewelry punch.  These little tags add so much to any card.  I adhered with the mini glue dots the tags underneath the knot of the ribbon.  I stamped the typewriter image on Very Vanilla CS then punched it out with the Decorative Label Punch.  I also punched another Decorative Label in black and framed the Typewriter image.  I added the Red glitter heart to the top of the typewriter image and the pearls to the corners.

One of my goals this year is to finish the inside of my cards as I did below.  It just looks so much neater and gives you another opportunity to use more images from a stamp set.

click image to enlarge


inside of cards - click image to enlarge


All Stampin’ Up! supplies below may be ordered from my website or email me to place your order.

All products are Stampin’ Up! unless noted.

Simple Valentine Cards

Card Size: 4.25″ w x 5.50″h

Stamp Sets: Artistic Etchings, Puns from the Past, Tiny Tags

Paper: CS: Very Vanilla, Riding Hood Red, Black; DSP: Newsprint; Red Glitter paper

Ink: Classic Ink Pad: Riding Hood Red, Basic Black

Card Accessories: Eyelet border punch, Scallop Trim border punch, Medium Jewelry punch, Ticket Corner punch, Decorative Label Punch,  Small Heart Punch, Vintage Wallpaper embossing folder, Texture Plates Kit #4 (Friend, Confidant print type), Black Satin ribbon, Basic pearls and clear rhinestones, sponge dauber, Dimensionals

Technique: Stamping, Embossing

Flirty Valentine Corset Card

For this week’s Hand Stamped Sentiments ribbon and lace challenge I created this corset template.  The template is sized to fit into a SU medium envelope (5-3/4″ x 4-3/8″).  I traced the corset on Very Vanilla CS then ran it through my Big Shot with the Vintage Wallpaper embossing folder and sponged it with Riding Hood Red ink.  I used the 5/8″ Victoria crochet trim as lace.  I put a strip of stick tape on the back of the crochet trim and pleated it as I adhered the trim.  I used my Crop-a-dile Big Bite to set the 1/8″ eyelets and used grosgrain ribbon to lace the corset.  The regular hand-held Crop-a-dile will not work because it doesn’t reach.  You can also use a regular eyelet setter kit.  It was a lot fun creating this card.  The possibilities are endless in creating this card.  You can use different embossing folders, different colored card stock, clear rhinestones and different ribbons.

I create these as invitations for hens night, bachelorette or bridal showers.  Got to my Etsy shop to order and request your custom color.

Click image to enlarge

Click image to enlarge

All Stampin’ Up! supplies below may be ordered from my website or email me to place your order.

All products are Stampin’ Up! unless noted.

Flirty Corset CArd

Card Size: Approx. 4.25″ w x 5.50″h

Stamp Sets: Teeny Tiny Wishes, I {Heart} Hearts

Paper: CS: Very Vanilla, Blushing Bride

Ink: Classic Ink Pad: Riding Hood Red

Card Accessories: 5/8″ Victoria Crochet Trim ribbon, Basic Pearls, Metallic eyelets, 1/4″ Very Vanilla grosgrain ribbon, sponge dauber, sticky tape

Technique: Stamping, Embossing

With all my Heart

This week at Hand Stamped Sentiments we have sketch challenge.  I knew I wanted to create a Valentine card because I’ve been itching to use the red glitter paper in the new occasions mini. I also used one of my favorite stamp sets Notably Ornate and my two DSP favs – Love Letter and Newsprint.  Hop on over to HHS and take the challenge.  We’d love to see your projects.

HHS sketch challenge #51

HHS Sketch Challenge 51

With all my heart Valentine card

click image to enlarge

I have also entered my card over at Pals Paper Arts.  Their Design Team is so talented.

I knew I wanted to to create a Valentine card because I wanted to use the Red Glitter paper and the Notably Ornate stamp set because I love the frame.  I stamped it and the bird in Basic Black and heat embossed it with clear embossing powder.  I cut them both out with my paper snips.  The dotted heart is from the I {Heart} Hearts set and stamped in Cherry Cobbler and also trimmed with paper snips and heat embossed with clear embossing powder.  I framed the heart with the Pinking Heart border.  Kasey has a wonderful tutorial on how to frame with punched borders.

I created the large scallop border with 1″ circles.  I punched the circles from the Love Letter DSP.  I adhered the circles starting from the center so the border would end up even on both sides. The polka dot paper is from the Love Letter DSP and I also used a Newsprint layer.  For that Valentine feel I used the Red Glitter paper.  Love it!!  The sentiment banner ends are punched using the 1-1/4 square punch.  The sentiment is from the With all my Heart stamp set.

All Stampin’ Up! supplies below may be ordered from my website or email me to place your order.

All products are Stampin’ Up! unless noted.

Amour card

Card Size: Approx. 5.50″ w x 4.25″h

Stamp Sets: Notably Ornate, With All My Heart, I {Heart} Hearts

Paper: CS:  Basic Black, Very Vanilla; DSP:  Love Letter, Newsprint, Red Glitter paper

Ink: Cherry Cobbler, Basic Black

Accessories: 1″ circle punch, Small heart punch, Pinking Hearts Border Punch, 1-1/4 Square Punch, Basic Pearls, Heat tool, Versamark, Clear embossing powder

Technique: Stamping, Heat embossing

Owl Love

This week at Hand Stamped Sentiments we have a Punch Theme Challenge.  I was so excited about this challenge because one of my favorite punches is the Two-Step Owl punch.   So I decided to create my project around this punch.

I’ve been wanting to make an owl box to store 3″x3″ cards and I’ve succeeded.  The 3″ x 3″ cards and envelopes fit nicely into this box.  I’m finishing up the tutorial along with the dress tutorial.  I promise to post them by the end of the week.

click image to enlarge

All Stampin’ Up! supplies below may be ordered from my website or email me to place your order.

All products are Stampin’ Up! unless noted.

Owl Box and 3″ x 3″ cards

Finished Box Size: Approx. 5.50″ w x 7.00″h

Cards, Finished Size: 3″ x 3″

Stamp Sets: Tiny Tags

Paper: Digital paper Play Date, CS:  Chocolate Chip, So Saffron, Tempting Teal, Real Red, Crumb Cake

Ink: Chocolate Chip

Accessories: Decorative Label Punch, Two-Step Owl Punch, Two-Step Bird Punch, Scallop Trim Punch, Jewelry Tag Punch, Basic pearls, 5/8″ Real Red grosgrain ribbon,

Techniques: Stamping, Paper Punching


%d bloggers like this: