• my photo

    Click photo for About Me

  • Enter your email address to subscribe to this blog and receive notifications of new posts by email.

    Join 1,021 other subscribers
  • Pinterest

    Follow Me on Pinterest
  • Amazing Deals

    Click image for Amazing Deals!

  • Share this blog

    Bookmark and Share
  • Archives

  • Categories

  • Recent Posts

  • Blog Stats

    • 402,155 hits
  • Meta

  • Disclaimer

    All content found at Stampin' by Genny is the sole responsibility of Genevieve Valdes, a Stampin’ Up! Independent Demonstrator. Stampin’ Up! does not endorse, edit, or otherwise contribute to this website.

BOO to you and a Howl-o-ween Treat

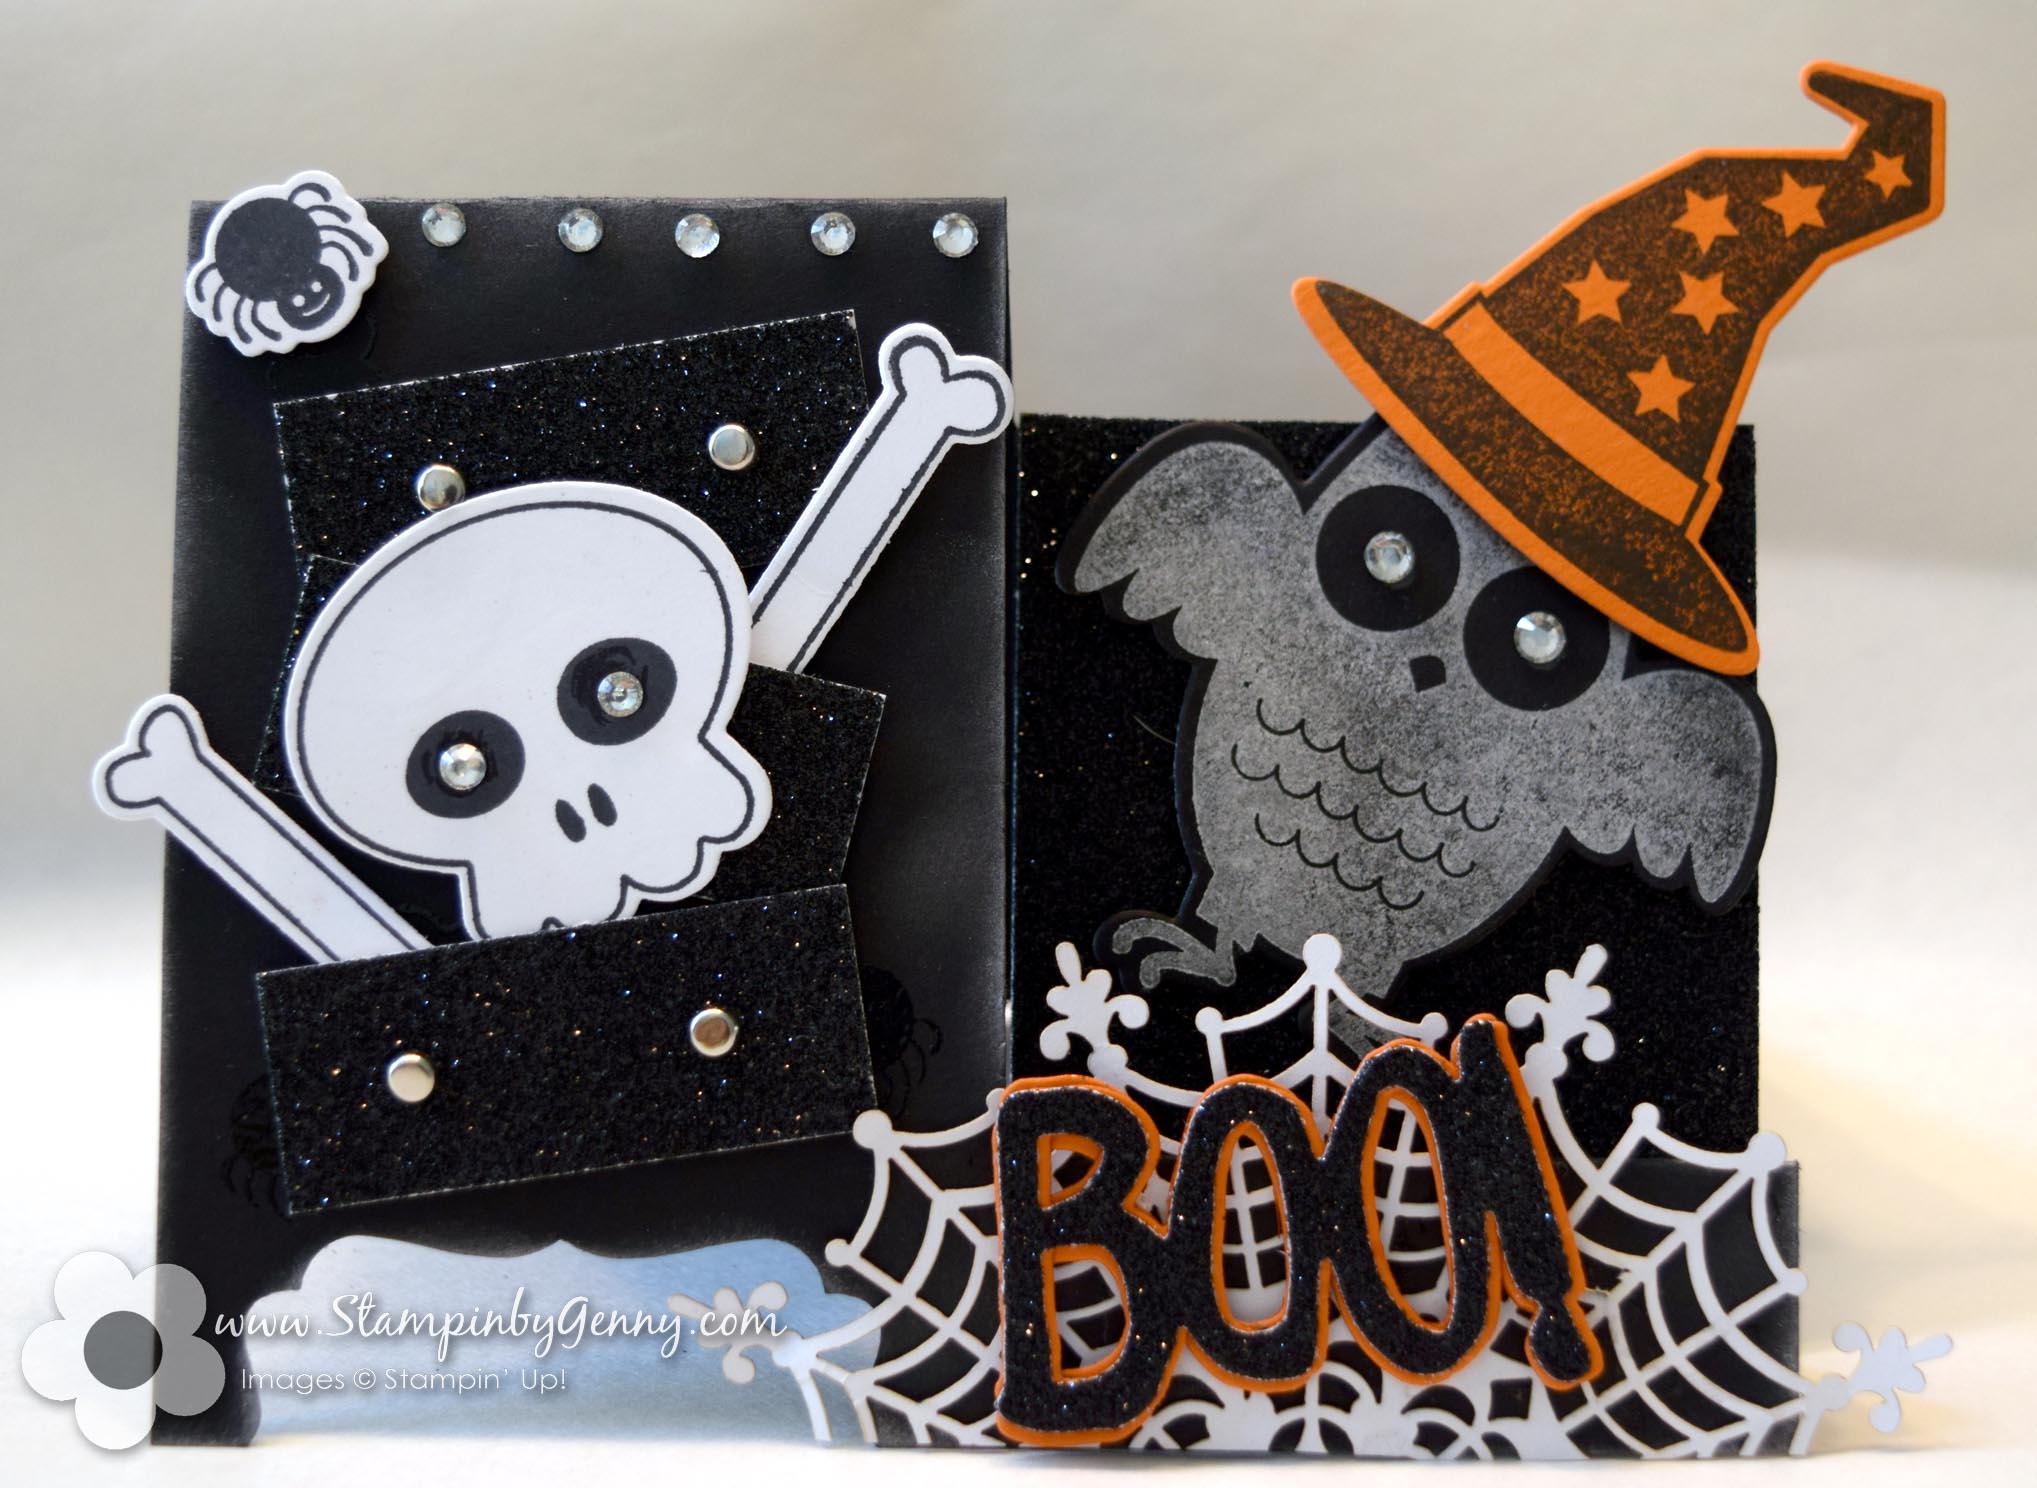
I received my pre-order stash from Stampin’ Up! and part of my order included the Howl-o-ween Treat Stamp Set + Boo to You Framelits Dies bundle.  Super cute images and the framelits makes it easy to die-cut them.  These cute images inspired me to make a side drawer card.  This type of card  CASE’d from Jackie Topa.  For instructions and a video click here.  I have previously made a couple of Halloween cards of this type and can be found here and here.

My side step drawer card features a skeleton and spider coming out of spooky drawers and an owl with a witch’s hat saying BOO!  I also used for embellishment the Spider Web Doilies.  I love them.  One side is black and the other is white.  I used the white side so it would contrast against the black.  I stamped the owl with silver ink.  I cut the drawers and the panel behind the owl from the new Black Glimmer paper.  I also used the Decorative Label punch on the to create the legs of the dresser.  I had so much fun creating this card!

All these products may be found in the new 2015 Holiday Catalog.

Stampin Up Halloween Howl-o-ween Treat Boo to You Framelits dies side step drawer cardAll Stampin’ Up! supplies below may be ordered from my website or email me to place your order.

All products are Stampin’ Up! unless noted.

BOO to you and a Howl-o-ween Treat card

Size:  4.25″ h x  5.00″ w

Stamp Sets:  Howl-o-ween Treat

Paper:  Cardstock:  Basic Black, Whisper White, Tangelo Twist, Black Glimmer paper

Ink:  Encore Silver ink, Momento Black

Accessories:  1/8″ silver brads, basic rhinestones, Spider Web Doilies, Boo to You Framelits dies, Decorative Label punch, Fine Tip Glue pen, dimensionals


Dreamy Owl Easel card

This week’s challenge at Hand Stamped Sentiments is a color challenge of Baja Breeze, Marina Mist, Not Quite Navy and Neutral (Crumb Cake, Whisper White or Very Vanilla).  When I saw these colors together a cute dreamy owl came to mind.  As mentioned in my earlier post, my latest addiction are easel cards.  For this card I used the large Circle Scallop die to die cut the base in Marina Mist.  I also used the Mixed Bunch stamp set and punch.  I stamped the Very Vanilla with Marina Mist and Not Quite Navy to create the backgrounds.  I used the Owl Builder, Two Step Bird, Blossom, Punch Pack and Modern Label punches.  For some dreamy shimmer I smooched my card with Vanilla Shimmer Smooch.  I went overboard with the pearls but I think it made my card.  The sentiment is stamped with Not Quite Navy and heat embossed with Iridescent embossing powder.

Dreamy Owl Easel Card

click to enlarge

I hope these colors inspire you to create a project and post it on Hand Stamped Sentiments.  Check out the projects from our very talented design team for more inspiration.

All Stampin’ Up! supplies below may be ordered from my website or email me to place your order.

All products are Stampin’ Up! unless noted.

Dreamy Owl Easel Card

Size:  approx. 4.50″ w x 5.00″ h

Stamp sets: Mixed Bunch, Loving Thoughts

Paper: Card Stock:  Very Vanilla, Marina Mist, Baja Breeze, Not Quite Navy

Ink: Marina Mist, Baja Breeze, Not Quite Navy, Versamark

Accessories: Big Shot, Scallop Circle die, Perfect Polka Dots Embossing Folder, Striped Textured Embossing Folder, Owl Builder Punch, Bird Punch, Punch Pack, Bojo Blossoms Punch, Modern Label PUnch, Circle Scissors Plus, Basic Pearls

Playing with Pennants and Banners

This week Hand Stamped Sentiments is having a Banner Bash!  Create any paper craft project using banners or pennants.  I’ve been wanting to use my new Halloween stamp set Howl-o-Ween Creeps so here’s a sneak peek of one of the monster images and sentiments.  This set is so much fun!  I can’t wait to create more Halloween items with this set.  I stamped the Frankenstein image on water color paper then used a blender pen and ink pads to color him.  I punched him out with 1-3/4 inch circle punch and sponged the edges with Basic Black ink.  Since the theme for the challenge is pennants I decided to create one large pennant using the Perfect Pennants die for the front of my card.  I then printed with My Digital Studio the DSP layers.  I used Cast a Spell and the Night Owl Digital kit.  I hope you’re inspired to start thinking about your fall and Halloween projects.  The Howl-o-Ween Creeps stamp set will be available on September 1st.

Click images to enlarge

OLYMPUS DIGITAL CAMERA         OLYMPUS DIGITAL CAMERA         OLYMPUS DIGITAL CAMERA
Inside of card

Join us Hand Stamped Sentiments for our Banner Bash Theme Challenge!

Banner Bash #81

All Stampin’ Up! supplies below may be ordered from my website or email me to place your order.

All products are Stampin’ Up! unless noted.

Happy Howl-O-Ween Card

Size:  5.50” H x 4.25” W

Stamp sets: Howl-o-ween Creeps, Wicked Cool

Paper: Card base:  Pumpkin Pie, Card Stock:  Pumpkin Pie, Basic Black, Whisper White, Rich Razzleberry; DSP; Digital Paper Cast a Spell and Night Owl Digital kit, Watercolor paper

Ink: Basic Black, Old Olive, Rich Razzleberry, Perfect Plum

Accessories: Big Shot, Perfect Pennants Die, Scallop Trim Border Punch, 1-1/4” Square Punch, 1-3/8” Circle Punch,1-3/4” Circle Punch, Retired Bat Punch, 1/8” Pumpkin Pie ribbon, Basic Rhinestones, Blender Pen

Owl Love

This week at Hand Stamped Sentiments we have a Punch Theme Challenge.  I was so excited about this challenge because one of my favorite punches is the Two-Step Owl punch.   So I decided to create my project around this punch.

I’ve been wanting to make an owl box to store 3″x3″ cards and I’ve succeeded.  The 3″ x 3″ cards and envelopes fit nicely into this box.  I’m finishing up the tutorial along with the dress tutorial.  I promise to post them by the end of the week.

click image to enlarge

All Stampin’ Up! supplies below may be ordered from my website or email me to place your order.

All products are Stampin’ Up! unless noted.

Owl Box and 3″ x 3″ cards

Finished Box Size: Approx. 5.50″ w x 7.00″h

Cards, Finished Size: 3″ x 3″

Stamp Sets: Tiny Tags

Paper: Digital paper Play Date, CS:  Chocolate Chip, So Saffron, Tempting Teal, Real Red, Crumb Cake

Ink: Chocolate Chip

Accessories: Decorative Label Punch, Two-Step Owl Punch, Two-Step Bird Punch, Scallop Trim Punch, Jewelry Tag Punch, Basic pearls, 5/8″ Real Red grosgrain ribbon,

Techniques: Stamping, Paper Punching


A Haunted Spooky Dresser

I’ve become addicted to creating spooky dressers.  In my previous post I created a witch in the dresser.  Today I created a haunted dresser.  I love the Wicked Cool stamp set and Two-step Owl punch.  The punch is so versatile.  You can create penguins, witch owls, tulips bats and ghosts.  For this card I created the bat and ghosts from the owl punch.  The bat tutorial comes from Bonnie Mountford’s blog. I got the idea for the ghosts from Diane Carr.     See my previous post to link to Jackie Topa’s dresser tutorial and for Patti Lee’s blog link.

I have also submitted my card for the PPA60 Halloween Inspiration challenge.  Stop by and take a look at all the fabulous Halloween cards.

Haunted dresses card

click image to enlarge

All Stampin’ Up! supplies below may be ordered from my website or email me to place your order.
All products are Stampin’ Up! unless noted.

Project info:

Haunted Dresser Card


Finished size: 4.25″ H x 5.50″ W

Stamp Sets: Wicked Cool

Paper: Cardstock:  Basic Black, Whisper White, Pumpkin Pie, Cherry Cobbler


Ink: Whisper White Craft ink, Versamark

Accessories: Curly Label Punch, Two-Step Owl Punch, Scallop Trim edge Punch, 1″ circle Punch, 1-3/8″ circle punch for bat wings, Regular hole punch for scalloping the bottom of bat wings, Clear embossing powder for spider webs, Silver embossing powder for sentiment, Silver Glimmer brads, dimensionals, Sponge daubers, Heat tool

Techniques: Paper crafting, Punch crafting

I’ve become addicted to creating spooky dressers.  In my previous post I created a witch in the dresser.  Today I created a haunted dresser.  I love the Wicked Cool stamp set and Two-step Owl punch.  The punch is so versatile.  You can create penguins, witch owls, tulips bats and ghosts.  For this card I created the bat and ghosts from the owl punch.  The bat tutorial comes from Bonnie Mountford’s blog. I got the idea for the ghosts from Diane Carr.     See my previous post a link to Jackie Topa’s dresser tutorial and for Patti Lee’s blog link.

%d bloggers like this: