

• my photo

    Click photo for About Me

  • Enter your email address to subscribe to this blog and receive notifications of new posts by email.

    Join 1,190 other subscribers
  • Pinterest

    Follow Me on Pinterest
  • Amazing Deals

    Click image for Amazing Deals!

  • Share this blog

    Bookmark and Share
  • Archives

  • Categories

  • Recent Posts

  • Blog Stats

    • 466,981 hits
  • Meta

  • Disclaimer

    All content found at Stampin' by Genny is the sole responsibility of Genevieve Valdes, a Stampin’ Up! Independent Demonstrator. Stampin’ Up! does not endorse, edit, or otherwise contribute to this website.

Snowflakes in San Antonio

I hope all of you have mailed your Christmas cards and have your shopping done.  As for me all my cards are done.  I’m just in the process of addressing.  I hope to get these in the mail by Wednesday.  Finally the weather here has turned cold.  It’s not so motivating to get Christmas activities completed when it’s warm outside.  Now it feels like Christmas.  Although it doesn’t normally snow here in San Antonio I can still wish for a white Christmas or at least on my Christmas cards.  So here at my craft table there are snowflakes in San Antonio.  This week at Hand Stamped Sentiments we have a snowflake theme challenge.  Create any project with snowflakes.  You’re welcome to use any brand products.  I look forward to seeing your projects.  So hop on over to HSS and take the challenge.

I’ve been wanting to use the Shimmery White paper from SU and my snowflake die and this challenge was perfect.  I love the elegance of the Shimmery White paper.  So beautiful!  I hope you can see how the paper shimmers in my card below.  This card was very easy to create.  I embossed the front of my card with the Northern Flurry embossing folder and used SU Dazzling Diamonds on the embossed and the die cut snowflakes.  I also embellished them with the self-adhesive Basic Pearls.   These are the perfect embellishment for your Christmas cards.  I adhered the die cut snowflake with Dimensionals and added a Very Vanilla satin bow.  The embellishment is from the Snow Swirled stamp set and is embossed in silver.  I hope your inspired to create your snowflake project.   See you at HSS.

snowflake backgroundq

HSS Snowflake Theme Challenge #46

snowflake theme card

click image to enlarge

All Stampin’ Up! supplies below may be ordered from my website or email me to place your order.

All products are Stampin’ Up! unless noted.

Snowflake card

Finished Size: 5.25″ w x 5.25″ h

Stamp Sets: Snow Swirled (sentiment)

Paper: Card stock:  Shimmery White

Ink: Versamark

Accessories: Big Shot, Northern Flurry embossing folder, Snowflake #2 Original Die, 1-1/4 square punch for ends of banner, Silver embossing powder, Heat tool, Basic Pearls, Dazzling Diamonds, Very Vanilla Satin Ribbon

Techniques: Stamping, Heat Embossing, Dry Embossing

My Digital Studio Vintage Christmas Card

This week at Hand Stamped Sentiments we have a color splash challenge. The colors Cherry Cobbler, Old Olive and Early Espresso are perfect for this time of year.

Since I’ve purchased many of the new Christmas digital stamps I was excited to create a Vintage Christmas Card with My Digital Studio. It was so easy and fun! I used the Christmas Collage stamp over Very Vanilla Textured card stock and colored it Cherry Cobbler but brought down the opacity to 20%.  I also used the Early Espresso Wallpaper DSP for the bottom of the card.  The ribbon is from the digital seam binding collection in Cherry Cobbler.  For a fuller bow I put two bows.  Under the ribbon I added two Eyelet border strips in Old Olive and Very Vanilla.  I love the digital Eyelet punch it’s perfect for the vintage look.  I also embellished with pearls from the pearls and rhinestones digital collection.  The tag is the Decorative Label digital punch in Very Vanilla and I outlined it in Cherry Cobbler.  The sentiment is from the digital stamp set Bells and Boughs.  Although the card was created entirely on MDS I think it still has the warmth and feel of a vintage Christmas Card.   Let me know what you think.  I hope you hop over to Hand Stamped Sentiments and take the Color Splash Challenge.  I’d love to see your projects.

Vintage Christmas Card created with My Digital Studio - click to enlarge

All Stampin’ Up! supplies below may be ordered from my website or email me to place your order.

All products are Stampin’ Up! unless noted.

Digital Vintage Christmas Card – This card was created with Stampin’ Up!’s My Digital Studio

Digital Stamp Sets: Christmas Collage, Bells and Boughs

Digital Paper: Card stock:  Very Vanilla Textured, Early Espresso Wallpaper

Digital Ink: Cherry Cobbler, Old Olive

Digital Accessories: Decorative Label Punch, Cherry Cobbler Seam Binding, Pearls, Eyelet Border Punch

Techniques: Digital Crafting

The Festive Table

This week at Hand Stamped Sentiments the challenge is to create accessories for your holiday table.  Place cards, napkin holders, favors, invitations…you get the idea.  I love the Cherry Cobbler card stock and this color is perfect for my Christmas table.  I created an invitation, favor, place card, luminary and candle.

The luminary was so easy to make.  You can click here for the pdf tutorial.  I punched the circle shape on all of the sides of my luminary which is optional.  You can punch only the front if you like.  I stamped the medallion from the Artistic Etchings stamp set with Cherry Cobbler on the vellum.  I glittered around the punched circle using Tombow liquid glue and Champagne Glass Glitter.  I then adhered the vellum to the back of all sides of my luminary.  I then assembled the luminary with sticky tape.  To light the luminary I used a battery operated candle which is safer than using a real candle.

To continue with the elegant look I heat embossed with gold the poinsettia image from the Bells & Boughs stamp set on the the invitation and the candle.  I also gold embossed the ‘You’re Invited’.  The candle stamping is also very easy.  You can click here for a written and video tutorial from SCS.

The favor was created using the Candy Wrapper die from the holiday mini.  I also stamped the ‘Dec 25’ from the Tags til Christmas stamp set and punched it out with the Decorative Label punch.  Love, love, love this punch.  I glittered the oval with Champagne Glass glitter.  The glitter is so easy to use.  Because of the size it doesn’t make a mess.  I wrapped the favor in the red medallion dsp from the Deck the Halls DSP then adhered the label.  You can fill the favor with peppermints or chocolates.  These will be a hit with your dinner guests.

The place card was also very easy.  I used the tag from the Tags til Christmas stamp set but I masked the ‘to and from’ then embossed the branch and pinecone image in gold.  I wrote the name with a gold pen and simply placed the card on the napkin ring.

So dress up your table for the holidays!  With a little creativity and imagination dressing up your table doesn’t have to break the bank.

The Festive Table - click to enlarge

Candy Wrapper favor

luminary

Christmas dinner invitation

gold embossed candle

gold embossed candle

place card

All Stampin’ Up! supplies below may be ordered from my website or email me to place your order.

All products are Stampin’ Up! unless noted.

The Festive Table

Candy Wrapper

Stamp Sets: Tags til Christmas

Paper: Card stock:  Whisper White, Cherry Cobbler, Red Medallion DSP from the Deck the Halls DSP group

Ink: Cherry Cobbler

Accessories: Big Shot, Candy Wrapper die, Decorative Label punch, Champagne Glass Glitter, Tombow liquid glue

Techniques: Stamping, Die cutting, Glittering


Luminary

Finished size: 3.00″ w x 3.00″ h

Stamp Sets: Artistic Etchings

Luminary tutorial: click here for PDF

Paper: Textured Card stock Cherry Cobbler for sides, smooth card stock for bottom

Ink: Cherry Cobbler

Accessories: 1-3/4 circle punch, Champagne Glass Glitter, Tombow Liquid Glue, sticky tape

Techniques: Stamping, Glittering


Christmas Dinner Invitation

Finished Size: 5.25″ w x 5.25″ h

Stamp Sets: Bells & Boughs, Sincere Salutations

Paper: Card stock:  Whisper White, Cherry Cobbler, Red Medallion DSP from Deck the Halls DSP group

Ink: Versamark

Accessories: Big Shot, Square Lattice embossing folder, Decorative Label punch, Gold embossing powder, Heat tool, Whisper White Organza Ribbon

Techniques: Stamping, Heat Embossing, Dry Embossing


Gold Embossed Poinsettia Candle

Stamp Sets: Bells & Boughs

Candle Stamping Technique:  Click here for written tutorial and video on Splitcoast Stampers site

Paper: tissue

Ink: Versamark

Accessories: Gold Embossing Powder, Heat tool, Gold Brads

Techniques: Stamping, Heat Embossing


Place Card

Finished Size: 2.50″ w x 1.50″ h

Stamp Sets: Tags til Christmas

Paper: Card stock:  Cherry Cobbler, Whisper White

Ink: Versamark

Accessories: Decorative Label Punch, Gold Embossing Powder, gold ink pen

Techniques: Stamping, Heat Embossing


Hand Stamped Sentiments From Simple to Wow Challenge #43

Sorry for the late post but this week as for many of you is a busy one.  With family staying with us and trying to be a good hostess sometimes some things fall a bit behind.  So on with this post.  This week at Hand Stamped Sentiments we were to take a simple card from our gallery and Wow it up!  I selected a card I created last Christmas with the Snow Swirled stamp set.  Now that my card-making skills have improved I knew I could wow up this card.

The card on the left is my simple card from last year.  The second card is my wow card.  I added the Real Red layer then stamped the red Swirl Tree and on the Very Vanilla layer and ran it through the Big Shot with the Northern Flurry Embossing folder, stamped a couple of red snowflakes, added the Dazzling Diamonds to the embossed snowflakes. Punched the corners with the ticket punch and embellished the tree with pearls.  I adhered the ribbon to the Very Vanilla layer before adhering it to the Real Red layer.  The sentiment is from the Short & Sweet stamp set.  I punched the Very Vanilla oval with the large punch and punched Real Red cardstock with the Scallop punch and adhered with glue dots to the Real Red grosgrain ribbon.


From Simple to Wow - click image to enlarge

All Stampin’ Up! supplies below may be ordered from my website or email me to place your order.

All products are Stampin’ Up! unless noted.

From Simple to Wow Snow Swirled

Finished size: 5.50″ w x 4.25″ h

Stamp Sets: Snow Swirled, Short & Sweet (simple card sentiment from A Cardinal Christmas)

Paper: Card stock:  Crumb Cake, Very Vanilla, Real Red

Ink: Real Red

Accessories: Big Shot, Northern Flurry Embossing Folder, Real Red 5/8″ grosgrain ribbon, Scallop Oval Punch, Large Oval Punch, Self Adhesive Pearls, Dazzling Diamonds, Tombow Mono Multi Liquid Glue, Dimensionals, Ticket Corner Punch

Techniques: Stamping, Embossing

Vintage Christmas Card

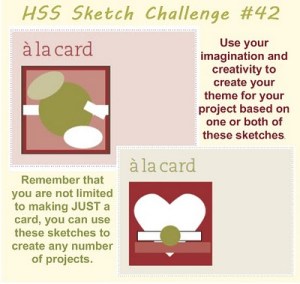
This week at Hand Stamped Sentiments we have a sketch challenge.   The sketches come from the Stampin’ Success magazine.  There are two sketches.  You choose the one that inspires you the most.  I chose to do the first sketch because I’ve been so inspired by Deck the Halls DSP and the vintage look.  I know I promised to post more of the cards that my guests did at the Christmas Stamp-a-Stack this past Saturday and I will.  Look for them on Wednesday.  But for now here’s my newest creation.


click image to enlarge

All Stampin’ Up! supplies below may be ordered from my website or email me to place your order.

All products are Stampin’ Up! unless noted.

Vintage Christmas Card

Finished size: 5″ x 5″

Stamp Sets: Belles & Boughs

Paper: Card stock:  Early Espresso, Always Artichoke, Deck the Halls DSP, Cherry Cobbler; watercolor paper

Ink: Early Espresso, Always Artichoke, Cherry Cobbler, More Mustard, Soft Suede, Versamark (heat embossed in gold the bells and holly images then water colored)

Accessories: Big Shot, Scallop Circle #2 die, Circle Scissor Plus, Decorative Label Punch, Blender pens, Gold Champagne Glass Glitter, 5/8″ Very Vanilla Satin ribbon, Stampin’ Sponges, dimensionals

Techniques: Heat embossing, watercoloring, die cutting

Hand Stamped Sentiments – From A Card to Something Else – Challenge #39

This week’s challenge at Hand Stamped Sentiments is so much fun!  The challenge is to be inspired to create a 3D gift project from a card.  I created a card with the Northern Hearts hostess stamp set from Stampin’ Up!  This stamp set is so versatile.  It’s a Christmas stamp set but can be used for Valentine’s or a birthday.  I love it!  This stamp set can only be earned with a minimum workshop of $150.  Email me to book your workshop so you can earn this stamp set.

With Christmas around the corner I decided to create a Christmas gift set.  I created the card using the bird image in a heart then thought about putting it together with a heart box.  The heart box is perfect for a small gift.  I purchased the heart box from a craft store and painted it with white acrylic paint.  I traced the lid on Cherry Cobbler card stock, cut it out and stamped the bird image in craft Whisper White then adhered it to the top of the lid.  I stamped the image with Cherry Cobbler ink on Whisper White card stock then cut it out banner style.  I also added small half pearls, and used the Eyelet border punch for trimming and the Perfect Polka dots embossing folder to give my project that extra touch.  The sentiment is from the Contempo Christmas stamp set which is perfect.  I hope you’re inspired to participate in this fun challenge.

click image to enlarge

All Stampin’ Up! supplies below may be ordered from my website or email me to place your order.

All products are Stampin’ Up! unless noted.

Christmas is Love card and heart box

Finished size: card size:  4.25w x 5.50″h box size approx:  2.5″ x 1.5″ x 2.5″

Stamp Sets: Northern  Hearts hostess stamp set, Contempo Christmas

Paper: Card stock:  Cherry Cobbler, Whisper White

Ink: Craft Whisper White, Classic  Cherry Cobbler

Accessories: Big Shot, Perfect Polka dots embossing folder, Eyelet Border Punch, Crimper, self adhesive half pearls, sticky tape, non-SU white acrylic paint, heart box with lid

Techniques: Stamping, embossing


Falling Leaves keep falling

This week at Hand Stamped Sentiments we have sketch challenge to create either a fall or Halloween project.  The sketches are from the October SUCCESS magazine for Stampin’ Up! demonstrators.  I’ve been wanting to use the leaf image from the Lovely as a Tree stamp set.  It’s perfect for a fall card and using the Stampin’ Up! water color pencils with the Aqua Painter blends the colors so easily.  I would love to see your creation so hop on over to HHS and post your creation.

I used More Mustard card stock as my card base and used my Big Shot to texture it with the Square Lattice embossing folder.  I stamped the leaf image on water color paper, used water color pencils to color the image.  I sponged the edges with More Mustard classic ink then adhered to a Chocolate Chip layer.  The Old Olive DSP is from the Welcome Neighbor DSP pad from Sale-a-bration.  The circles were punched with Two-step owl punch and I used antique brass brads in the centers.  The ribbon was fluted by pulling on one of the fibers then adhered with mini dots.  The smallest layer is Chocolate Chip CS.

Fall sketch card 

Click image to enlarge

All Stampin’ Up! supplies below may be ordered from my website or email me to place your order.
All products are Stampin’ Up! unless noted.

Fall card

Finished size: 4.25″ w x 5.5″h

Stamp Sets: Lovely as a Tree

Paper: Card stock:  More Mustard, Chocolate Chip, Water color paper, Old Olive DSP from Welcome Neighbor Sale-a-bration 6″ x 6″ pad

Ink: More Mustard Classic ink, leaf image was stamped with StayzOn Brown then colored with watercolor pencils and Aquapainter

Accessories: Antique Brass brads, Two-Step Owl punch, 1/4″ Very Vanilla grosgrain ribbon, Big Shot, Square Lattice embossing folder

Techniques: Stamping, Water coloring


See the birdie…

This week at Hand Stamped Sentiments there is a new color splash challenge.  The colors are fresh and crisp – Real Red, Pear Pizzaz, Pacific Point and Early Espresso with either Whisper White or Very Vanilla.  For my card I was inspired by Ashley C. Newell’s Thinking of You card featured in the book ‘ A Card a Day’.  I created my own printed paper by stamping the flourish from the Baroque Motifs on the Pear Pizzaz and on the Whisper White.  I then punched the Pearl Pizzaz with the 1/3/4″ circle punch and I punched the Whisper White wing with the Two-Step Bird punch. The bird image is also punched with the Two-Step Bird punch from the Early Espresso.  I wanted the bird image to be subtle so I used the Early Espresso then layered the circles and white branch behind it so you could just see the silhouette of the bird.  I cut the white branch free hand with paper snips.

Color Splash Challenge

HSS Color Splash Challenge #36

Bird card

click to enlarge

All Stampin’ Up! supplies below may be ordered from my website or email me to place your order.
All products are Stampin’ Up! unless noted.

Thinking of You Bird card

Finished size: 4.25″ w x 5.5″h

Stamp Sets: Baroque Motifs, Three Little Words

Paper: Card stock:  Whisper White, Early Espresso, Pear Pizzaz, Real Red

Ink: Craft Whisper White, Early Espresso, Pacific Point

Accessories: Basic Pearls, Two-Step Bird Punch, 1-3/4″ circle punch, 1-1/4″ circle punch

Techniques: Stamping

Fall is in the air…

Well it looks like fall is definitely here!  Today when I went out this morning to walk my dog there was a slight chill and it felt so nice because the sun was just beginning to peek out.  All this inspired me to create this week’s Hand Stamped Sentiment’s Baby Wipe Technique Challenge card with the Autumn Splendor and Day of Gratitude stamp sets.  This technique is perfect for capturing the different leaf colors.  I used Pumpkin Pie, Chocolate Chip and Old Olive re-inkers on my baby wipe.  I then used the baby wipe ink pad to stamp the Autumn Splendor leaf images and Punch Potpourri bird image on Very Vanilla card stock.

I used the Scallop Trim corner and border punches on the Very Vanilla layers.  I ran the smaller Very Vanilla layer through my Big Shot with the Square Lattice embossing folder.   Both Very Vanilla layers were sponged with Pumpkin Pie.

The Chocolate Chip layer is distressed with scissors.

I implemented the tone on tone technique and stamped the medallion image from the Day of Gratitude stamp set with Old Olive ink on the Old Olive layer.  I stamped the sentiment with Versamark and Chocolate Chip ink then heat embossed with clear embossing powder.  As a final touch I added a half pearl for the eye of the bird and to the corner of the Old Olive layer.

I enjoyed this technique and encourage you to try it.  It’s very easy and results are beautiful.  You can go here to SCS to see a written and video tutorial for this technique.  Once you’ve created your baby wipe technique project please post it to the Hand Stamped Sentiments site.

Baby Wipe Technique Leaf card

click image to enlarge

All Stampin’ Up! supplies below may be ordered from my website or email me to place your order.
All products are Stampin’ Up! unless noted.

Baby wipe Leaf technique card


Finished size: 5.50″ H x 5.50″ W

Stamp Sets: Day of Gratitude, Autumn Splendor

Paper: Card stock:  Old Olive card base (5.50″ x 5.50″), Very Vanilla (started with following sizes then punched 5.25″ x 5.25″, 4.25″ x 4.25″),  Chocolate Chip (4.50″ x 4.50″), Old Olive (3.25″ x 3.25″)


Ink: Chocolate Chip, Pumpkin, Pie, Old Olive, Versamark

Accessories: Big Shot, Square Lattice embossing folder, half pearls, Two-step bird punch, Scallop Trim corner and border punches, Clear embossing powder, Heat tool

Techniques: Stamping, Embossing

Day of Gratitude

Fall is in the air and I’ve been creating cards with the stamp set Day of Gratitude.  This is the stamp set I received at the Stampin’ Up Fort Worth regional.  The stamp set is featured in the holiday mini.  I especially like the medallion in the set so I created this week’s card for Hand Stamped Sentiments Sketch Challenge with the medallion as the focal point.  The sketch is featured in the Success September issue.

Success September Sketch

Fall Medallion

click image to enlarge

I first stamped the medallion in Chocolate Chip then used sponge daubers to apply Old Olive, Cajun Craze and Daffodil Yellow.  I CASED this coloring technique from dhagberg2000 at SCS.  The Old Olive layer is embossed with the Big Shot using the Vintage Wallpaper embossing folder.  The other side layers are Chocolate Chip and Cajun Craze.  I stamped the sentiment on Very Vanilla with Cajun Craze and used hemp cording.  I then stamped the acorn with Chocolate Chip and cut it out and adhered with a mini glue dot.

Day of Gratitude stamp set

Day of Gratitude stamp set, clear 121148 $18.95, wood 120835 $26.95

All Stampin’ Up! supplies below may be ordered from my website or email me to place your order.
All products are Stampin’ Up! unless noted.

Fall Medallion Card

Finished size: 4.25″ H x 5.50″ W

Stamp Sets: Day of Gratitude

Paper: Cardstock:  Very Vanilla card base, Old Olive, Chocolate Chip, Cajun Craze

Ink: Chocolate Chip, Cajun Craze, Old Olive, Daffodil Delight

Accessories: Wide Oval Punch, Big Shot, Vintage Wallpaper embossing folder, Hemp cord, Antique Brad, dimensionals

Techniques: Stamping, Embossing