• my photo

    Click photo for About Me

  • Enter your email address to subscribe to this blog and receive notifications of new posts by email.

    Join 1,007 other subscribers
  • Pinterest

    Follow Me on Pinterest
  • Amazing Deals

    Click image for Amazing Deals!

  • Share this blog

    Bookmark and Share
  • Archives

  • Categories

  • Recent Posts

  • Blog Stats

    • 400,866 hits
  • Meta

  • Disclaimer

    All content found at Stampin' by Genny is the sole responsibility of Genevieve Valdes, a Stampin’ Up! Independent Demonstrator. Stampin’ Up! does not endorse, edit, or otherwise contribute to this website.

Easter Friends say Happy Easter

I was inspired to create this card from Hand Stamped Sentiments Color Challenge – Mint Macaron, So Saffron and Fresh Freesia. These colors are perfect for spring and for Easter. I recently purchased the Stampin’ Up Easter Friends and combined this stamp set with the color challenge to create an Easter card.

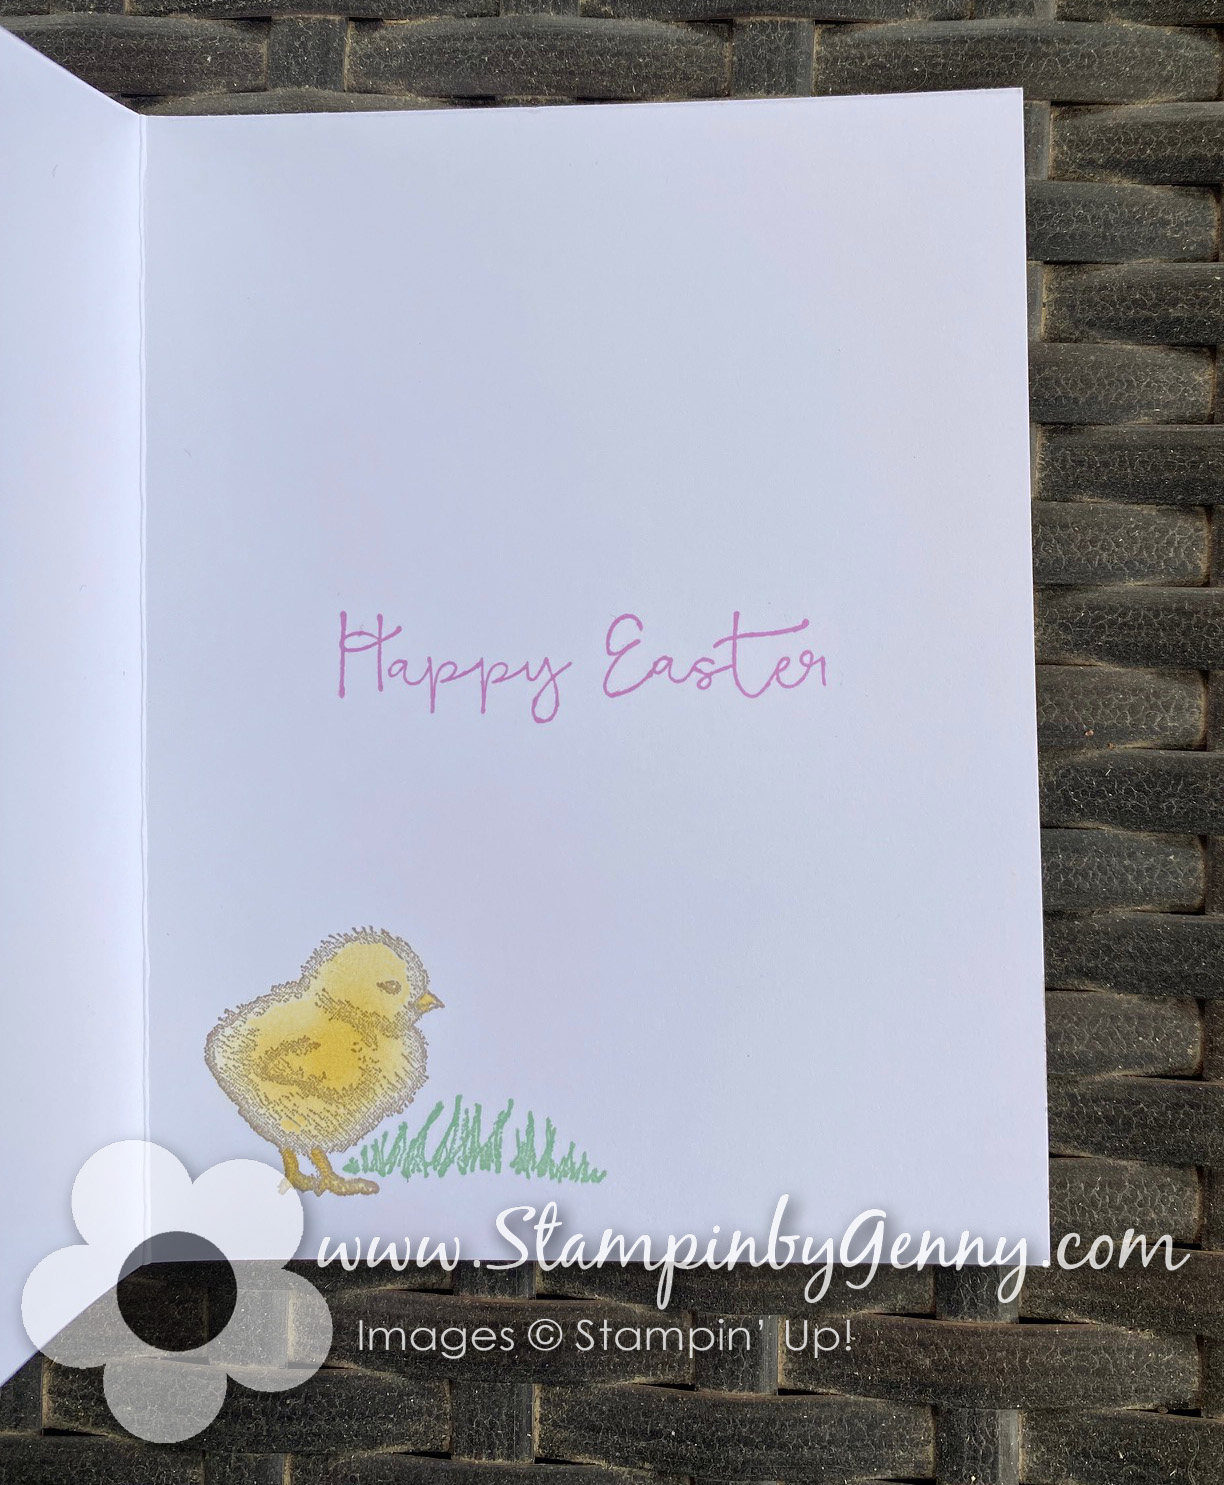
I used the three largest scalloped dies from the Scalloped Contours Dies. I used Fresh Freesia for the largest scalloped die then used DSP from the Hand-Penned DSP collection. The sentiment is from the Easter Friends stamp set and stamped in Mint Macaron on Basic White card stock. The cute ducky is stamped in Gray Granite and sponged with So Saffron. The legs, feet and beak were colored with a Blender Pen in So Saffron and colored darker than the body which I used a sponge dauber. To embellish I used Fresh Freesia color jewels from the 2021-2021 In Color Jewels. The ribbon is 3/8″ Open Weave Fresh Freesia. The inside of the card is stamped with Fresh Freesia sentiment and chick image in Gray Granite and sponged with So Saffron. Sentiment and images are from the Easter Friends Stampin’ Up stamp set.

Take the color challenge and see what you can create with these beautiful spring colors. Go to HHS and be inspired by the Hand Stamped Sentiments design team.

All products are Stampin’ Up! unless noted.

Easter Friends say Happy Easter Card

Card Size:  5.50″ H x 4.25″ W

Stamp Sets/Bundle: Easter Friends Stamp Set

Paper:  Card stock:  Thick Basic White, Fresh Freesia, Basic White; DSP: Hand-Penned, Specialty Paper

Ink: Gray Granite, So Saffron, Mint Macaron, Fresh Freesia

Accessories: Scalloped Contours Dies, In Color 2021-2023 In Color Jewels, 3/8″ Fresh Freesia Open Weave Ribbon, sponge dauber, Blender Pen, dimensionals, mini glue dots

Bunny card

Today I wanted to share this cute bunny card I created.  I CASED it from  Sandi MacIver’s blog.   She’s a very talented designer.  Go over to her blog and check out her other projects.  I created the background and bunny foot pads on My Digital Studio.  I love this software!  I am going to make several of these cards to mail.  Won’t the recipients get a kick when they get a bunny out of the envelope!

click for larger image

I sponged the bunny head and feet with Pretty in Pink classic ink #101301.

The cute little nose is the small heart punch (117193) found in the mini Occasions catalog.

Inside of ears are the small oval punch #107304.

The feet are made from the SU Wide Oval punch, #112082.  You really need this punch because it fits so many of SU’s sentiments also.

The bottom pad is the 1 inch circle punch, #109046 and the little toes are just the regular everyday hole punch.

I got the “Happy Easter” on each foot by using the text tool and changed the text color to Real Red.  This was all done in My Digital Studio #118108.  Then printed it out on Pretty in Pink background.  I left enough room between each word so I could punch each out with my 1″ circle punch.

The whiskers are a scrap of Whisper White run through the cutter, slicing 3 skinny pieces.  Tape these to the back of the nose, fanned them out a bit, then added a dimensional.

The eyes are black brads, #109109 with Pretty in Pink circles from a regular hole punch.

Project info:

The templates for this project appear on two entries on Sandi’s blog so for simplicity I have consolidated them here.

Click here for bunny head template.  Sandi’s tip:  When you print out the bunny head, the measurements should be;  3 inches across from the cheek to cheek, and from her chin to the V in her ears, 4 inches.

Click here for egg templates.  Sandi’s tip:  When you print off the egg, the large one on the left should be 7 1/4 inches long.  That measurements matches the bunny head.  Of course, if you want it smaller, than reduce both templates by the same amount.

Stamps:  none, My Digital Studio used for “Happy Easter” sentiment

Paper:  Whisper White cardstock, Pretty in Pink and print #3 from Sunny Day backgrounds printed from My Digital Studio.

Ink:  Pretty in Pink Classic ink used on 1/4″ white grosgrain ribbon and to sponge the bunny head and feet

Accessories: SU paper punches:  1″ circle, Wide Oval, Small Oval, Small Heart, regular hole punch, SU black brads, SU white 1/4″ ribbon inked with Pretty in Pink

Techniques:  Digital and Paper crafting

%d bloggers like this: